Logan Wolfram

Enjoying Life for Dessert

  • Home
  • About
    • Meet Logan
    • Meet My Family
  • Blog
  • Eat
  • Journey
  • Create
  • Connect

What’s for Dinner?! Ginger Lime Flank Steak

May 6, 2011 by Logan 5 Comments

This has to be one of my favorite things to make…particularly in the summer when pretty much everything is itching to be thrown on the grill. It’s easy, can for the most part be done ahead, and the clean-up is a cinch!  I’m sure there are other great marinades out there, and I have a couple of variations that I do as well, but this one is in my opinion, the most flavorful and a twist different than your basic steaky sort of marinade.

I made the flank steak a couple of days ago to take to another friend who just had a baby.  And in my haste to get out the door, I forgot to take a picture of the finished product.  So oh well.  And you’ll never believe that not only did I have to jump start my car in the morning, I had to do it again on my way to take the meal.  And this time I at least knew all of the steps to do it correctly since I’d just typed it up that afternoon for all of you!

So anyhow…the recipe.

Ingredients:

  • 1- flank steak (I like to get as close to 2 lbs as I can.  They shrink up a good amount and there are a ton of things you can do with the leftover steak….think quiche, fajitas, sandwiches.) 
  • 4 tsp Gourmet Garden Ginger (it is fresh ginger already ground up in a tube…much more flavorful than the dried stuff and easier than the fresh root.) 
  • 1 lime
  • 1/3 c Soy sauce
  • 2 Tbsp minced garlic
  • 1/2 tsp Lawrys seasoned salt
  • 1/2 tsp thyme 
  • 1 tsp parsley 
  • 1/2 tsp fresh ground pepper

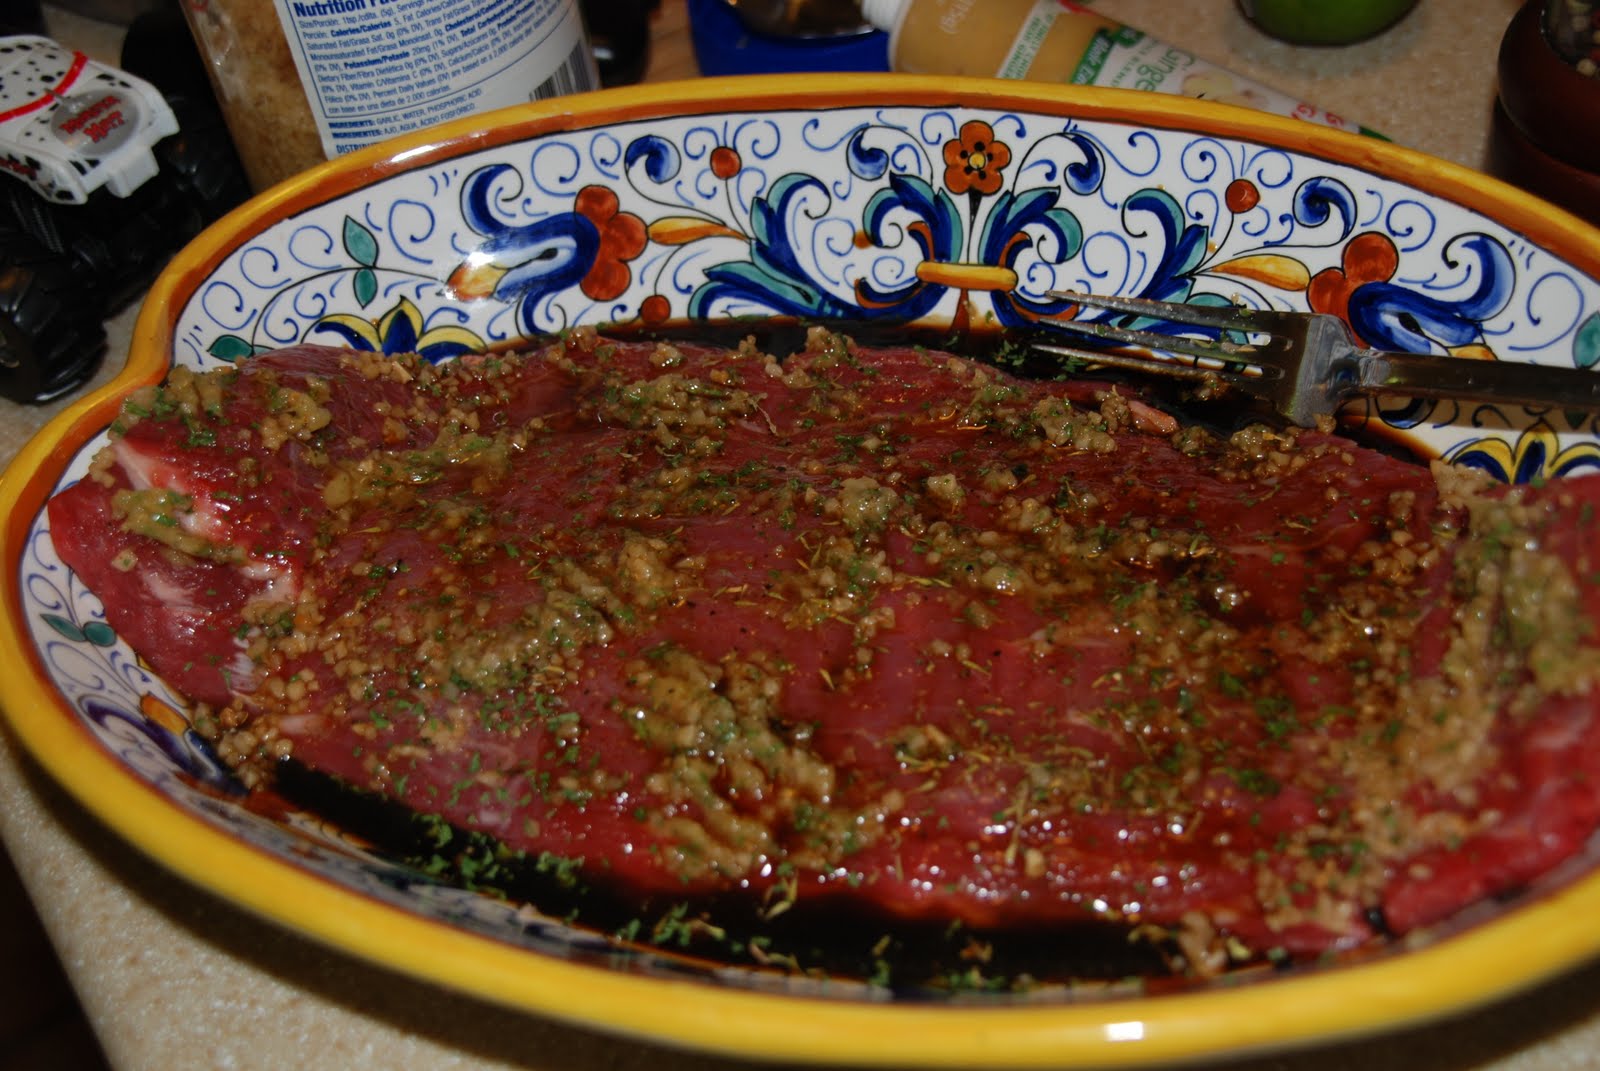
Put your steak in some sort of dish that you can marinate it in for several hours.  I always do this part first thing in the morning (sometimes even while my kids are eating breakfast.)  It’s the best if it marinates at least 8 hours, and it’s unbelievable if you even do it overnight.

With a fork, pierce the meat several times on one side.

Put 1 Tbsp garlic on top, and then 2 tsp of the ginger paste.  Then smear that all around to cover the meat…you can use a fork or your hand.  Just cover it semi-evenly.

Evenly sprinkle about 1/4 tsp of Lawrys, 1/4 tsp thyme, 1/4 tsp fresh ground pepper, 1/2 tsp parsley all over the meat.

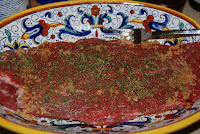
Once the meat has the seasonings all over it, squeeze 1/2 of the lime over top of it, and pour about 3 Tbsp of Soy sauce evenly around the top of the steak.  It will look about like this picture below.  Then flip the whole steak over and do the same entire process from piercing to soy sauce to the other side.  Cover with plastic wrap and keep in fridge 8+ hours til it’s time to grill it.

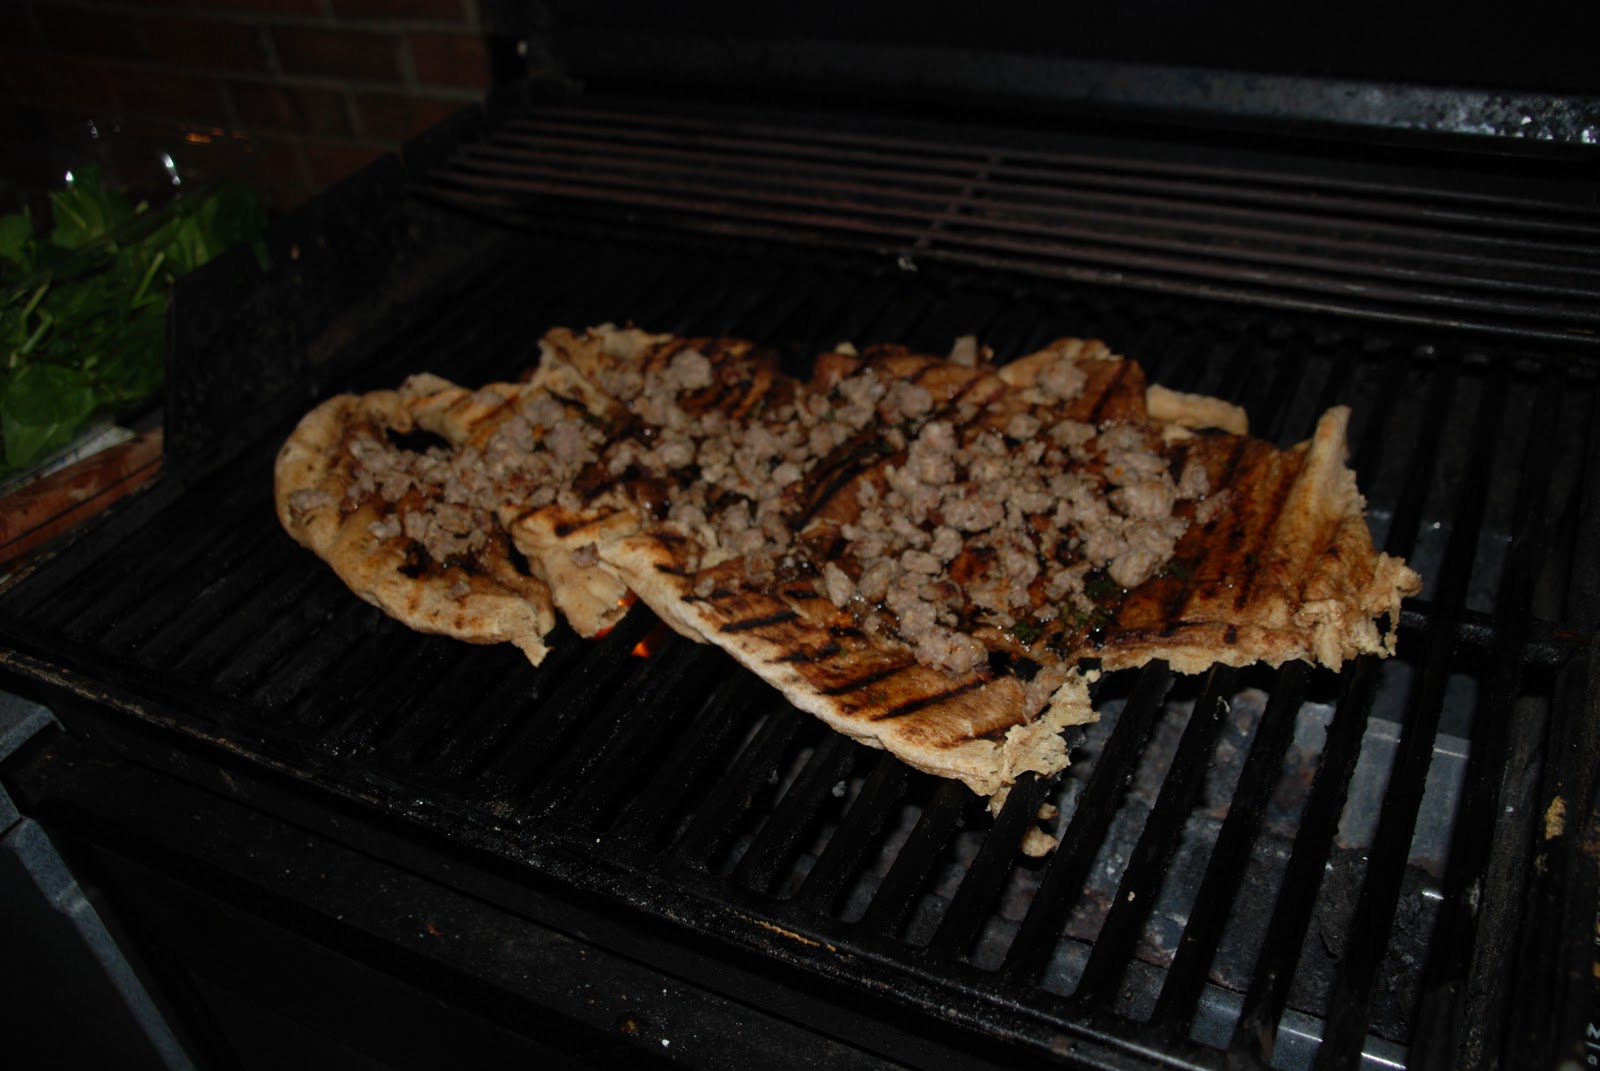
To grill it, I get my grill preheated to somewhere round about 375-400 degrees.  The key to a good sear on the outside is not to stand there messing with it.  Put the steak on the grill, close the top and set a timer for about 8 minutes.  And then leave it alone til the timer goes off.  Flip the steak, set the timer for another 8-9 minutes and then go out and check it for doneness using the hand method I showed you yesterday.  For those of you who like your steak medium rare to medium, it’s probably done to your liking after this time period.  For those of you who want it a little less pink in the center, you may want to keep it on a bit longer.  Be aware though that because of the cut of a flank steak, the center will have more pinkness, while the edges of the entire steak will be cooked more.  When serving a crowd, keep this in mind depending on the way everyone likes their steak.  You’ll end up with varying levels of doneness on this cut of meat.

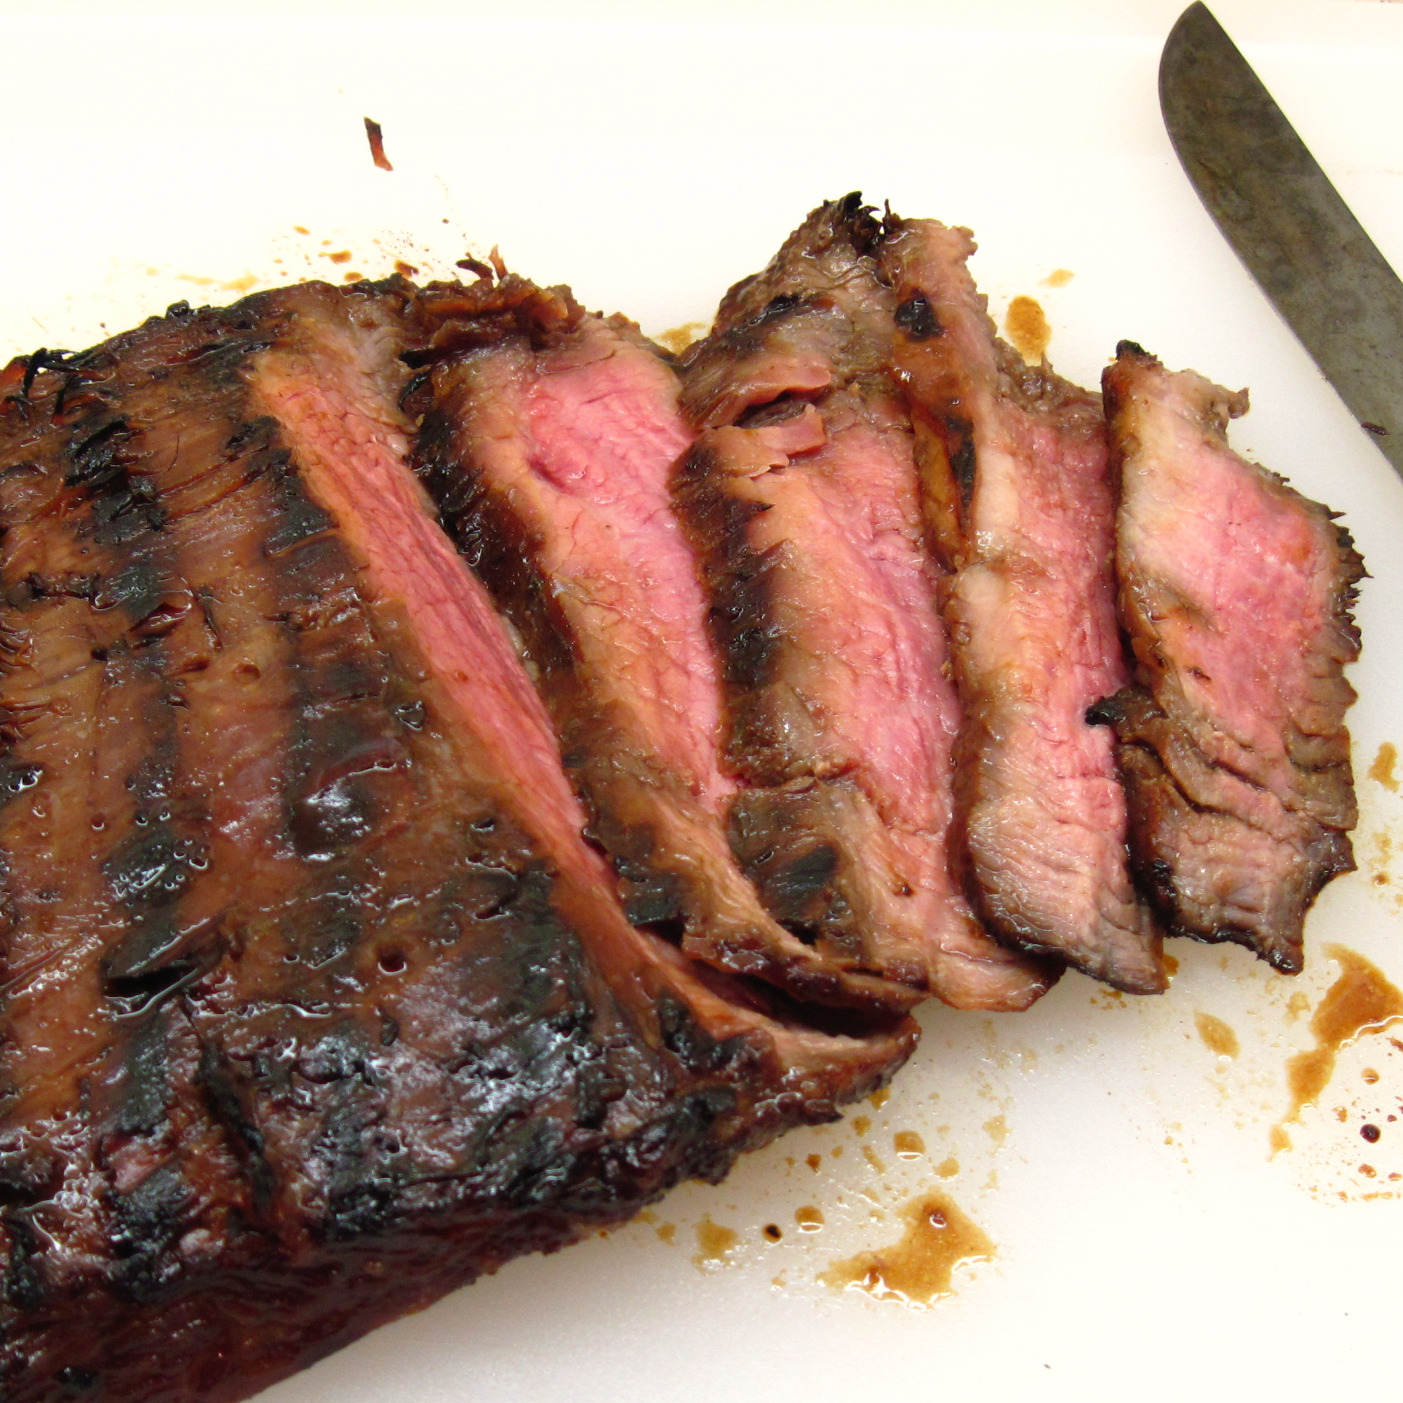
When you take the steak off of the grill, let it “rest” without cutting it for about 5-8 minutes.  This will allow it to seal in the juices a bit more.  When you cut this steak, you’re going to cut it on a 45 degree angle so that your pieces will look much wider than if you cut straight down.

I of course forgot to take a picture, but I found another one to show you from a lady named Kath Dedon (thank you google images.)

I think that for this simple steak, it’s nice to have a starch to accompany it.  My family loves onion roasted potatoes, and the following recipe is great!  In case you forget the ingredients, look on the back of the Lipton Onion Soup box because that’s where I got it!

It’s about 2 lbs of potatoes (i like red skinned for these), 1/3 c oil (I prefer olive b/c it’s healthier), and 1 packet of Lipton Recipe Secrets Onion soup mix.  Cut your potatoes into bite sized chunks, put them in a ziplock bag, add the oil and soup mix and shake.  Bake at 425 for about 35 minutes or until golden brown.

This is a super easy meal and guests always love it too.  I recommend serving it with a green salad or green beans…something green anyways.

Hope you all enjoy this one!  Would love to hear your feedback when you try it, and believe me…it’s one worth trying!

 Don’t forget, you only have a few more days to enter to win the giveaway of the Fascinator

Filed Under: Eat

How to Test Doneness of Steak (a trick)….

May 5, 2011 by Logan 5 Comments

I worked as a line cook in a really fantastic restaurant in college for a semester and then for a period of time after I graduated too.  The best things I learned there have stuck with me over time…things like how to cut an onion, some great information about using spices, how to make homemade chicken stock, and more.  This particular trick is one I’ve shared with lots of friends.  Summer is a great time for throwing steaks on the grill, but nothing is worse looking than serving up a steak with multiple slices in the middle testing for doneness.  The chef I worked under (all I remember was that we all called him Red) taught me this trick and now I’m going to teach it to you.

Hold out your hand with your fingers facing you.  You’re going to touch your thumb and each different finger together… and each time, you are going to press on your thumb muscle with your other hand (where I’ll show “Press Here.”) With each finger change, it’ll feel different.  It’s easier to show you than to try to just explain.

So check this out…

When you press on your muscle here it’ll feel kinda mushy and depress easily.  If you touch your steak on the grill and it feels like this, your steak will be rare when you take it off and cut it.

Ok, so for this one you touch your pointer finger to your thumb and press the muscle where I’ve circled.  Notice I’m not super mashing my fingers together…you just touch them and it’ll work out great.  For a Medium Rare steak it’ll feel like this…depress a little but definitely more firmness and less give than the rare steak.

This is how I like my steak (or somewhere between this and medium rare, but that’s getting a bit advanced for the hand trick.)  Touch your thumb to your middle finger and then press on the thumb muscle.  It’s definitely firmer now, but still some give…now you have a Medium cooked steak!

Thumb to ring finger and you’ll have Medium Well!  Firm now, but it will still look like steak and taste like steak.

Honestly, I don’t even think the hand trick matters at this point.  If you like your meat well done, I hope you don’t buy really good meat or you’re totally ruining it when you cook every last germ and drop of blood out of it.  My advice…be vegetarian if you like steak this way.

But, if you insist on eating overcooked and tough meat, this trick is the one for you….thumb to pinky finger and you have Well Done.  And if you’re still unsure, cook it some more…you’re not going to really overdo it now….you already committed this far….go for the char and “Git ‘Er Done!”

 So that’s it.  I think it’s a pretty great trick, and unless you have a massively over-developed or atrophied thumb muscle, this should work for you.

Sorry I didn’t hire a hand model for this one.  And yes, these are my very own overworked, underpaid, never manicured paws.    Many thanks to Louis Lunsford from high school who told me that I have “man hands.”  So there you have it folks…manly woman hands teaching you how to cook a steak!

Now get grilling!

I’m linking up at The Stories of A to Z Tips and Tutorials Tuesday!

Filed Under: Create, Eat, Journey

The Dinner Deliverer

April 15, 2011 by Logan 2 Comments

I’m gonna be honest.  Today I sort of have writer’s block.  And I don’t know that I really have it or if I’m just so busy with everything else I’m trying to accomplish today that I shouldn’t really even be stopping right now to write this post. 

I took dinner to a friend with a new baby last night.  Tonight I’m taking dinner to another friend who just had a baby last week, and made extra of that meal to actually then take with me to the hospital to a friend who had a baby about 3 hours ago.  Nothing better than good food when you’re in the hospital.  I ate so much jello in the hospital with both of my kids, I really thought I’d died and gone to heaven when our friends Stuart and Greta brought me a Subway turkey sandwich.  Who’d have ever thought Subway would leave you in some sort of foodie bliss?!

I want to add here as well that in my humble personal opinion, there is really not much more amazingness that you can do for a friend than to bring them a meal in times of need.  When we have had both of our kids, the meals have been so incredibly appreciated I can’t even tell you.  And when I miscarried not one but 2 babies, each time the meals were ways my friends could hug my neck with more than just their arms.  And when someone dies…and you don’t know when you’ll breathe normally again….to not worry about a grocery list or actually going to the store or preparing a meal….heaven on a plate makes it’s way to your door in the form of the grace of a meal prepared.  Or when you’ve had one of those weeks where everything honestly just wears you out and a friend calls and says “Hey, I made a big pot of soup and we don’t need it all…I’m bringing you some”….well you know they did it on purpose and you couldn’t be happier!  Anyhow….make someone a meal.  Whether the need is obvious or maybe more subtle….make a meal….take a meal….hug their neck by filling their bellies!  Trust me, it’s a good way to love!

So, I just got sidetracked on apparently what is more of a soapbox than I realized it was…all to say…I’ve been cooking like a mad woman today.   So I cooked Loaded Quiche yesterday and the Fig and Sausage Salad for tonight.  Since Tid Bit was in school this morning I did have time to whip up a couple of those Toasted Coconut Cream Pies I’ve told you about as well.  I could seriously stick my head in the bowl of that filling and spend hours licking it before coming up for air.  Seriously…it’s that good.


Anyhow, I’m thankful that we have a day with no plans tomorrow.  I still have to get my act in gear around this house for our Easter Egg Hunt next weekend.  I’ve been messing with some things on my dining room table centerpiece lately too.  I’ll have to show you that sometime soon.  It doesn’t look fully awesome yet because it will depend heavily on the flowers my neighbor said I can pick from her amazing garden next Friday.  Here’s to crossing my fingers that her peonies are blooming…fat chance, but you never know!

Ok…I better finish up these salads so I can make a dinner delivery as soon as the littlest one wakes up from nap.  Seems my almost 5 year old has finally over the past 2 weeks truly come to the point of giving up the afternoon nap.  I have to say, I’m pretty bummed about that.  I do enjoy the quiet each afternoon!  Farewell naptime…I do love you and won’t mind if you still visit the bigger boy from time to time!

Hope the weather wherever you are is as glorious as it is over my house right now!

Filed Under: Eat, Journey

What’s for Dinner?! Loaded Quiche!

April 14, 2011 by Logan 5 Comments

For the longest time my husband refused to eat quiche.  He said it was a girly food…like the cucumber sandwich and strawberry soup kind of girly food.  I’ve always loved it, so I set out to find a really good basic quiche recipe and make it better.  And since then in our house, quiche has become a refrigerator clean-out sort of food.  You know when you have some ingredients that don’t have much life left on them but you can’t figure exactly what to do with them all in one dish….well, make a quiche.  And now, it’s become a favorite among my family and our friends.  Today I’m making one to take to a friend who just had a baby, per her request.  And as easy as they are to make, I’m delighted to oblige.  Throw in some fresh fruit and a side salad, and we have one healthy, hearty, and fresh tasting meal.  And…you can make it in the morning!

The basic recipe requires 1 pie crust, 5 eggs, and 1 1/2c half and half.  Add some Lawrys seasoning, fresh ground pepper, and that’s the basics.

But honestly, I think basic can get boring.  So I like to spice it up.  Besides, if you’re gonna be cleaning out your fridge, you’re gonna move away from boring really quickly anyhow.

So, consider the following that I personally think you should always include.

  • Some variety of sauteed onion (whether it’s onion, leeks, shallots, etc….they pack some serious flavor punch.)  I always put garlic as well…no matter which other of these I use too.
  • Meat (bacon, sausage, chicken, leftover steak pieces, ham, etc)
  • Cheese….and usually a couple of kinds (I often have cheddar, and then maybe brie, goat cheese, jalapeno cheddar, feta, whatever you have in your fridge!)
  • Veggies…I usually put fresh spinach leaves, & tomato (also try things like broccoli, artichoke, etc.)

Pre-bake the pie shell til it’s golden brown (usually on about 425 for 10-15minutes.)  I typically always either make a pastry if I don’t have any, but the easiest is to use the frozen deep dish shells, or the pre-rolled out pastry dough.

While that’s baking, if you’re using an uncooked meat like bacon or sausage, then go ahead and cook that fully.  Today I’m using bacon.  I pre-cut it into small pieces with a pair of awesome kitchen shears that I have by Cutco and then cooked it til it was crispy.  I highly recommend snagging a pair of these if you can.  I use them to trim chicken, cut through those annoying plastic things on kids toys, etc.  They will even cut a penny in half!

Drain the bacon on a paper towel and then put it in the bottom of the baked pie shell.

Reserve a couple Tbsp of bacon grease (I used peppered bacon so that the grease is even yummier) and put your leeks or onions and garlic in the grease to saute til cooked.

Then layer that on top of the bacon in the crust.

Next goes the fresh spinach and sliced tomato!  
(Mine were a tad wrinkly…not awesome for raw eating, but perfect for a quiche!)

Today in my fridge I had some jalapeno monterey jack, cheddar, and goat cheese….so what you see below is a mix of all 3!  I always put the cheese on last because it sort of creates a crust on top once you add the egg/half and half mixture.

I always make at least 2 quiches at a time because it’s so easy and they freeze well.  
So here you see 10 eggs and 3c half and half.  I put probably 1/2 tsp Lawrys seasoned salt, 1/2 tsp fresh ground pepper, and a dash of nutmeg in the mixture.  Beat it well.

 My mom taught me this handy trick for making quiche.  Since the egg and half and half mixture makes the quiche runny, it’s best to put them on a pan in the oven and THEN pour the egg mixture in.  Also if any bubbles over, make sure you have a pan beneath or you’ll have a nasty burned mess in the bottom of your oven. 

Bake them at 375 for about 45 minutes or until lightly browned on top and they don’t jiggle in the center at all.  You want to let them set for about 15 minutes before you cut them as well.  I often make them in the morning and just heat it up again for supper for about 20 minutes with a piece of foil covering the top so that the crust doesn’t burn.

So…if you’re looking for something easy to make that’s yummy.  Give this a shot!  My absolute favorite combo is the ingredients above but instead of the jalapeno monterey jack cheese, I love brie and goat cheese with the cheddar.

Oftentimes when I make a flank steak (I’ll share that recipe next time I make it) and we have leftovers, I’ll put pieces of that with sauteed onions and mushrooms and a spicy cheese to make a quiche.  Another good one is to use rotisserie chicken with sundried tomatoes, spinach, feta, and artichokes.   Some other things that can be fun to add… roasted red peppers, swiss cheese, thinly sliced zucchini, shrimp or crabmeat….get creative and have fun with it!

And the final product today…. 
(it’ll settle down, but if I want to finish this post…you’ll have to see it puffy straight out of the oven!

Bon Apetit!

Filed Under: Eat

How to….Cut a Leek

April 13, 2011 by Logan 2 Comments

If you are just joining us today, please make sure to read the post I did about an hour ago.  This one is helpful, but that one will make you pee in your pants.  So, if you’re in an office now, or if you’re pregnant and already struggling with incontinence, take this moment to go relieve yourself.  Then come back, learn how to cut a leek and read today’s earlier post on To Pose or Not to Pose…Maternity Photos.

I taught you how to cut an onion awhile back.  And hopefully it helped you become more efficient in the kitchen so that one day you can win The Amazing Race if they ever have an onion cutting challenge again….or you can just get dinner ready faster with your kids dogs nipping at your heels while you cook.  Today I thought that I’d show you how to cut and clean a leek.  If you don’t know what a leek is, click HERE to see what Wikipedia has to say about it.  If you don’t want to do that…just know that it’s in the onion and garlic family and they are great to cook with.  I’m making quiche tomorrow (I’ll share the recipe for that then) using leeks.  And, a leek looks like this.

 Leeks are really dirty.  Must be in the way they grow, but there is grunge between every layer. 

I’m gonna show you how to cut and clean them the easy way…the way a chef taught me.

 First order of business is cutting.  Don’t even think about trying to clean them first…it’s a pain and then the cutting will be worse too.  Trust me, you’ll just make a mess and never want to use leeks again.  And you shouldn’t decide that…they are fantastic.

I drew a line on the leek to show you where to make your first cut.  Use a paring knife.  You want to make a series of shallow cuts for this first part.  The dark green part of the leek isn’t good to eat, but if you just chopped the whole thing off where the dark green starts, then you’d waste a good portion of the usable leek.

So what you’re going to do is make a series of cuts to remove only one layer of the husk at a time.  Move outwards towards the end so that each time you cut, you’re just cutting away the dark green.  You want to preserve the super pale greenish part because it is tender and good to use.

<—-See how I did it there.  How far each cut should be will depend on your leek.  Just make sure you’re removing the hard stalky part.

Now, sometimes I just go ahead and cut so that the leek will be in small circles (like if you were cutting an onion into rings.)  But this time I wanted them a bit smaller so they’ll distribute into more smaller pieces when i make my quiche tomorrow.  I cut a line down the middle.  And, just like with cutting an onion, don’t cut through that hairy end.  It holds the thing together for you naturally. 

Use your big chef knife for this part.  You are done with your paring knife now.

Next you want to cut the leek into probably about 1/4 inch slices.  Cut the whole thing up until you get right up on the hairy end  (throw that hairy part away.)

<—–It will look about like this when you’re done.  But you will totally see dirt all over the pieces.  NOW is the time to wash them.  It’s easier to remove the dirt when you can separate the pieces.  

I can’t seem to figure out what I’ve done here, but for the life of me I can’t get this picture to turn the right direction…so, if you were wondering, I do live in a place where the same laws of gravity apply.  Our water does not come out sideways.

Wash and separate your leeks now.  This is the easy way to do it.  I promise. 

Once you’ve done this and dried them on a paper towel, you’re ready to get cooking!

Tomorrow I will give you a fantastic recipe for quiche that even men like.

Filed Under: Create, Eat

What’s for Dinner?! Lemon Curry Roasted Chicken, Amazing Rice Pilaf!

March 15, 2011 by Logan 4 Comments

I made this dish for dinner last night after sort of a hiatus from inspired cooking.  As you know if you’ve been reading here lately, my Hubs has been working late for about the past 6 weeks on a major project, so the dinner department suffers severely.  It’s just not as much fun not having dinner as a family and thus, I just don’t feel like getting creative lately.

I don’t know what it was yesterday, but something hit me and the cooking bug bit me again!  Oh happy day!  I scoured my cookbooks until I found something that sounded amazing that I knew I had all the ingredients to make.  And, I found this amazing gem from Sarah Foster of Foster’s Market.  I shared one of her cookbooks with you the other day in the  post I did on Chocolate Whopper cookies , but these recipes today come from one of her other cookbooks that is equally inspiring and delicious called Fresh Everyday which you can buy HERE.

 I should also tell you that I didn’t have a whole chicken when I made this.  I used bone-in/skin-on chicken breasts and in the places it said to put stuff in the cavity, I just sort of crammed the things directly below the boned part of the breast.  And I’m happy to say, it still turned out amazingly!!!  I’m a bigger fan of the white meat anyways.  I can’t tell you how flavorful and yummy this was.  And if you think you’re afraid of or don’t like curry…think again.  This basically creates a spicy, sweet, just overly mouth-watering piece of meat.  And the sauce that you pour over it at the end….oh my goodness.  I can’t wait to make this again!!!

So without further ado, I introduce you to Lemon Curry Roasted Chicken and the perfect side to accompany it, Rice Pilaf for every season!  I just roasted some broccoli to add a little green to our plates!  (If you don’t know how to roast broccoli, just throw some florets into a ziplock bag, lightly coat with olive oil, season with a bit of season salt like Lawrys, pepper, and a little garlic.  Toss it all together in the bag, then evenly spread on a lined baking sheet.  I usually bake about 15 minutes at 375.  It’s so flavorful and lovely.  And my kids actually devour broccoli this way too!)

OK ok…the recipes!

Lemon-curry roasted chicken
Adapted from Fresh Every Day by Sara Foster
1 3- to 3 1/2-pound chicken
2 lemons, halved
1 apple, halved and cored
2 cinnamon sticks
3 tablespoons olive oil
1/4 cup curry powder
1 tablespoon light brown sugar
1 tablespoon sea salt
2 teaspoons freshly ground black pepper
Leaves from 6 to 7 fresh thyme or lemon thyme sprigs (about 2 tablespoons)
1 cup chicken broth
1/2 cup dry white wine

1. Preheat oven to 425 degrees.

2.  Remove the giblets and loose fat from the cavity of the chicken.  Rinse the chicken inside and out and pat it dry with paper towels.  Place the chicken, breast side up, on a roasting rack set inside a large roasting pan or ovenproof skillet.  Squeeze the juice from the lemons over the chicken and inside the cavity.  Place 2 of the squeezed lemon halves, the apple halves, and cinnamon sticks in the cavity of the chicken and place the remaining lemon halves in the bottom of the pan.

3.  Stir the olive oil, curry powder, brown sugar, salt, pepper, and thyme together in a small bowl to make a paste.  massage the paste into the skin of the chicken and let the chicken sit 20 to 30 minutes at room temperature to marinate before cooking.

4.  Pour the broth and wine around the chicken and roast for 1 hour 20 minutes to 1 hour 25 minutes, basting frequently, until the juices run clear when the chicken is pierced with a knife in the thickest part of the thigh or an instant-read thermometer inserted into that point registers 170 to 175 degrees F.  Add a cupful of water or wine to the pan if it gets dry.  Let the chicken rest for 10 to 15 minutes before carving.

Like I said…I used 4 large chicken breasts for this…and no complaint here from the result!

Ok…now, the rice pilaf, which was also unreal!!!

 Long Grain and Wild Rice Pilaf with Quinoa, Golden Raisins, and Orange Zest

1 Tbsp unsalted Butter
1 Tbsp olive oil
1 Leek washed well, trimmed and julienned (I didn’t have a leek, so I just julienned an onion.)
1 c long grain wild rice (rinsed and drained)
2 1/2 c. chicken broth
1 large carrot trimmed and julienned
grated zest and juice of 1 orange
2 tsp sea salt
1/2 tsp fresh ground black pepper
1/2 c. quinoa
2 Tbsp hopped fresh flat-leaf parsley (I used dried b/c i didn’t have fresh)
1 Tbsp fresh thyme leaves (used dried again here…just add it in when you add the quinoa so that the dry herbs have time to flavor the dish and soften.)
1/2 c. golden (or regular) raisins

(depending on the cook time of the rice you use…about 2/3 that cook time.)

2. While the rice simmers, rinse the quinoa in a fine mesh strainer and drain well.  Add the quinoa to the saucepan with the rice and stir to combine.(If you’re using dry herbs, I’d add the in at this point too.)  Replace the lid and simmer the quinoa and rice for another 15-20 minutes, until all the liquid is absorbed and the grains are soft and fluffy.

3. Remove the saucepan from heat and stir in the parsley, thyme (if you’re using fresh herbs…do this here), and raisins.  Serve warm with salt and pepper to taste as needed!

Enjoy!!  And if you make this (which you totally should), then leave me a comment later to tell me what you thought!

Much love,
Logan

Filed Under: Eat

What’s for Dinner?! Lemon Curry Roasted Chicken, Amazing Rice Pilaf!

March 15, 2011 by Logan 3 Comments

I made this dish for dinner last night after sort of a hiatus from inspired cooking.  As you know if you’ve been reading here lately, my Hubs has been working late for about the past 6 weeks on a major project, so the dinner department suffers severely.  It’s just not as much fun not having dinner as a family and thus, I just don’t feel like getting creative lately.

I don’t know what it was yesterday, but something hit me and the cooking bug bit me again!  Oh happy day!  I scoured my cookbooks until I found something that sounded amazing that I knew I had all the ingredients to make.  And, I found this amazing gem from Sarah Foster of Foster’s Market.  I shared one of her cookbooks with you the other day in the  post I did on Chocolate Whopper cookies , but these recipes today come from one of her other cookbooks that is equally inspiring and delicious called Fresh Everyday which you can buy HERE.

 I should also tell you that I didn’t have a whole chicken when I made this.  I used bone-in/skin-on chicken breasts and in the places it said to put stuff in the cavity, I just sort of crammed the things directly below the boned part of the breast.  And I’m happy to say, it still turned out amazingly!!!  I’m a bigger fan of the white meat anyways.  I can’t tell you how flavorful and yummy this was.  And if you think you’re afraid of or don’t like curry…think again.  This basically creates a spicy, sweet, just overly mouth-watering piece of meat.  And the sauce that you pour over it at the end….oh my goodness.  I can’t wait to make this again!!!

So without further ado, I introduce you to Lemon Curry Roasted Chicken and the perfect side to accompany it, Rice Pilaf for every season!  I just roasted some broccoli to add a little green to our plates!  (If you don’t know how to roast broccoli, just throw some florets into a ziplock bag, lightly coat with olive oil, season with a bit of season salt like Lawrys, pepper, and a little garlic.  Toss it all together in the bag, then evenly spread on a lined baking sheet.  I usually bake about 15 minutes at 375.  It’s so flavorful and lovely.  And my kids actually devour broccoli this way too!)

OK ok…the recipes!

Lemon-curry roasted chicken
Adapted from Fresh Every Day by Sara Foster
1 3- to 3 1/2-pound chicken
2 lemons, halved
1 apple, halved and cored
2 cinnamon sticks
3 tablespoons olive oil
1/4 cup curry powder
1 tablespoon light brown sugar
1 tablespoon sea salt
2 teaspoons freshly ground black pepper
Leaves from 6 to 7 fresh thyme or lemon thyme sprigs (about 2 tablespoons)
1 cup chicken broth
1/2 cup dry white wine

1. Preheat oven to 425 degrees.

2.  Remove the giblets and loose fat from the cavity of the chicken.  Rinse the chicken inside and out and pat it dry with paper towels.  Place the chicken, breast side up, on a roasting rack set inside a large roasting pan or ovenproof skillet.  Squeeze the juice from the lemons over the chicken and inside the cavity.  Place 2 of the squeezed lemon halves, the apple halves, and cinnamon sticks in the cavity of the chicken and place the remaining lemon halves in the bottom of the pan.

3.  Stir the olive oil, curry powder, brown sugar, salt, pepper, and thyme together in a small bowl to make a paste.  massage the paste into the skin of the chicken and let the chicken sit 20 to 30 minutes at room temperature to marinate before cooking.

4.  Pour the broth and wine around the chicken and roast for 1 hour 20 minutes to 1 hour 25 minutes, basting frequently, until the juices run clear when the chicken is pierced with a knife in the thickest part of the thigh or an instant-read thermometer inserted into that point registers 170 to 175 degrees F.  Add a cupful of water or wine to the pan if it gets dry.  Let the chicken rest for 10 to 15 minutes before carving.

Like I said…I used 4 large chicken breasts for this…and no complaint here from the result!

Ok…now, the rice pilaf, which was also unreal!!!

 Long Grain and Wild Rice Pilaf with Quinoa, Golden Raisins, and Orange Zest

1 Tbsp unsalted Butter
1 Tbsp olive oil
1 Leek washed well, trimmed and julienned (I didn’t have a leek, so I just julienned an onion.)
1 c long grain wild rice (rinsed and drained)
2 1/2 c. chicken broth
1 large carrot trimmed and julienned
grated zest and juice of 1 orange
2 tsp sea salt
1/2 tsp fresh ground black pepper
1/2 c. quinoa
2 Tbsp hopped fresh flat-leaf parsley (I used dried b/c i didn’t have fresh)
1 Tbsp fresh thyme leaves (used dried again here…just add it in when you add the quinoa so that the dry herbs have time to flavor the dish and soften.)
1/2 c. golden (or regular) raisins

(depending on the cook time of the rice you use…about 2/3 that cook time.)

2. While the rice simmers, rinse the quinoa in a fine mesh strainer and drain well.  Add the quinoa to the saucepan with the rice and stir to combine.(If you’re using dry herbs, I’d add the in at this point too.)  Replace the lid and simmer the quinoa and rice for another 15-20 minutes, until all the liquid is absorbed and the grains are soft and fluffy.

3. Remove the saucepan from heat and stir in the parsley, thyme (if you’re using fresh herbs…do this here), and raisins.  Serve warm with salt and pepper to taste as needed!

Enjoy!!  And if you make this (which you totally should), then leave me a comment later to tell me what you thought!

Much love,
Logan

Filed Under: Eat

What’s Cooking?! Chocolate Whoppers…aka. my newest downfall!

March 10, 2011 by Logan 6 Comments

This morning when I woke up it was still raining…and my house smelled like poop from our septic tank issues. 

UN-Awesome.

Since I really didn’t do much of anything productive yesterday with the rain, I thought I’d kill 2 birds with one stone today…make something to show for and abolish the literal crappy smell in my house.

Baking time!!!

Little did I know the problem these cookies would cause for me today.  I’m so glad I gave most of the pie that I made the other day away…or all of this yummy goodness around would be seriously problematic!  I took an entire tin of these cookies to lunch at McDonalds with friends today…I have to get them out of my house.  I mean it…it’s like having Cadbury Cream Eggs around….not a redeemable thing about them for my waistline!  My friends all agreed….these things are so good they’re bad!

If you’ve never heard of Sara Foster, then you should look her up.  She has a couple of restaurants called Foster’s Market in the Raleigh/Chapel Hill, NC area and a couple of cookbooks to her name that never disappoint. I promise! 

<————– This recipe for Chocolate Whoppers is from this cookbook which you can get for a good deal HERE.

You will love me for this…but you will also hate me for this.  They are just ridiculously good…and I’ve never really considered myself a chocolate chocolate chip cookie kind of person.  I stand completely….

reformed!

Without further ado…. I introduce you to the newest nemesis to hit my kitchen this week…

The Chocolate Whopper!

Makes about 1 dozen 2½ inch- to 3-inch cookies

6 ounces semisweet chocolate (preferably high-quality baking chocolate, such as Valrhona or Callebaut), chopped into large chunks
2 ounces unsweetened chocolate, chopped into large chunks
6 tablespoons (¾ stick) unsalted butter
2 large eggs
1 tablespoon plus 2 teaspoons instant espresso powder (I didn’t have this so I just ground some coffee super fine….they are still TO DIE FOR!)
2 teaspoons pure vanilla extract
¾ cup sugar
⅓ cup all-purpose flour (yes you read this right!)
1 teaspoon baking powder
½ teaspoon salt
2 cups coarsely chopped walnuts
1 cup (6 ounces) semisweet chocolate chips

1. Preheat the oven to 325 degrees.

2. Lightly grease 2 baking sheets and set aside. (I just lined sheets with parchment paper)

3. Melt together the semisweet chocolate, unsweetened chocolate chunks, and butter in a double boiler over low heat until just melted, stirring occasionally. (Note: Do not overheat; remove from the heat as soon as chocolate has melted.) Stir to blend the chocolate and butter, and set aside. (I cheat…and do not use a double boiler…I just stir constantly and do this over low heat on the stove.)

4. Cream together the eggs, espresso powder, and vanilla in a large bowl with an electric mixer. Add the sugar and mix until thick and creamy.

5. Sift together the flour, baking powder, and salt in a separate bowl and stir to mix. Set aside.

6. Add the chocolate mixture to the egg mixture and blend until well combined. Add the flour mixture and stir just until the dry ingredients are moist.

7. Fold in the walnuts and chocolate chips. (Note: The batter will be very moist—similar to the consistency of cake batter.)

8. Scoop the batter with a ¼-cup (2-ounce) ice cream scoop or by the heaping tablespoon and drop onto the prepared baking sheets about 3 inches apart. (Note: Bake right away, before the chocolate begins to cool and harden.) (I didn’t make them this big, so I got a little over 2 dozen total)

9. Bake 10 to 12 minutes, turning the baking sheets once during the cooking time. The cookies will still be very gooey inside and soft, but do not overcook or the cooled cookies will be dry. Cool about 10 minutes on the baking sheets before gently removing the whoppers to a baking rack to cool completely.

Don’t hate me because these are beautiful!
Much love,

Logan

Filed Under: Eat

What’s Cooking?! Toasted Coconut Caramel Cream Pies

March 8, 2011 by Logan 1 Comment

Before I tell you this recipe, I have to apologize in advance that this pie will ruin your quest to be thin.  It will insure your jello jog, make you feel self conscious in your hanky pankys, and all in all destroy any shred of will power you might be trying to advance for Lent.

That being said…you will bite into a mouthful of this stuff and enjoy what I think a little slice of heaven must really be like.  I feel confident God will have this available for me in heaven.

Truth is though, I am not on a quest to be your Jillian Michaels. (Although I wouldn’t mind looking like her!)  I am not your Paula Deen either.  But, I am just your friend who will on occasion share a recipe that will make your worst days better….and this recipe is just that!

I took a gazillion pictures today, which frankly I think is a little annoying, so you have to tell me yourselves if you like the picture thing or if you’d prefer I ditch it in favor of just a written recipe.  I do know that for many of you though, the pictures are what put a recipe within your reach and if that’s the case, then it’s worth it to me to keep taking pictures to make you know that gourmet-like cooking is completely within your reach!

So before I introduce you to this decadent treat, I have to tell you why I made it.

This may come as no surprise to you, but I am my neighborhood’s official Welcome and Care Coordinator.  Basically when someone new moves in, I take them flowers, or pie, or dinner, or coordinate others to do it too!  I am the Welcome Wagon for our neighborhood and I am so excited about it!  And after a year of not having a single person to welcome around here, I have 2 in one week!  Oh joy!  So one of them I’m taking flowers to, and the other one I’m taking this pie.  And then I’ll flip flop in a few days and do it again!  This is so up my alley I can’t even tell you!

Anywho….here’s the pie!

Toasted Coconut Caramel Cream Pies 
(makes 2)

1 can sweetened condensed milk                        1 bag coconut
1 8 oz pkg cream cheese                                     1 c. chopped pecans
1 16oz pkg Cool Whip                                        1 stick butter (1/2 c.)
2 deep dish pie crusts                                          Caramel Ice Cream Topping

Bake crusts as directed by package and set aside to cool.  Toast coconut on baking sheet in the oven…at about 350 degrees.  Takes about 20 minutes, but you need to check it and stir it around about every 4 minutes til browned.  Melt butter in large saucepan and brown pecans for about 5 minutes or so.  Add toasted coconut to nut/butter mixture and continue to brown some more…over about medium heat.  You will need to be almost constantly stirring this to make sure it doesn’t burn. Set aside to cool.  Mix cream cheese and sweetened condensed milk well in electric beater til smooth.  Fold in cool whip.  Once everything is completely cooled, layer fluff mixture, coconut mix, and drizzle caramel topping 3 times in pie shells.  Refrigerate to set a few hours before serving.

I use these frozen crusts, but see how on the right I re-pinched the sides to keep it from looking so storebought.  So if I’ve given you these pies before know that I do love you enough to make homemade crust, but just don’t do it here!

Above you can see the difference from plain coconut to toasted. Also, here’s the butter and nuts to brown in a large saucepan!  This one is my favorite and it’s by All-Clad.  A good all purpose pan is something every cook should have in my opinion!

Once the nuts begin to brown, add the coconut and continue to brown all together.  Keep stirring so you don’t burn this yummy, crunchy mixture!  See the way it looks different from when you add it to when it’s done?


Blend the cream cheese and condensed milk til smooth, and hand fold in the Cool Whip.

Make sure you don’t forget to prick the pie crust with a fork or this giant bubble effect will happen! Oops!

Onc everything is cool, begin layering everything.  Do this 3 times til you’re done!  Then Voila!  Yumminess after chilling!

Bon Appetit!!!

– Logan

Linking up to Tidy Mom’s Best Pie recipes.  “Come join Love the Pie with TidyMom  sponsored by Cherokee USA, Le Creuset, Wilton, Bags by Bloom and  Harvard Common Press”

Filed Under: Eat

Tales of a Lesser Woman: I botched up my own recipe!

March 8, 2011 by Logan 2 Comments

You know the pizza recipe I shared the other day?  The fig and sausage one.

Well, I made it last night and even though I’ve made it LOTS of times before, I changed a couple of things this go round.  A couple of changes worked just fine, but a couple turned out to be the most ridiculous nightmarish cooking debauchles that will go down in my mind forever!

The good news is that it still tasted really good!

First, I will tell you that reconstititing dried figs worked just fine and I’ll definitely do it again.  To reconstitute dry figs you need to put them in a bowl and pour boiling water over them til they start to puff up.  I had to do this twice…pour out the first water when it starts to cool and pour another batch of boiling water over them.  They puffed up just fine, but they looked so disgusting.  My mom says I’m not allowed to tell you what we thought they looked like, but sufficed to say it was a very gross looking thing.  So when you serve these up, I recommend slicing them to put on your pizza so you don’t gross yourself or any guest out completely!  See what I mean?

Pretty bad huh?!

Well now that I’ve started your day out with something entirely inappropriate, I apologize.

Ok, for the rest of the pizza, I have to tell you…whole wheat dough made a mess!  It wasn’t as elastic as regular dough and it probably didn’t help at all that for some unknown reason I made each dough portion into one giant pizza instead of 2 smaller ones.  Since you have to put this on the grill, it works a whole lot easier to make smaller pizzas.  The big one stretched so ridiculously and made a mess.  My mom was here and we were laughing so hard over it that we were crying!  The first one was just enormous, but the second one tore into about 6 different pieces and was just a joke!

<—–Look!  This is the second one…once we put the onions and sausage on it.

<—– Even though this dough was a complete mess, you can’t tell by the time we put everything on it!  The whole wheat dough took a bit longer to cook as well.  Next time I’ll be using regular dough again.  Also, instead of arugula I typically use spinach because I always have it around.

<—— This is actually how many pieces that dough tore into!  The most important thing though was that it still tasted every bit as wonderful as it should!

 My mom said “Oh wow honey, this recipe is so easy and lovely I just can’t wait to rush right home and make it!”  But truly, it is actually easy…and definitely delish!  Just divide your dough, use regular pizza dough instead of whole wheat, and make sure you slice up the reconstituted scrotum-looking figs to put on the pizza so it looks nice!

So really…make this one. You will love it!

And I promised a recipe for a great pie today, so I’ll try to do that this afternoon.  Or I can post how to antique a table today?  What do you prefer?  Either way, it’ll all get posted soon enough!

– Logan

Filed Under: Eat, Journey

  • « Previous Page
  • 1
  • …
  • 3
  • 4
  • 5
  • 6
  • 7
  • Next Page »
  • 
  • 
  • 
  • 
  • 
  • 

Subscribe by Email

Oldies but Goodies

Copyright © 2025 · Logan Wolfram · Logo by Annie Barnett · Site by Design by Insight