Logan Wolfram

Enjoying Life for Dessert

  • Home
  • About
    • Meet Logan
    • Meet My Family
  • Blog
  • Eat
  • Journey
  • Create
  • Connect

What’s Cooking?! Blue Ridge Black Bean Salad/Salsa

May 29, 2012 by Logan 2 Comments

It’s been awhile since I’ve shared a stand out recipe and this one just screams summer to me!

We were at my parent’s lakehouse this past weekend for Memorial Day and we ate the heck out of this super yummy and ridiculously healthy salad/salsa stuff.  It is so good you could eat it straight from the bowl.  It’s also awesome for a really fast dinner salad to toss over some greens with your meat of choice.  I have made it as a side to grilled chicken too, but my favorite way is to eat this stuff loaded up on a tortilla chip.

Both of my kids love it and I’m loving that they’ll eat all of this healthy jumble of goodness.  My plan is to keep it around this summer as much as I can make it!  It makes a monsterous amount, so try buying a couple of mason jars and give some to a friend if you don’t think your family will eat all of it.  Who wouldn’t love you for that?!

Here you go friends.
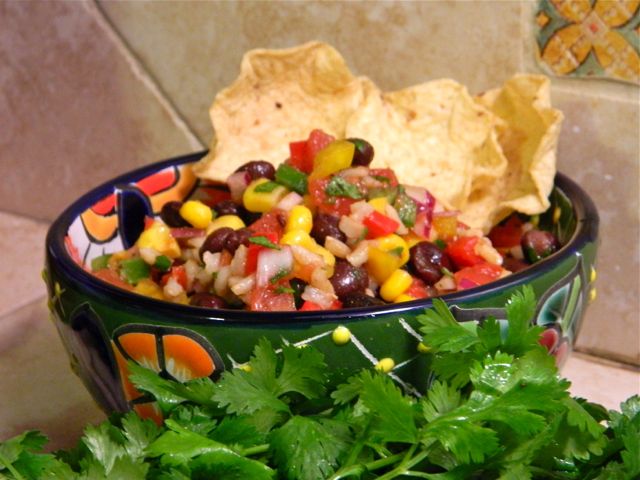
Blue Ridge Black Bean Salad

from the Junior League of Roanoke, VA.

Lime Vinaigrette

  • 2 tablespoons fresh lime juice
  • 2 tablespoons balsamic vinegar
  • 2 tablespoons olive oil
  • 2 teaspoons ground cumin
  • red pepper to taste
  • salt and black pepper to taste

Salad

  • 2 or 3 (16 oz) cans black beans, drained, rinsed
  • 1 (11 oz) can white shoe peg corn, drained (yellow corn may also be used)
  • 1 to 2 cups cooked brown rice (I had a stroke of genius today and saved time using an Uncle Ben’s 90 sec brown rice bag.)
  • 2 (14 oz) cans diced tomatoes
  • 1 each green, red and yellow bell pepper, chopped
  • 1 small purple onion, chopped
  • 1/2 cup chopped fresh cilantro

For the vinaigrette, combine the lime juice, vinegar, olive oil, cumin and red pepper in a bowl and whisk to mix well.  Whisk in salt and black pepper to taste.

For the salad, combine the beans, corn, rice, undrained tomatoes, bell peppers, onion, and cilantro in a large bowl and mix well.  Add the vinaigrette and toss to mix. Chill, covered, in the refrigerator for up to several days. Serves 10-12.

Bon Appetit and Ole!

Filed Under: Eat

Dog Days….of Summer, and of Life!

May 21, 2012 by Logan 3 Comments

So, It’s been AGES since I’ve written here.  Sorry about that.  I have loads of things to share too….our amazing trip to Mexico, a funny story about how the Arbys lady (who looked like Granny Klampett) tried to save me at the gas pump, pictures of my almost done laundry room and newly painted living room.  Seriously…life has been full here lately and I just haven’t made the time to write.  It takes time you know, and the time I’ve spent lately has been trying to keep my life in order as we gear up for summer and learn to live again after the past few weird months.

Honestly, I feel like I lost the first quarter of this year.  Sick for 3 months and then losing Fisher…and then 3 more weeks of super sick from 2 D&C’s and then other complications….ugh.  Glad it’s past….it’s the future that I have no idea about now.

I have been writing weekly though…even if it hasn’t been here.  On Mondays I write devotions for Allume, and if you’re curious, then you can check out what I wrote today HERE.

My firstborn turned 6 recently and he just graduated from K5.  The cap and gown thing still cracks me up, but the program they did was adorable.  I shed a tear….or 7.

Oh, and in other exciting news….remember that amazing dress I LOVED last summer from Anthropologie?  Well, I found it for less than 1/2 of original price on ebay last week in my size and I bought it!  Oh my words….I LOVE it!  I think it’s a sign when you dream about a dress for an entire year that you should definitely buy it!

I’m going to make concerted effort to get back into the swing of things here now that life is getting sorted out.  I have a few amazing product discoveries from the past few months that I can’t wait to share with you too.  Good stuff coming…for the blog, and for my life.  I’m sure of it!  And in the meantime, I realized that I never did post pictures of my little man’s 2nd birthday party which was in JANUARY.

It was a dog theme, so I broke out my ever useful astroturf as a tablecloth, snagged a few dog bowls at random stores, and made some cake pops that made me want to poke out my eye.  Seriously…just because you can do something doesn’t mean you should.  Those things were a pain in the tookis and I will only be making cake pops ever again for my kids birthdays….if even then!

The pics are great…thanks to my freaking awesome photographer friend Kim who stopped by to snap a few shots for me to commemorate all my hard work.  And yes, you’ll see lots of pictures of the PITA cake pops (and by pita….I don’t mean chip.  I mean “pain in the….”

Glad to be back friends. I hope you missed me and will start stopping by again!


Filed Under: Create, Eat, Journey

What’s Cooking?! Incredible Sugar Cookies

December 27, 2011 by Logan 2 Comments

Happy couple of days after Christmas everyone!  I hope that your holiday was filled with wonder.

We watched the Nativity Story on Christmas Eve afternoon before our service at church and I loved how it set the scene for my heart for worship even more.  If you’ve never seen that movie…go watch it.  It is such a neat look at what it must have really been like back in that time and place when Christ was born.  Gives you a new perspective on it all.

I’ve been enjoying the last few days with nothing on our agenda as well.  Since my oldest is out of school this week, I plan on doing more of the same…a whole lotta “nothing major.”  Today though, we’re going to make some sugar cookies.  My littlest one is turning TWO in just a couple of weeks, so I figure we’ll do what we can to get started on some preparations for his party.  Last year, these sugar cookies were a great hit when I made them at his Very Hungry Caterpillar  birthday party, and again in the shape of musical notes at Tid Bit’s bluegrass themed party.  This year we’re going to be doing a dog theme because the child LOVES dogs.  I think I’m going to go simple on the cookies though and make them in the shape of bones.  I have shared this recipe before, but realized since it was ages ago and I was just learning about blogging, I didn’t tag it properly and it’s hard to find on the blog.  So here it is again for ya!

It uses powdered sugar instead of regular granulated, resulting in a really shortbready tasting cookie…DELISH!  I scoured the internet and cookbooks to find the perfect recipe, and this one is about as perfect as I have ever had! It makes really good thick cookies, which I love.  I guess if you’re a thin cookie person though, that’s just all up to you and your rolling pin!  To make the icing just mix powdered sugar,  a dash of vanilla, and milk (or soymilk) til it’s the consistency you want.

Amazing Sugar Cookies
yield: about 75 medium cookies

  • 24 ounces butter (softened)
  • 20 ounces powdered sugar (sifted)
  • 3 whole eggs, plus
  • 1 egg yolk
  • 1/2 ounce vanilla extract
  • 1/4 ounce almond extract
  • 6 1/2 cups flour
Directions:
  1. With paddle attachment, mix butter for 30 seconds. Add a 1/3 of the powdered sugar, mix on first speed for 1 minute. Add another 1/3 of the powdered sugar, mix another minute. Finally, add the last 1/3 of sugar, mix 1 minute.
  2. Combine eggs, vanilla, and almond extract together, add to butter/sugar mixture. Mix for 30 seconds.
  3. Add a 1/3 of the flour, mix 1 minute.
  4. Scrape.
  5. Add the next 1/3 of the flour, mix 2 minutes.
  6. Scrape.
  7. Add the final 1/3 of the flour, mix 3 minutes.
  8. Refrigerate until able to be rolled out and cut into desired shapes. (if you’re using the dairy free version i told above,  I’d refrigerate it AT LEAST 24 hrs before rolling out to make sure it really sets up.) Bake at 350 for 9-15 minutes depending on the size you cut them!)

(As a side note for my friends who have food allergies, you can make this recipe dairy free.  To do so, I substituted 1/2 the amount of butter with Fleishman’s Unsalted Margarine, and 1/2 with Earth Balance Buttery Sticks which I buy at Whole foods.  You really need to mix the two to get it right.  The margarine makes a flavorful, but super soft and sticky dough by itself, and the buttery sticks sometimes have a slightly oily taste but have a harder consistency…by mixing the 2, you’ll keep a good buttery flavor from the margarine and keep the texture right from the buttery sticks.)

I hope you are enjoying some relaxing time with your family too!  Makes me long for the days of summer for sure!

Filed Under: Create, Eat, Journey

What’s Cooking?! Santa Hat Brownie Bites

December 19, 2011 by Logan 3 Comments

I wish I could claim this idea as my own…but I can’t.  I saw a picture of these adorable santa hat brownie bites somewhere on Pinterest and thought to myself, “I’m making those for sure!”  So, I did….for the party that we had on Friday (which was a great success by the way!)

I never went back to find out how the person had done it, because I thought it was pretty self-explanatory.  And…I make my grandmother’s amazing brownie recipe all the time, so that was a no-brainer too.  Someone told me the other day they’d heard of this done with cool whip, but I made homemade cream cheese icing which is tastier and stickier too (to hold the berry in place.)

So here’s my Mema’s brownie recipe.  I normally make it in a 9×13 pan and bake at 350 for 25 minutes, but this time I used mini muffin tins and baked for around 18 minutes.  Make sure you spray your muffin tins so these will fall out when they’re done!

To make the best and easiest brownies ever, you’ll need:

  • 4 sq (4 oz) unsweet Baker’s chocolate (comes in an orange box in the baking section)
  • 2 sticks butter
  • 2 c. sugar
  • 4 eggs
  • 1 c. flour
  • 1 tsp vanilla (I always just squirt the vanilla in, so it’s probably way more than 1 tsp…I’m generous with vanilla like that!)

Put the chocolate and butter into a microwave safe dish and melt on high for about 3 1/2 minutes.  When that’s done, stir it up well to make sure the chocolate squares melted completely.  Then add and incorporate sugar, then eggs, then vanilla, and finally flour.  Don’t overmix.  I always just do this by hand…less to wash and it’s so easy anyhow.  Pour into whatever baking vessel you choose and bake at 350…for about 18 minutes in mini-muffin tins, 25 in a 9×13 pan, and 35-40 in an 8×8 if you like a thicker brownie.  A toothpick should come out pretty clean in the center of the pan.  I like mine slightly underdone though…just slightly…to make them really fudgy.

To make cream cheese frosting:

  • 2 (8 ounce) packages cream cheese, softened
  • 1/2 cup butter, softened
  • 2 cups sifted confectioners’ sugar
  • 1 teaspoon vanilla extract

In a medium bowl, cream together the cream cheese and butter until creamy. Mix in the vanilla, then gradually stir in the confectioners’ sugar. Store in the refrigerator after use.

For the santa hat bites, wash, dry, and cap your strawberries (they need to be really good and dry so they don’t make everything runny.)

Use a ziploc bag with a small corner cut off to pipe the icing onto the brownie.  I found it worked best to not cover the entire brownie…start at the outside and make a circle of icing.  (I left a small space in the center to give the icing room to spread out when you put the berry on top.)  Stick the berry on top, and then pipe a small dollop of frosting onto the point of the berry.  Keep refrigerated until you’re ready to serve!

These were crazy good and so cute to have at the party!  I made an entire tray and could’ve eaten them all!  So so good!  Tried one with a raspberry too, and while it didn’t look like a Santa hat…it was pretty tasty as well!


Filed Under: Create, Eat

Drop-bys…and a Recipe for Savory Cracker Snack Mix

December 6, 2011 by Logan 2 Comments

Do you know that I got 4 Christmas cards in the mail yesterday?!  And do you have any idea how happy that made me?!  Just like I was talking about yesterday…times FOUR!  Pure awesomeness!

Today, I’m busting my tail editing pictures of my house to show you tomorrow, making invitations for my sister’s baby shower (which I’ll share with you probably Thursday,) trying to catch up on laundry since I’ve fluffed the load in the dryer no less than 4 times here lately, and at some point, I really need to think of something great to make for dinner.  Or at least something decent…

I was thinking though this morning about another thing I really love about the holidays…and that is that people drop by randomly more often.  A lot of the time it’s to bring goodies, or to sing carols, or just because they were in the neighborhood…and I love it!  For many of you though, the thought of random drop-bys honestly makes you cringe.  And I get it…but here’s what I have to say to you about that….DON’T WORRY!  Whoever it is….they’re coming to see YOU!  And so what if your house isn’t party ready?!  They are coming to see YOU!  And if they’ve never been in your home before…well, just think that your willingness to invite them in for a little snack or a cup of coffee may just be the very thing they needed that day…no pretense, just a person who cares more about them than about some illusion of perfection.  You never know what difference you’ll make just by being real enough to just let someone in to your real home…to your real life.

Hebrews 13:2 says… “Do not neglect to show hospitality to strangers, for by this some have entertained angels without knowing it.” And the way I figure it, is if you aren’t suppossed to neglect being hospitable to strangers….then you sure as heck shouldn’t neglect being hospitable to friends!

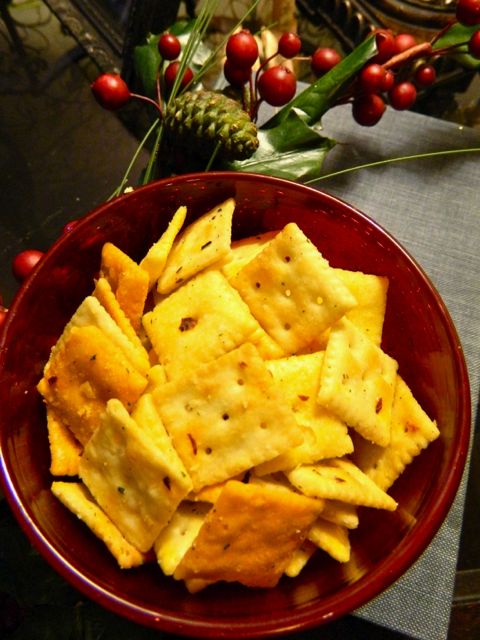
So today I wanted to share a SUPER easy recipe for a little snack mix that’s great to keep around the house in case you do have drop-bys and need a quick little munchie to pull out.

This is SO easy to make and keeps for quite awhile…that is, if you can keep from eating it all the time!

Savory Cracker Snack Mix

You’ll need:

  • 1 box Cheez-it Duoz (I like the cheddar and parmesan mix)
  • 1 box Premium Saltine Cracker Minis
  • 1 packet Ranch Dressing Seasoning
  • 2/3 cup Canola Oil
  • red pepper flakes (to taste…if you don’t like spicy, then skip this one…if you do, I’d start with about 1 tsp or so.)

Dump all of this stuff together and mix well in a large bowl.  About every 15 minutes for an hour, give it a quick stir.

That’s it.  Seriously…that’s it.

It tastes so savory and good…the crackers get super flaky because of the oil, it makes a ton, and it keeps for ages.  Just one of those things that’s great to have around in case you need a little bitty something to pull out and snack on while you enjoy company you may or may not have been expecting!  And let me encourage you….DO make a point to enjoy the company you weren’t expecting…you’ll be glad you did!

**How do you feel when people drop by unexpectedly?  Glad for the break in your day, or mortified about what they might be thinking?  Would love to know your thoughts on extending random acts of hospitality…

Filed Under: Eat, Journey

How to…Make a Great Cup of Coffee

November 18, 2011 by Logan 5 Comments

I’m a coffee lover.  As in, I have a real opinion on real coffee.  And while I like the occasional fluffy sounding coffee treat, as a general rule, I prefer just a plain mug of a fantastic regular brew.  For awhile my fav was a local Greenville, SC roaster called West End Coffee Company and while it’s probably still my favorite, at the rate that I go through it…it wasn’t the best for my budget.  I’ll drink the Maxwell Houses and Eight O’Clocks of the world happily at your house too…but in my house, I’ve found a soulful connection with Whole Foods’s Pleasant Morning Buzz which is a little more dinero than it used to be but still not too bad at about $13 for a 24oz bag.

I was thinking this morning as I arose to drink my happily anticipated cup of morning coffee that it seems that too many people don’t know how to make a decent cup of coffee.  I only say this because several of my friends have even confessed that they don’t know how to do it well.  So I thought I’d give ya’ll the low-down… especially since the holidays are upon us and you may likely find yourself with more opportunities to brew coffee than you’re typically accustomed to doing.

So here are some tips:

Buy decent coffee, and if you can make yourself grind it, then buy it in whole bean form when you can and keep it in an airtight container. Buying a one-week supply is ideal. Contrary to popular belief, coffee beans and grounds should be stored in an airtight container at room temperature to maintain their best flavor. (Now’s the time to rescue those beans from the freezer…yes…NOW.)  If you know you won’t grind it yourself, then it’s ok…buy the pre-ground stuff…I’m coming to hang out with YOU anyhow…not your coffee.

Use good water…In Greenville, our water was rated to be some of the best water in the country…so I use tap water.  If you have nasty minerally water, then your coffee will only be as good as your nasty water….which is well….kinda nasty.  Filter that stuff and you’ll be happier.

Ideally, grind your coffee beans just before brewing. (If you’re using pre-ground, that’s okay, too. I know what it’s like to be busy!) The faster your brew cycle, the finer you should grind the beans. A good rule of thumb is to use a fine grind (20–25 seconds in a blade grinder) for vacuum pots and one-cup cones, a drip grind (15 seconds) for most drip brewers and a coarse grind (10 seconds) for plunger pots and cold water extractors. (this little tid bit was from Whole Food’s website.)


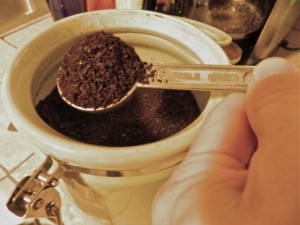
Here’s the part that trips up most of the people I know.  The coffee to water ratio.  The rule of thumb is about 2 Tbsp per 3/4 c water that will be poured through…no matter how much you’re making.  On our standard coffee pots, 3/4 cup is about what they consider to be 1 cup.  So my own personal rule of thumb is to use a crazy full heaping Tbsp for every 2 cups…which when I measured it this morning to tell you this was just shy of 2 Tbsp.  Here’s what I do though…take the number of cups you want to make (a standard coffee pot makes 12)…half it (so we’re at about 6)…and then add one to grow on (so 7 ginormous heaping tablespoons for 1 standard pot of coffee.)  And if you’re making a lot of coffee or anything else for that matter, know that there are 4 Tbsp in 1/4 cup.  So do the math and cut down on your scooping.  (Tuck that little measurement conversion into your back pocket for the next time you’re doubling a recipe too.)

And, when you drink your coffee….it’s gonna taste the best within the first 30 minutes it’s brewed.

Hope this helps! Now you’ll be the one among your friends who becomes known for a good cup o’joe!  Happy brewing!

Starting on Monday, I’m going to show you a few crafts that I’ve been working on with all those hymnal pages I told you about!

Before I leave you today, I thought I’d show you how to make my MOST favorite cup of coffee ever.

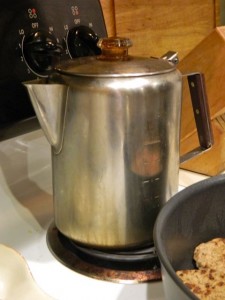
<—-This old pot….

+

This company…—->

+

A fire in the fireplace…—->

+


<—- This view…

From this porch…

equals

Pretty much the most perfect cup of coffee ever.

And I’ll be enjoying my coffee that way every morning over Thanksgiving in the mountains too!

Filed Under: Create, Eat

What’s for Dinner?! Black-Eyed Pea Stew…and it’s WAY better than it sounds!

November 5, 2011 by Logan 5 Comments

I must confess that headed into this recipe I was skeptical.  I’m a good Southern girl, but that doesn’t mean that I have a burning passion for things like black eyed peas and collards that I want to tell the world about.  In fact, memories of every single New Year’s Day growing up still make me cringe.

If you’re from the South, you probably at least know what I’m talking about.  The New Years Day dinner.  Black eyed peas for luck and prosperity in the new year, collard greens for money, cornbread for gold, stewed tomatoes for wealth and health, and if you really want to be the luckiest one at your table, then you’ll be the one served the penny in the bottom of the pot along with all of your black-eyed goodness.

I started dreading New Year’s Day food always very shortly after Christmas.  And every year I remember begging my mom to just make something normal.

SO, when my sister recommended that I try this recipe (originally from Cooking Light back in 2007) I just wasn’t so sure.  But she’s a great cook and so is my mom who also recommended it.  They both love the New Years food though.  It was a risk to be sure, but after weeks of sickness, and busyness, and travel…I have to be honest and say that my creative cooking bone has taken a vacation as well.  To put it plainly, I’ve been in a culinary slump.  And for today, I just didn’t want to have to think about what was for dinner…I just wanted to cook it.

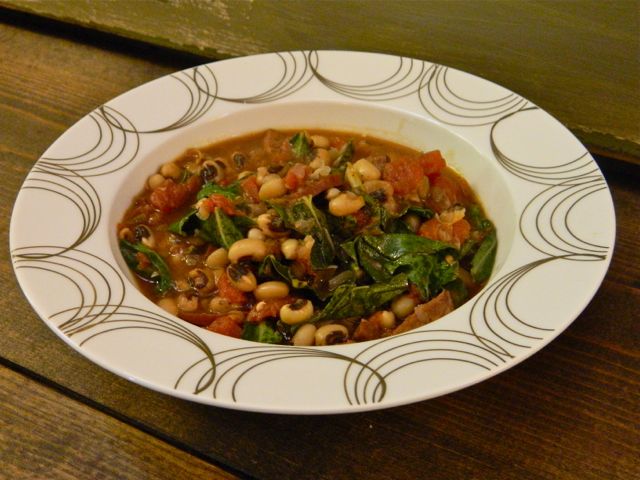
I did it though.  I went to the store and I bought the stuff I needed and I made this stew.  And now since I taste-tested, I can’t wait to eat this stew tonight for dinner.  It is awesome! I’m thinking that even though it’s late in the year…and I don’t really have an ounce of superstition in me…maybe, just maybe this stewey conglomerate of all the New Years foods in one will bring added bonus to the rest of the year.  At the very least though, it’ll feed my family tonight.  And I’m gonna be bold and recommend that you feed yours with it at some point too!

Here you go ya’ll.  For those who love collards and black-eyed peas…and for those who, like me, need a new opinion of them.

Ingredients

  • 2 cups dried black-eyed peas
  • 1 tablespoon peanut oil (whatever…I used EVOO.  I have a feeling any oil is probably fine.)
  • 3/4 cup finely chopped yellow onion
  • 8 ounces turkey kielbasa, halved lengthwise and cut into 1/2-inch pieces
  • 4 cups vegetable broth (I LOVE Better than Bouillon more than broth or bouillon…give them a shot for any base broth)
  • 1 teaspoon salt
  • 1/2 teaspoon crushed red pepper
  • 1/2 teaspoon freshly ground black pepper
  • 2 bay leaves
  • 1 tablespoon cider vinegar
  • 1 (28-ounce) can no-salt-added diced tomatoes
  • 1 (10-ounce) bag prewashed collard greens (or mustard greens, or turnip greens…the collards are a little heartier though)
  • 1 (10oz can) Rotele tomatoes (the original recipe didn’t call for this, but it added some awesome kick.) For a less spicy version, I’d leave this out.

Preparation

  • Sort and wash peas; set aside.
  • Heat oil in a large saucepan over medium heat. Add onion to pan; cook 3 minutes or until tender. Add sausage; cook 4 minutes or until lightly browned.
  • Stir in broth; bring to a simmer, scraping pan to loosen browned bits. Stir in peas, salt, peppers, and bay leaves. Cover and simmer 45 minutes or until peas begin to soften. Uncover and cook 15 minutes or until liquid begins to thicken.
  • Stir in vinegar, tomatoes, and mustard greens; simmer 10 minutes or until peas are tender, stirring occasionally. Discard bay leaves.

Enjoy ya’ll.  And lemme know if any unusual luck comes your way after you make it!  🙂


Filed Under: Eat

What’s Cooking: Rum-Raisin Apple Bread…and Giveaway Winners!

November 1, 2011 by Logan 1 Comment

appleA couple of weeks ago my family went apple picking at my most favorite orchard ever called Skytop in the mountains of North Carolina.  We needed a family day, wanted to pick apples but didn’t want to have to do it amongst crowds, so we took some advice my mom gave me ages ago to “never let schooling interfere with education,” took Tid Bit out of school for the day and headed mountainward.

It was a glorious day.  Cool, sunny, crisp, in need of a jacket and hat.  Fall breathing everywhere.  It’s my favorite kind of weather.  It was my favorite kind of day.


And we picked some serious apples.  Pink Lady apples.  My favorite kind of apples (which coincidentally are the MOST expensive kinds to buy at the store.)  Of course…


And because I recently learned an interesting factoid that apples will last 10 times longer in the fridge (equating to about 90 days of freshness,) I thought we needed to buy even more than we picked.  Can I just say that one entire drawer of my fridge is full…so full of apples that I can barely open it.  And I still have probably 25 more apples on the counter…counting down their days of freshness 10 times faster than the happy apples in the fridge.

I had a problem.  And I needed apple recipes.  But not the same apple recipes that are standbys either.  I wanted fresh ideas for my quickly unfreshening apples.  So I went to my current stand-by favorite cookbook and found a recipe for Rum-Raisin Apple Bread.  It had me at “rum”…and the fact that it required a good number of apples to make it.  Mostly, I figured that since my favorite banana bread recipe has rum, it must be a key player in moisture and flavor even though you don’t taste it at all in the finished product.  If I’d gone to culinary school, I’d probably know the exact science behind what it does…but I didn’t, so I leave it to Alton Brown and Good Eats from the Food Network to teach me about those things.

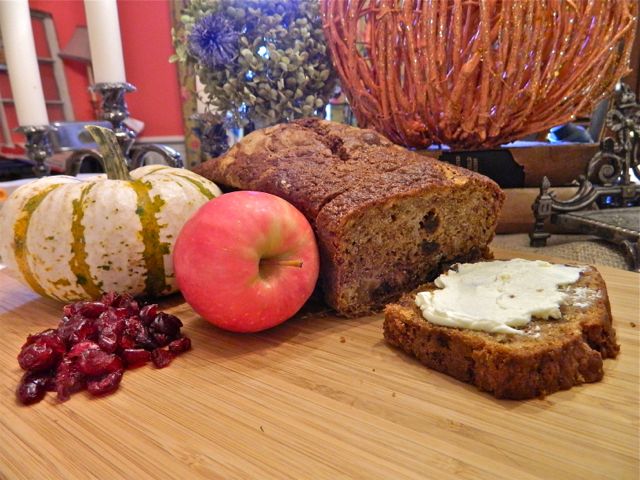
It’s a good one ya’ll.  I totally overcooked it because I decided in my infinite wisdom to begin this project before church.  It took me longer to do than I’d guestimated because of all the extra helpers in the kitchen, so I had to set the oven to finish up while we were gone.  It’s still good though.  The flavor is subtle, fallish, and delish.  It is especially excellent toasted with cream cheese or butter slathered on top.  Plus, it was easy peasy to make.  You get to chop the apples in a food processor!

So without further ado…I give you…

Rum-Raisin Apple Bread


This sweet, quick bread is moist and rich, and needs no embellishment at all. It keeps up to 5 days, freezes beautifully, and makes a nice holiday gift.

Makes two 9 by 5-inch loaves

4 cups all-purpose flour (I might use 1/2 whole wheat flour next time too to give it that more nutty flavor but keep it from being too heavy)
1 tablespoon baking powder
2 teaspoons baking soda
2 teaspoons ground cinnamon
1 teaspoon ground cardamom
½ teaspoon salt
2 cups sugar
4 large eggs
1¼ cups canola or safflower oil
¾ cup dark rum
1 tablespoon pure vanilla extract
4 Granny Smith or other tart apples, peeled, cored, and roughly chopped
1 cup raisins
1 cup currants

1. Preheat the oven to 350 degrees

2. Grease and lightly flour two 9 by 5 by 3-inch loaf pans and set aside.

3. Sift together the flour, baking powder, baking soda, cinnamon, cardamom, and salt in a large bowl and stir to mix.

4. Cream together the sugar, eggs, oil, rum, and vanilla in a separate bowl with an electric mixer.

5. Add the flour mixture to the egg mixture and stir just until the dry ingredients are moist and blended. Do not overmix.

6. Put the apples in the bowl of a food processor fitted with the metal blade and pulse several times; you should have 4 to 4½ cups processed apples. Add the apples, raisins, and currants to the batter and stir until just blended. Pour the batter evenly into the prepared pans.

7. Bake 1 to 1¼ hours, until the breads have risen, the tops are slightly cracked, and a toothpick inserted in the center of each loaf comes out clean. (Note: This is a very dense, moist loaf.)

8. Let rest for 10 to 15 minutes before removing from the pans. Serve warm or place on a baking rack to cool.

We’ve been having it for breakfast or also I’ve loved it as a snack with afternoon coffee.  I doubled the recipe, put 3 loaves in the freezer, and have loved having it around for just general homemade yumminess at my fingertips.

Enjoy!

Oh, and PS.  The winners (as chosen randomly from random.org) from the Fashion Week Giveaways are:

#14 Comment “enter me in, loges! I FB liked you and Becca!” from Amy

from the Accessorize Yourself post

and #1 comment “I liked Luxe Beauty on Facebook” from Molly

from the Best Face Forward post.

If you ladies would please email me your addresses to Logan @ LifeForDessert dot com then I’ll pass along your information to our generous giveaway sponsors Style By Becca and Luxe Beauty Boutique (who don’t forget is still offering a discount code for purchase orders placed through the middle of this month. See the end of THIS POST for more details on how to save when you buy beauty products.)


Filed Under: Create, Eat, Journey, Uncategorized

What’s Cooking?! Pumpkin White Chocolate Chunk Oatmeal Cookies

October 5, 2011 by Logan 4 Comments

There’s just something about fall that makes me want spiced things, apple things, and pumpkin things….you know, cozy, yummy, fallish goodness.  You’ll still be hard pressed to convince me that pumpkin belongs in a coffee drink (YUCK,)  but it doesn’t take long at all to convince me to eat just about anything baked, with pumpkin as the star of the show.

When I saw these cookies in one of my favorite cookbooks, Fresh Everyday by Foster’s Market, and they had the words “pumpkin,” “white chocolate,” and “cookies” all in just the title…I knew that I was destined to make them.  So I did today…with my little man while my baby took a nap.  We had a great time…making, and then eating them.  Dang it…diet ruiner for sure!

You have to try them.  You will LOVE.  They also have a whole bag of butterscotch chips in the recipe too…but you grind them up into the flour so that every single bite has melty, butterscotchy goodness….with the pumpkin…with the white chocolate.  Oh my words…next to my friend Lisa’s ginger cookies, these may be my new favorite fall cookie.  I’ll have to get Lisa’s ginger cookie recipe to share with you too…they are not just a diet ruiner, but a hide-those-dang-things-away kind of cookie.  Mmmm….Mmmmm…Mmmm!

Here you go friends.  Have at it!  You know I want some comment love for sure if you give these a shot too!

Pumpkin White Chocolate Chunk Oatmeal Cookies

Makes about 2 dozen 4-inch cookies, but I used my little cookie scooper thingy and got easily 4 dozen smaller cookies.

2 cups all-purpose flour
1 teaspoon baking soda
1 cup butterscotch chips (LOL! I didn’t even pay attention here either…I put the entire bag! Oops.  Looks like I might have to make them again and follow the directions!  What a shame…having to make and eat them again.  Alas, I will persevere!)
12 tablespoons ( 1 1/2 sticks)unsalted butter,softened
2/3 cup granulated sugar
2/3 cup light brown sugar
1 large egg
2/3 cup cooked fresh or canned pumpkin puree
1 cup old fashioned rolled oats (I added 1/2 c. extra oats this time and decided next time I’d put 2 full cups in the recipe for added chewy goodness.)
8 ounces white chocolate, cut into 1/4-inch chunks or 1 1/2 cups white chocolate chips (screw measuring…put a whole bag!)
1 cup chopped walnuts (I used pecans…because I had them…and I like them better.)

1. Preheat the oven to 350 degrees. Line two baking sheets with parchment paper or lightly grease.

2. Place the flour and baking soda in the bowl of a food processor fitted with the metal blade and pulse several times. Add the butterscotch chips and process until the chips are grounds to resemble coarse meal. Turn this mixture into a large bowl.

3. In a separate bowl cream together the butter, granulated sugar and brown sugar until fluffy, 2 to 3 minutes, stopping several times to scrape down the sides of the bowl. Add the egg and pumpkin and stir to combine.

4. Combine the pumpkin mixture with the flour mixture and stir to moisten all dry ingredients. Add the oats, chocolate and walnuts and stir to combine well. Cover and refrigerate for at least 30 minutes or overnight.

5. Scoop the dough onto the prepared baking sheet with 1/4 cup measure or ice cream scoop leaving 2 inches between the cookies.

6. Bake the cookies on a center rack in the oven for 13 to 15 minutes, rotating the cookie sheets halfway through for even baking, until golden brown. Cool the cookies on the baking sheets about 10 minutes before transferring to a wire rack to cool completely.

While you’re waiting for them to cool…call a friend, brew some coffee, and then sit outside with your friend and enjoy this glorious fall weather…with a plate of cookies of course!

Filed Under: Eat, Uncategorized

What’s for Dinner?! Chicken Tagine with Lemon and Olives

September 15, 2011 by Logan 3 Comments

Last night I made this amazing recipe for dinner.  It’s easy, ridiculously flavorful, and was a HUGE hit with my entire family.  Both of my kids ate seconds.  It makes your house smell unbelievably yummy too.  Don’t fret if you don’t like olives…I know they tend to be higher on the “not such a fan list” alot of the time.  You cut them up and there aren’t many anyhow.  I wouldn’t omit them though…I’m sure somehow they add fab-o flavor.

Picture Source

A tagine is a teracotta pot used in African and Moroccan style cooking.  It has sort of a flat base with a cone-shaped top and is typically used for making flavorful stews and whatnot.  Apparently the stews that are often cooked in a tagine are named for the actual cooking vessel…thus the name of this recipe.  I don’t have one, and chances are that you don’t either…but no worries, you can do this in a Dutch oven or a large skillet with a lid and it’s totally fine.

I recommend serving this dish with cous cous (I like the kind that comes in a box with a spice pkg…last night I used a whole grain olive oil variety) and warm Naan flatbread.  Yes…I know that’s 2 carbohydrates in one meal, but you’ll want the Naan bread to sop up this amazing sauce.  Peas were my green of choice last night, and honestly they tasted good mixed in with everything all together anyhow.  I also doubled the sauce recipe from the original because this sauce is yummy over the cous cous too…so I’m going to write the recipe for you below just the way that I like to make it.

You’ll need the following to make this wonderfully tasty dish:

  • 2 Tbsp fresh lemon juice (about 1 large lemon)
  • 12 boneless, skinless chicken thighs (you can use breasts, but the thighs are much more tender and flavorful for this.)
  • 1/2-1 c. all-purpose flour (for dredging)
  • 1/2 tsp salt
  • 1/2 tsp ground black pepper
  • 1/2 tsp turmeric (you will probably have to buy this bright orange spice…it’s a random one to already have)
  • 1/8 tsp cayenne pepper
  • 2 Tbsp olive oil (or more perhaps)
  • 2 onions, chopped
  • 2 tsp minced fresh ginger (or you can use the fresh-ish kind that comes in a refrigerated tube!)
  • 3 garlic cloves, minced
  • 2 c. low sodium chicken broth
  • 1/2 c green olives halved or chopped (I used the kinds with the pimento b/c they were WAY cheaper and don’t change the taste in this dish at all)
  • rind from 1 lemon, zested
  • 2 cinnamon sticks
  1. Combine lemon juice and chicken in a large zip-lock plastic bag and marinate in refrigerator for about 30 minutes.  Remove chicken afterwards and discard remaining juice in bag.
  2. Pat the chicken dry with paper towels and dredge in mix of flour, pepper, salt, cayenne pepper, and turmeric.  Heat oil in a large skillet with high sides or dutch oven over med-high heat.  Add half of the chicken and cook about 3 minutes on each side or until lightly browned.  Once it’s browned on both sides, remove from pan, add a little more oil as necessary for the second batch of chicken and repeat procedure with other half of chicken.  I also sprinkled a bit more turmeric over the chicken as it browned.  Once done, remove all the chicken from the pan and set aside.
  3. Then, to same pan, add the onion, ginger, and garlic and saute until tender (about 5 minutes or so.)  Then return all of the chicken to the pan.  Add the chicken broth, olives, lemon zest, and cinnamon sticks, and about another 1/4 tsp turmeric, and bring to a boil.
  4. Once boiling, cover the pan, reduce the heat, and simmer 1 hour or until chicken is tender.  Discard cinnamon stick before serving.

After you make this…come back and leave me a comment and let me know what you thought!  Promise…it’s SOOO yummy.  And just fyi…it takes a little over an hour and a half start to finish.  Most of that time you’re not doing anything but smelling it and trying to make your mouth stop watering though.  It made plenty for us to have leftovers as well.  And I’m sorry, but I forgot to take a picture because my kids were STARVING when I was plating it last night, but it actually does look kinda similar to the stuff in the picture of the tagine above…just to give you sort of an idea.

Can’t wait to see what you all think!  Do you trust me yet with recipes?!  By now, hopefully you should know…I don’t share it if it’s not UH-mazing!

PS.  For those of you who weighed in on my boot dilemna from yesterday…I ordered Boot A, the Bonnie Boot…which was my secret favorite all along!  It was very fun to have most of you agree!  I’ll have to post pictures of me sporting them as soon as they get here!  EEekkkk…can’t wait!  And I meant to let you all know too that the root canal on Little Bit from last week went pretty well.  It was a pretty awful thing to have to do on a 19 month old. My sweet baby did have to be sedated, but still he cried all the way through it…just disoriented I think from it all.  I had to hold his hands (as both comfort and to keep him from flailing) and it was so stinking sad.  I’ll be perfectly happy to never have a front row seat to a root canal again…and happier if it never has to be done on one of my kiddos too!  I do have to say that the pediatric dentist and his staff were worth every freaking out-of-network penny that we paid…they were phenomenal with my baby and with me!

Filed Under: Eat

  • « Previous Page
  • 1
  • 2
  • 3
  • 4
  • 5
  • …
  • 7
  • Next Page »
  • 
  • 
  • 
  • 
  • 
  • 

Subscribe by Email

Oldies but Goodies

Copyright © 2025 · Logan Wolfram · Logo by Annie Barnett · Site by Design by Insight