Logan Wolfram

Enjoying Life for Dessert

  • Home
  • About
    • Meet Logan
    • Meet My Family
  • Blog
  • Eat
  • Journey
  • Create
  • Connect

The Prophecy of Pumpkin Bread {and a recipe}

November 11, 2014 by Logan 1 Comment

pumpkin bread

There are days when I just get the urge to bake.  And there are days when I get the urge to bake for someone.

Yesterday I got the urge to bake for my friend Amanda.

And often when I bake, I double or triple or quadruple a recipe so that I can make tons and freeze the extra for later urges…to eat or to give.  I kinda figure that while you’re making a mess, it isn’t that much more mess to prepare extra to satisfy urges.

I should let you know though that while I made umteen loaves of pumpkin bread yesterday, I did neglect to cook dinner and had to run out to pick some up. (Keeping it real here people.)

So when it was warm from the oven and my husband had walked in and I was going to walk out and grab some take-out for us, I told him that I needed to stop by and take some to Amanda.

She didn’t know I was coming.  I tried calling and texting and she didn’t answer, and I decided that I didn’t care if she knew I was coming or not, because this wasn’t the first thought I’ve had of Amanda lately.  I’ve been thinking of her alot.  Her mom has been battling cancer and that alone is reason enough to be more prayerful on her behalf than normal…but yesterday I couldn’t get over the feeling that she needed warm bread.

I wrapped up the bread and tied it pretty and hopped in the car with it and a container of the best tomato soup known to man (which sadly I don’t make and cannot wrangle the recipe for) and headed to just drop by to drop off a little “thinking of you.”

When I got to her house she had just gotten out of the shower, had on sweats, no makeup, and a giant smile of welcome for my unannounced drop in.  I could have cared less what Amanda had on or the state of her home (which by the way is preparing for remodel so it’s stripped bare in some parts.)  I just felt strongly like she needed to know she was on my mind and on the Lord’s that He’d keep bringing her to mine.

So I hugged her and gave her bread and she cried and said I had no idea how much she needed that yesterday.

But somehow I knew.  It’s why I baked bread in the first place.  And sometimes breaking bread with someone looks more like baking bread for them.

It’s the prophecy of pumpkin bread…those urges we get to do something to remember someone else tangibly and unexpectedly with nothing more than a hunch that it matters.

And it did.

And it does.

So the next time you get that feeling to bake and take….or to buy that cute little mug in the Marshalls check out line … or to stop by with a surprise cafe Americano on a dreary day for your friend… DO IT!  It just might be that the Lord’s prompting has some real needs behind it.

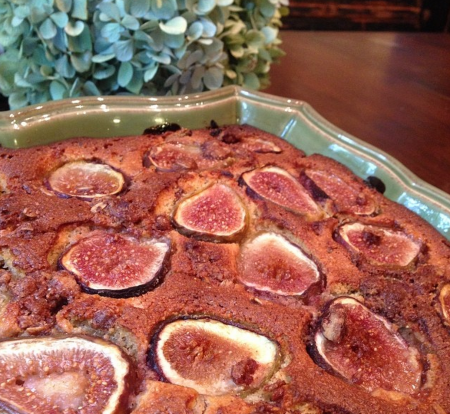
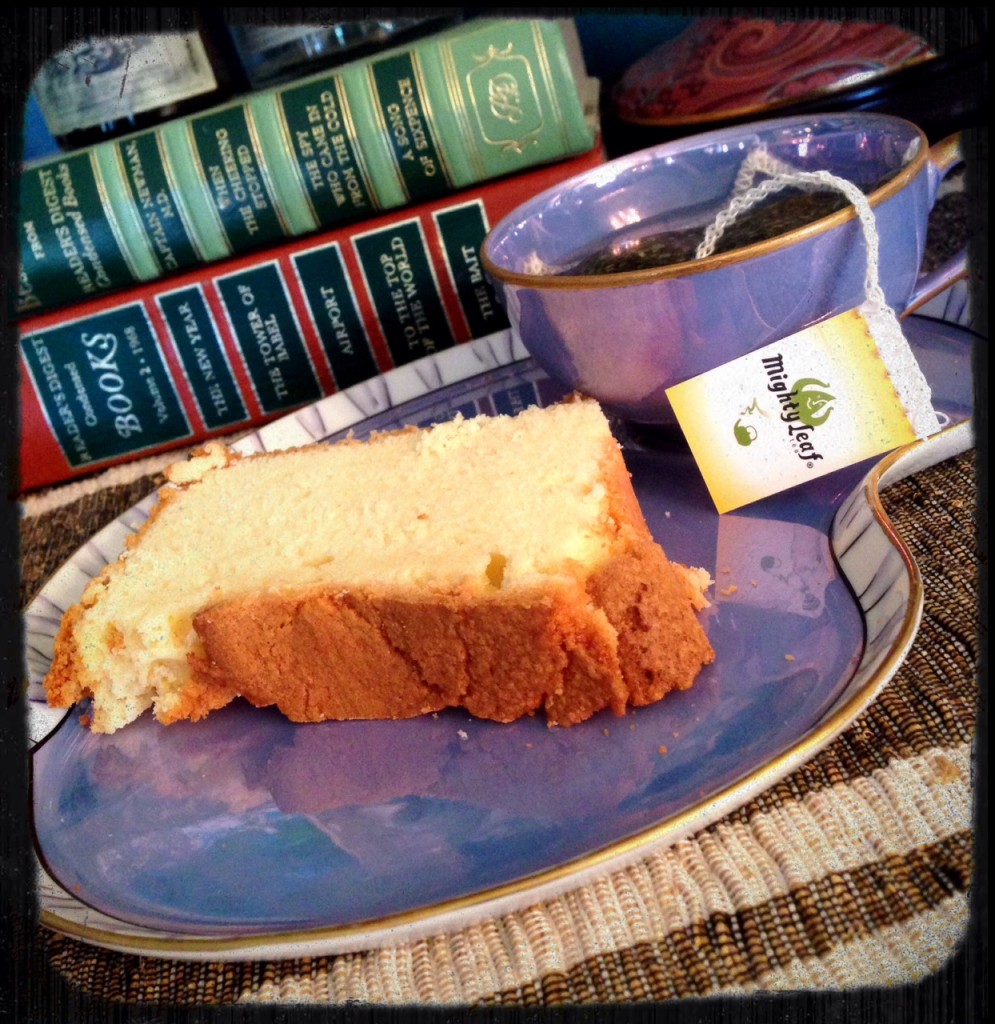
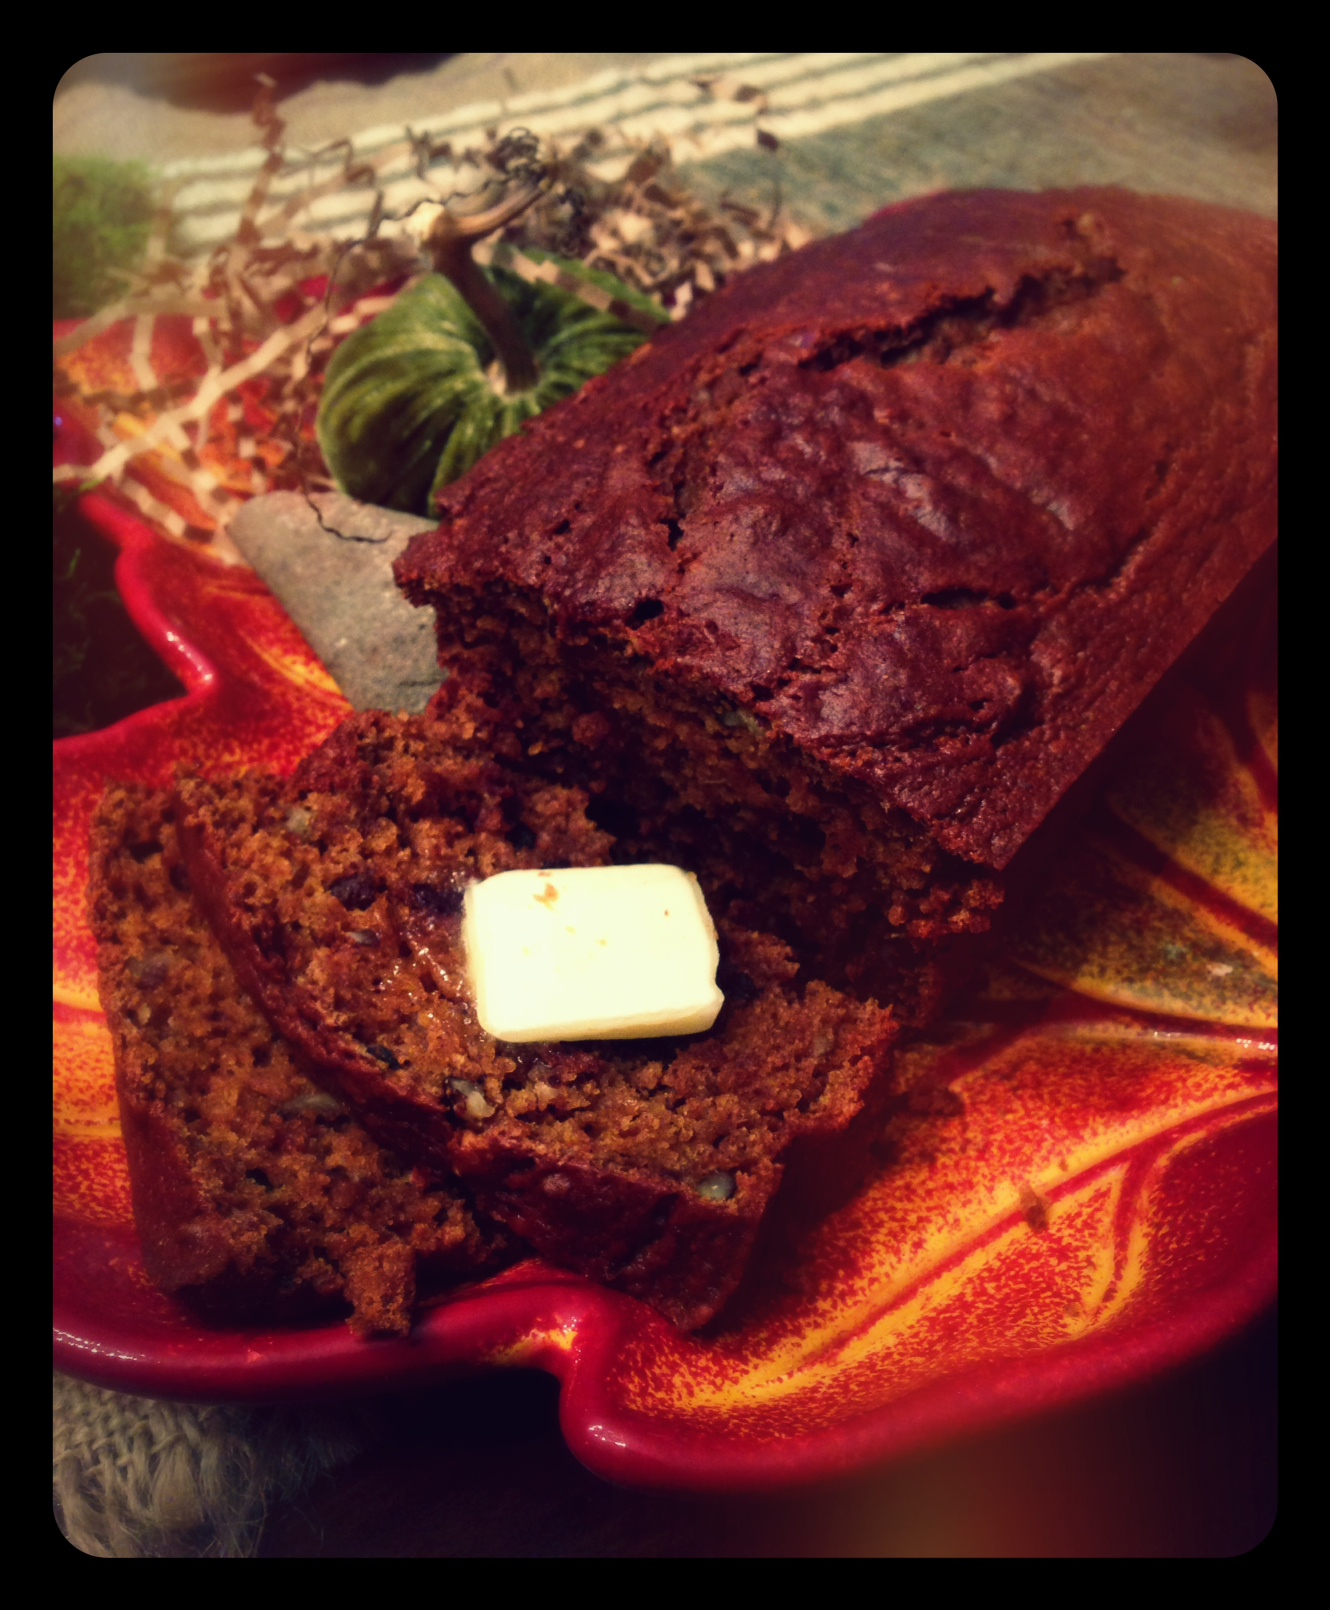
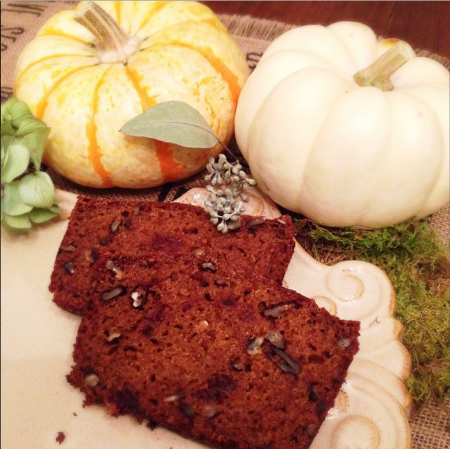
So here is the recipe for you… my most favorite pumpkin bread recipe ever.  It’s fallish and spiced and almost like a cake.  I love it with cream cheese spread on a warm piece!  And in the comments below, I’d love if you’d share stories like this…of when you took and someone needed or when someone brought and it ministered to you!

Pumpkin Bread with Dates and Pecans

  • 1 c. water
  • 1 c. applesauce
  • 1 can pumpkin
  • 3 c. sugar
  • 3 eggs
  • 1 c. chopped pecans
  • 3/4 c. chopped dates
  • 1 tsp each…nutmeg, ginger, salt, and baking powder
  • 3 1/2 c. flour
  • 2 tsp cinnamon
  • 2 tsp baking soda
  • 1/2 tsp cloves

Mix first 7 ingredients together in a large bowl.  Mix drys all together and add to pumpkin mixture and blend well.  Pour into 2-3 loaf pans and bake at 325 for 1 hr or until a toothpick inserted into the center comes out clean.

Filed Under: Eat

Meme’s Apple Cake {recipe}

August 26, 2014 by Logan 5 Comments

I started homeschooling.

Did I tell you I was going to do that?

It’s possible that I didn’t.  Mostly because about the time I realized it was what the Lord was asking me to do it, it was basically July and then I was attending a practicum and then not long after that we drove 3000 miles in a week to visit family in Texas.  While we were out there I spoke at the Declare Conference (which for the record was lovely) on “Wild Obedience: Stewarding a Life Well Lived.”  Funny thing…talking about obedience when I feel like most of the crazy things of my life the past few years are totally from not anything I’ve done, but just obedience to seemingly small things.

I could talk about this topic for awhile.  I did talk about it for an hour at Declare.  And now, I’m going to write about it in my book too.

I’m working on a book also.  Had I mentioned that?

I feel like we need to catch up.  Sorry about that.  Summer and all….and obedience that some days feels a bit like biting off more than I can chew.  God likes to keep me dependent though….it works well for our relationship. 😉

Anyhow, I’ve realize lately that in trying to keep life in balance, I’ve had a wonderful time rediscovering myself in the kitchen.  I’ve been testing recipes for my dear old friend Vivian Howard, who is working on a cookbook.  Viv is an incredible chef and has been making a name for herself as owner and executive chef of her NC restaurant, Chef and the Farmer.  She also has a delightful show on PBS called A Chef’s Life.  You should watch it.  And when it comes out… you MUST buy her cookbook!  Her recipes are fabulous.

Like this glorious Fig Coffee Cake.  It has a fancier name than that, but I’m not sure how much I can give away about it, so I’ll err on the side of secrecy.  Just know…it is worth making again….and again.

Screenshot 2014-08-26 21.13.08

I was testing the Fig chapter.  Yes…a whole chapter on figs.  It’s like I died and went to heaven and found myself in a cookbook.  But when Vivian asked me to make chicken livers, I really put myself on the line for her.  I have loathed chicken livers my entire life.  Since she had them in the fig chapter, and more importantly than that, since I love my friend, I thought I’d try her chicken livers and fig recipe.

Screenshot 2014-08-26 21.23.00

Ya’ll….I may never eat chicken livers any other way, but most assuredly, this way won me over.  Unreal.

Unfortunately for me though, I don’t do much frying…and while I did it right, I had a “jumper” blob of oil go all kamikaze and hop right out of the pot onto my head.  I had to go to the urgent care office….but not before I ate the dinner.

Priorities people…

Screenshot 2014-08-26 21.12.40

I’ve also tested a baked goat cheese recipe, transported myself to heavenly realms with bites of a tomato pie, and noshed on cookies that I told my kids are “basically like a granola bar” to give myself an excuse when I served them for breakfast one day.

Anyhow…all this to say, I’ve remembered how much I love being in the kitchen.  It does things for my soul that are good.

And after a rough day homeschooling yesterday (that’s another post for another day), I decided that I needed to do a little baking for our first day of our Classical Conversations community today.

We went apple picking on Sunday, which is one of my most favorite things ever.  So naturally, I needed to make something appley.

Screenshot 2014-08-26 21.13.58

I do love a good old timey recipe.  This apple cake recipe was from my great grandmother….Meme. It’s just the perfect amount of crisp on top and gooey inside with chunks of fruit and the perfect touch of sweetness and spices.  It’s a keeper ya’ll….and it’s been in my family for a good long time.

Old Timey Apple Cake

Meme’s Apple Cake

  • 3 cups unsifted flour
  • 2 cups sugar
  • 1 cup mayonnaise (Meme recommended Hellmans)
  • 1/3 cup milk
  • 2 eggs
  • 2 tsp baking powder
  • 1- 1/2 tsp cinnamon
  • 1/2 tsp nutmeg
  • 1/2 tsp salt
  • 1/4 tsp cloves
  • 3 cups chopped, peeled apples
  • 1 cup raisins
  • 1/2 cup chopped pecans

Mix in first 10 ingredients on low speed, scraping bowl frequently.  Stir in apples, raisins, and nuts.  Spoon into whatever pans you want.  Meme used 9″ cake pans and frosted layers with whipped cream in between.  I have used a bundt pan, loaf pans, and muffin tins.  Whatever you use, grease it first and bake at 350.  I’ve found that for loaf pans, it takes 30-45 min….about 45 min-1 hr for bundt pans, and about 25-30 min for muffins.  Make sure you eat a little bit warm, but this will keep well if you want to double up and freeze some too.

Happy almost fall ya’ll!  Enjoy!

Meme’s Apple Cake (here is a printable of the recipe on a 5×7 card!)

Filed Under: Eat, Journey

Summer Shrimp with Fresh Corn, Tomatoes, and Basil {A Recipe}

June 17, 2014 by Logan Leave a Comment

Once in a while I come across a recipe that is so simple, I actually even think to myself “this seems too simple to be very good.”

But in my quest to even simplify some of my life lately, I should really remind myself that sometimes it is the simplest things that yield the greatest return.

Lazy day fishing by a pond with my family….super simple, super awesome.  Breeze through a hammock with a good book in the back yard… understated perfection.  Fresh summer anything from the garden… bound to be nearly divine.

That’s how it is with this recipe.  Put excellent simple ingredients together, toss it around for maybe 10 minutes, and seems too good to be true.

But good and true it is!

From one of my favorite chefs, Sarah Foster, I give you a summer dish of epically simple and fabulous proportion!

Summer Shrimp with Fresh Corn, Tomatoes, and Basil

Sautéed Summer Shrimp with Fresh Corn, Tomatoes, and Basil (serves 4-6)

  • 3 Tbsp olive oil
  • 1 shallot, minced (I ran out of shallots and so I substituted a finely chopped 1/2 onion)
  • 1 1/2 lbs large shrimp, peeled and deveined
  • sea salt and freshly ground black pepper to taste
  • 1 Tbsp butter
  • 1 heirloom tomato cored and diced (I just used 2 regular tomatoes from the farmers market)
  • kernels from 2 ears fresh corn
  • 6 fresh basil leaves, cut into thin strips

1. Heat 2 Tbsp of the olive oil over medium-high heat in a large skillet.  Add the minced shallot and saute for 1 minute, just to soften.  Add the shrimp, season with salt and pepper, and saute for about 1 1/2 minutes per side or until the shrimp all turn pink.  Remove the shrimp and shallots from the pan and cover loosely with foil to keep warm. (If you need to do this in 2 batches to cook everything evenly, then just divide everything in half and do it twice.  I’m lazy, so I do it all at once.)

2. Melt the butter over high heat in the skillet you cooked the shrimp in, being careful not to let the butter brown.  Stir in the tomato and corn and saute until the corn is tender, 3-4 minutes.  Return the shrimp to the pan, sprinkle with the basil, and stir just to coat the shrimp with the sauce and warm them slightly.  Season with additional salt and pepper as needed and serve warm.

I served it tonight with spinach that I quickly wilted on the stove in a tad of butter with salt and pepper.  Also, our family LOVES this brown rice and quinoa mix from Seeds of Change that we pick up at Costco.  It only takes 90 seconds to warm up and has a good bit less sodium than many of the other 90 second rice packets contain.

Seeds of Change Brown Rice and Quinoa

That’s it!  See…super simple, super summery, and super delish!

For more awesome recipes from Sarah Foster, I highly recommend both of her cookbooks which can be found on Amazon!  This recipe is from Fresh Every Day, which is probably my favorite of the two!


Filed Under: Eat

Grilled Basil Salmon with Pineapple Jalapeño Salsa

May 23, 2014 by Logan 5 Comments

Screenshot 2014-05-23 09.21.29

I’m learning something about myself, and it’s that what comes out of my kitchen is often a barometer for the state of my heart.  If I’m cooking fresh and delicious food, it’s honestly becoming an indication of the amount of margin I’m creating in my life.  If we’re picking up dinner, then it probably means that I’m spent and don’t have much left to give.

Sadly, we’ve been picking up dinner a lot lately.

But I’m working to create more margin in my life… exiting extra facebook groups, making business calls and working on Allume during set office hours, plugging in my phone in another room for the afternoon.  I want more of my life back, and truthfully, something about the internet and all of the noise can easily just get in the way.

Cooking for me has always been a love.  And as my 8 year old went for seconds last night and kept exclaiming how much he was enjoying this yummy new dinner I made, I realized again how much my family feels love in what I serve up for them to eat.

Hospitality really begins with those who live in rooms just down the hall.  If I can’t give them my best, then I don’t need to be moving on beyond that to extend it elsewhere either.

So, give your family some love this week…and might I suggest that you can even begin by putting the following on their plates for dinner!Basil Grilled Salmon with Pineapple Jalapeño Salsa

Grilled Basil Salmon with Pineapple Jalapeño Salsa

  • 4 salmon fillets cut 1 inch thick (about 6 oz each), skin on
  • 2 Tbsp olive oil
  • 3 Tbsp light soy sauce or tamari
  • Juice of 1/2 orange
  • 8 basil leaves cut into thin strips
  • sea salt and freshly ground pepper to taste
  • I also added probably 2 tsp lime juice, and 1 Tbsp honey (but that was going off the reservation and adding my own stuff)

1. Rinse the salmon fillets under cool water, pat dry with paper towels, and place skin side down in a shallow dish. Rub the salmon fillets with the olive oil, drizzle with the soy sauce and orange juice (drizzle honey and lime now too if you want to add it), and sprinkle with the basil. Turn the fillets to coat with the marinade, press the basil into the flesh side of the fillet, and turn them skin side up.  Cover the dish with plastic wrap and marinate in the fridge for at least 1 hour or overnight.

2.  Prepare a hot fire in the grill (or heat a grill pan over medium heat to hot, almost to the smoking point.)  Remove the salmon fillets from the marinade, season with salt and pepper, and lay the fillets, skin side down, on the grill for 4 minutes, brushing the flesh side with the reserved marinade.  Turn the fillets and grill for an additional 4 minutes, spooning the marinade over them as they cook, until the fish is opaque and flakes easily when pierced with the tip of a sharp knife. Remove the fillets from the grill, peel off the skin, and place them, skinned side down, on a serving platter or individual plates.  Serve immediately topped with the grilled pineapple salsa (or any fresh salsa of your choice would actually be delish as well.)Screenshot 2014-05-23 09.21.09

Grilled Pineapple Jalapeño Salsa

  • 1/2 ripe pineapple, peeled and sliced into 1/4 inch thick rounds
  • 1 small red onion, diced
  • 1 jalapeño pepper, cored, seeded, and minced (recipe called for 2, but that would have been too hot for my kids)
  • 1/2 red bell pepper, cored, seeded, and diced
  • 1 Tbsp grated fresh ginger (1 inch piece), and if you didn’t know, you can buy fresh ginger & store it in the freezer for whenever you need a piece
  • 1 Tbsp honey
  • 1 Tbsp white vinegar
  • juice of 1/2 orange
  • juice of 1 lime
  • 1/4 c chopped fresh cilantro leaves
  • sea salt and freshly ground pepper to taste

1. Prepare a medium fire in the grill. (I grilled the pineapple before I did the fish, so while the fish was cooking, I was chopping the grilled pineapple.)  Place the pineapple rounds on the grill for 2-3 minutes per side until golden brown on both sides.  Set aside to cool to room temperature.

2.  Cut the pineapple into 1/4 inch chunks and discard the cores.  Place the chunks in a large bowl.  Add the onion, jalapeños, bell pepper, ginger, honey, vinegar, orange juice, lime juice, cilantro, salt, and pepper and toss gently to combine.  Use immediately or cover and refrigerate for up to 2 days.  Serve over grilled salmon. (We also thought this would be great on my recipe for slow roasted pork tacos, or any grilled chicken or fish.)

Bon Apetít ya’ll!

This recipe was originally found in one of my favorite cookbooks, Fresh Every Day by Sara Foster

Filed Under: Eat

Best Pound Cake Ever

January 24, 2014 by Logan 6 Comments

poundcake

I’m not sure where to begin to share about the activities that have transpired in the past 3 weeks of our lives, but on New Year’s Day, it sort of began when our HVAC literally started smoking and caught on fire.  About an hour later, our septic tank began overflowing poo and other grossness into our front yard.

Clearly, we had issues.

Last week we escaped our problems (after just installing an entire new HVAC system) and went to Disney world…a trip we’d paid for before Christmas as our kids’ gift.  And just as promised, the Magic Kingdom did feel magical (mostly…I mean, let’s be honest, that much stimulation makes kids from all over the globe a little nuts at times.)

We returned home Wednesday, and then yesterday our front yard had an excavator digging 3ft wide by 5 ft deep trenches in our front yard to fix our septic system… which according to professional diagnosis is “worse than we’d thought.”

Never a good diagnosis….and one which carries with it more sounds of *cha ching…cha ching* … money flying out the front door.  Seriously, if there even was a working money tree in our yard, we’d be picking the bark off of it by this point.

So I did what anyone in our situation would do…I baked a cake.

Sometimes comfort food is well…comforting.

And ever since I was a young girl and Kathi Cameron taught me how to make this, it’s been my favorite.  I still call it Mrs Cameron’s Pound Cake, and to make everything more right in the world, I am going to share it with you all.

Because sometimes when things are down and out, we just need to pick ourselves up and do something for someone else.  So yesterday I made chicken noodle soup and took it to a friend today, and made pound cake just because… (and if I’m honest, I also made it because I forgot to buy cupcakes from Publix to take to school for Hudson’s birthday celebration today.)  Friends, just do yourselves a favor and never let yourself run out of ingredients to whip up an emergency Mrs Cameron’s Pound Cake.

So here you go…

Mrs Cameron’s Pound Cake

1 c butter softened

1/2 c shortening

3 c. sugar

1 8oz pkg cream cheese

3 c sifted flour (cake flour makes it great, but if you don’t have that, regular will work)

6 eggs

1 Tbsp vanilla extract

1/2 Tbsp almond extract

*I also put probably 1 tsp lemon extract


Cream butter and shortening til white and fluffy.  Slowly add sugar and beat at a medium speed til fluffy. Add cream cheese and then beat it til it’s super fluffy!  Alternately add eggs and flour (I add the flour in probably 1/2 c increments and then always end with adding flour.)  Mix in well and then add in all of the flavor extracts.  Grease and flour about 3 loaf pans (or a bundt pan…whatever you want) and bake for about 45 minutes at 325.  Cool about 10 minutes and then turn them out!

Filed Under: Eat, Uncategorized

Amazing Sugar Cookie Recipe

December 6, 2013 by Logan 1 Comment

sugar cookies

This is the 3rd time I’ve posted this recipe, but let’s face it…I’ve made them way more than that!

These cookies are amazing!  Flaky like shortbread, hold their shape when cut with cookie cutters, and amazing whether you like them thin and crispy, or thick and soft.  Hands down, the best recipe I’ve found.  So good in fact, that my own mother has abandoned her life-long sugar cookie recipe in favor of this one.

Amazing Sugar Cookies 
yield: about 75 medium cookies

  • 24 ounces butter (softened)
  • 20 ounces powdered sugar (sifted)
  • 3 whole eggs, plus
  • 1 egg yolk
  • 1/2 ounce vanilla extract
  • 1/4 ounce almond extract
  • 6 1/2 cups flour
Directions:
  1. With paddle attachment, mix butter for 30 seconds. Add a 1/3 of the powdered sugar, mix on first speed for 1 minute. Add another 1/3 of the powdered sugar, mix another minute. Finally, add the last 1/3 of sugar, mix 1 minute.
  2. Combine eggs, vanilla, and almond extract together, add to butter/sugar mixture. Mix for 30 seconds.
  3. Add a 1/3 of the flour, mix 1 minute.
  4. Scrape.
  5. Add the next 1/3 of the flour, mix 2 minutes.
  6. Scrape.
  7. Add the final 1/3 of the flour, mix 3 minutes.
  8. Refrigerate until able to be rolled out and cut into desired shapes. (if you’re using the dairy free version i told above,  I’d refrigerate it  24 hrs before rolling out to make sure it really sets up.) Bake at 350 for 9-15 minutes depending on the size you cut them!)

Get crafty too with the packaging! My kids and I have been making paper snowflakes, so I decided to stick a large one on the front of a brown paper bag and just added some jute string, a couple pretty wired ribbons, and a clipping of christmas tree. Easy peezy lemon squeezy, and my kids thought it was fun too!

Screen Shot 2013-12-06 at 10.55.06 AM

Another quick idea is to toss a couple into a brown paper bag and include a printout of the recipe card on the outside! I’m really into brown paper packages tied up with string this year!

Filed Under: Eat, Uncategorized

Thankful

November 25, 2013 by Logan Leave a Comment

I can’t believe that Thanksgiving is this week. Truth be known, I’m still tired from Allume.  Not even sure how that is still possible, but it is.  One of my friends told me that for every hour you’re in surgery, it takes 1 week to recover from it.  So, if there is any equation that begins to be  true for conference planning, I’m gonna say it’s probably true too.

So, big deal in my house lately is that we got a puppy! If you follow me on facebook or instagram, you already knew that. He is seriously a cutie! His name is Titan, and because my family is a people of nicknames, he has already been called Titanium, Titanic, and Tights. I’m sure there will be more over the years.

Screen Shot 2013-11-25 at 11.18.12 AM

He is an English Mastiff which means he is going to be a beast of a dog.  Already, he has gained 5 pounds in just 10 days.  So if the same thing happens to you this holiday season, know you’re not alone.  Titan will be standing strong with you.

Also, this week, I purposed to make quinoa that would taste really, really good.  You will be pleased to know that if you saute carrots, onion, garlic, and celery in some flavored oil (I used Harissa Olive Oil) and then cook the quinoa in chicken broth, it’s kinda fantastic.  As in, move over rice, I like this stuff better now, and my entire family agrees.  I felt a sense of pride this morning when my 7-year-old asked me to load him up on it to take to school for lunch.  I feel like I might have just earned the stripes to shop at Whole Foods without feeling like a poser.

I’ve been thinking lately too a solid amount on Thankfulness.  Tis the season I guess.  But the thing is that it should always be the season if you think about it.  Not like November is a better time than April to celebrate gifts.

If you haven’t read the book “One Thousand Gifts” by Ann Voskamp, you really should. It’s a beautiful and poetic shaping of how to cultivate a lifestyle of thanks.  Perhaps one of my favorite things though, is that Ann shares about how the Greek word for “thanks” is the word “eucharisteo.”

I went to an Episcopalian boarding school in high school.  Having grown up in a community church, we always called “communion” well, communion.  But in the Episcopal church they called it “eucharist.”

And the thing that keeps coming to mind over and over as I ponder this season, and the thousands upon thousands of things that I’m thankful for, is that the thing I am most thankful for is the invitation to participate in the body and blood of Christ.  That it is the place from which the capacity for all thankfulness is rooted.  The very word is a partaking…a sharing in the Kingdom of heaven, and an outward expression of that co-laboring.

Thankfulness is a really big deal…for me to practice it, to share it, to walk in it, and to be of a people who are rooted in it…rooted in the blood of Christ.

So this season, as you sit around tables, and gather in the name of thankfulness…be reminded that the root of thanks is found at the foot of the cross….even in the very origin of the word.

Filed Under: Create, Eat, Journey

Fall…and the Perfect Pumpkin Bread Recipe

November 7, 2013 by Logan 6 Comments

Let’s talk fall for a minute.  As in, how rain doesn’t fall now in droplets of water so much as in storms of leaves floating down to earth from their lofty views above.

Dirt_road

About trees that burn in colors that only a celestial paintbrush could mix.

Miles_of_mountains...

And reflections of earth and water and sky somehow produce vibrant reflections of the soul.

Water_and_sky

Where the promises of God somehow come alive again in full color and travel from heaven to touch the fields of earth below.

Almost_doesn_t_seem_real...__1000gifts

Life slows as the wind chills, and our view pulls out and suddenly we can see for miles.

Golden_hour..._nofilter__blueridgemountains

It’s in these days we want to stop and enjoy the simplicity of pajamas by a fire…

This_kind_of_morning...

And flavors that remind us of it all…brought together and meant to enjoy one slow bite at a time.

pumpkin bread

You all know I have opinions about recipes, and while I can appreciate hints of pumpkin with heavy sprinklings of chocolate chips, or dense pound cake-like pumpkin breads with cinnamony notes, my most favorite of all times came from my roommate in college Laura. With chopped pecans, and bites of rich dates melting into cake-like bread, heavy flavors of nutmeg, ginger, cloves and cinnamon…this bread will always remain my favorite when it comes to flavors of fall.  Give it a try and let me know what you think.  And while you’re at it, try making my favorite Sweet Potato, Chorizo, and Spinach soup.  Dish up some fall flavors in a bowl of soup or sliced on a plate for breakfast with pats of butter or cream cheese!

Pumpkin Bread with Dates and Pecans

  • 1 c. water
  • 1 c. applesauce
  • 1 can pumpkin
  • 3 c. sugar
  • 3 eggs
  • 1 c. chopped pecans
  • 3/4 c. chopped dates
  • 1 tsp each…nutmeg, ginger, salt, and baking powder
  • 3 1/2 c. flour
  • 2 tsp cinnamon
  • 2 tsp baking soda
  • 1/2 tsp cloves

Mix first 7 ingredients together in a large bowl.  Mix drys all together and add to pumpkin mixture and blend well.  Pour into 2-3 loaf pans and bake at 325 for 1 hr or until a toothpick inserted into the center comes out clean.

Filed Under: Eat, Uncategorized

The Sisterhood of the Traveling Pan…A New Initiative

January 14, 2013 by Logan 5 Comments


Sisterhood of the Traveling Pan

Remember I said I was rolling out a new initiative?!

Well, here it is!  The Sisterhood of the Traveling Pan!  After I wrote a post about it recently, I’ve been thinking, and the Lord has been birthing a new idea!

So here’s what I’m doing, and I want to invite you all to join along.

Go out and buy a cute 9×13 pan that you don’t care to get back.  Make it cute though. HERE is a decent one from Paula Deen for Walmart. for just $20.  Don’t just buy a metal pan…part of this is to feel well thought through.

After you buy a pan, make your dinner and double it.  Fill the pan with dinner.  Now take it to someone.

Now here’s the part that I think will make this awesome.  I have 2 pans that I’m starting to circulate.  I have a group of about 10 friends or so that I’m going to start one pan amongst.  Part of the purpose for this is just to help each other out.  I know that we all have days when dinner is about the LAST thing we want to think about.  So what if a friend just calls you up and brings you one unexpectedly?  I do this a fair amount anyhow, but this time it’s super intentional.  Grab a group of friends and plan to start a traveling pan within your group.

I’m also starting a pan in my neighborhood.  I know a good many of my neighbors, but there are plenty that I don’t know.  The purpose of this pan is to stimulate the growth of community and hospitality within your neighborhood.

There are rules though…so here you go:

When you get the pan, you must send it to someone else within 2 weeks from receipt.  It doesn’t matter what you put in it, but it needs to be dinner.  If this is in your neighborhood, then I encourage you to take the pan to a neighbor that you don’t know.  This way, once the pan is going, you’ll be meeting 2 people who you didn’t already know.  And you won’t just be meeting them, you’ll be loving them well!

Also, when you take the pan, I encourage you to start a notebook to go with it.  I’ve created some printable 8.5×11 PDF files that I’m attaching below so that you have it all ready to go.  The idea is that you keep a guest book of sorts to travel with the pan.  Put your name and who you’re sending it to for each journal entry.  Write a short note to the recipient on the top of the left page and on the right hand side, include the recipes that you’ve sent them.  When they get the pan (or before they send the pan on its way) they write some notes about how the meal encouraged and blessed them.

Here is the journal page PDF that you see above: STP Journal Recipe Page

I think that people will love reading the past entries, and again, it will build community to get to know people better this way!  I’d suggest  calling that day to let someone know you’re bringing the meal so that it’s a complete surprise.  If for some reason, it’s not convenient for them, then just take the pan to bless someone else!

And here’s what I ask of you: Let me know how it goes!  Leave comments below on the Sisterhood of the Traveling Pan Page here on the blog, and leave comments too on the Life for Dessert facebook page!  Let’s start a movement of blessing and community building one pan at a time!

I’m also going to post recipes and other ideas frequently here too that will make great ones to take for your Traveling Pan! If you ever take soup or something that doesn’t fit in the pan, just make sure you take the pan with the meal so that it doesn’t stop! Who wants to join me?  Let’s start a mobile revolution that connects people and loves well!

Make sure to join the Sisterhood of the Traveling Pan on Facebook  to share stories, recipes, and more!

Filed Under: Eat, Journey

Black Eyed Pea Stew {What’s Cooking for New Year’s Day}

December 31, 2012 by Logan 1 Comment

This is a recipe from last year.  It’s worth sharing EVERY SINGLE YEAR though for New Year’s Day.  I promise!

I must confess that headed into this recipe I was skeptical. I’m a good Southern girl, but that doesn’t mean that I have a burning passion for all things black-eyed peas and collard greens that I want to tell the world about. In fact, memories of the food from every single New Year’s Day growing up still make me cringe.

If you’re from the South, you probably at least know what I’m talking about. The New Years Day dinner. Black eyed peas for luck and prosperity in the new year, collard greens for money, cornbread for gold, stewed tomatoes for wealth and health, and if you really want to be the luckiest one at your table, then you’ll be the one served the penny in the bottom of the pot along with all of your black-eyed goodness.

I started dreading New Year’s Day food always very shortly after Christmas. And every year I remember begging my mom to just make something normal.

SO, when my sister recommended that I try this recipe over a year ago (it is originally from Cooking Light 2007,) I just wasn’t so sure. But she’s a great cook and so is my mom, who also recommended it. They both love the New Years food though. It was a risk to be sure, but after weeks of sickness, and busyness, and travel…I have to be honest and say that my creative cooking bone had taken a vacation as well. To put it plainly, I’d been in a culinary slump. And the first time I made this, I just didn’t want to have to think about what was for dinner…I just wanted to cook it.

I did it though. I went to the store and I bought the stuff I needed and I made this stew. And now since I’ve taste-tested, I can’t wait to eat it again. It is awesome! This stew has single-handedly changed my opinion on New Year’s food.  In fact, when I saw black eyed-peas on sale at the store this week, I was actually excited to make this again at the time that seems to most celebrate these ingredients!

Here you go ya’ll. For those who love collards and black-eyed peas…and for those who, like me, need a new opinion of them.

Black Eyed-Pea Stew

Ingredients

  • 2 cups dried black-eyed peas
  • 1 tablespoon peanut oil (whatever…I used EVOO. I have a feeling any oil is probably fine.)
  • 3/4 cup finely chopped yellow onion
  • 8 ounces turkey kielbasa, halved lengthwise and cut into 1/2-inch pieces
  • 4 cups vegetable broth (I LOVE Better than Bouillon more than broth or bouillon…give them a shot for any base broth)
  • 1 teaspoon salt
  • 1/2 teaspoon crushed red pepper
  • 1/2 teaspoon freshly ground black pepper
  • 2 bay leaves
  • 1 tablespoon cider vinegar
  • 1 (28-ounce) can no-salt-added diced tomatoes
  • 1 (10-ounce) bag prewashed collard greens (or mustard greens, or turnip greens…the collards are a little heartier though)
  • 1 (10oz can) Rotele tomatoes (the original recipe didn’t call for this, but it added some awesome kick.) For a less spicy version, I’d leave this out.

Preparation

  • Sort and wash peas; set aside.
  • Heat oil in a large saucepan over medium heat. Add onion to pan; cook 3 minutes or until tender. Add sausage; cook 4 minutes or until lightly browned.
  • Stir in broth; bring to a simmer, scraping pan to loosen browned bits. Stir in peas, salt, peppers, and bay leaves. Cover and simmer 45 minutes or until peas begin to soften. Uncover and cook 15 minutes or until liquid begins to thicken.
  • Stir in vinegar, tomatoes, and mustard greens; simmer 10 minutes or until peas are tender, stirring occasionally. Discard bay leaves.

Enjoy ya’ll. And lemme know if any unusual luck comes your way after you make it! 🙂

I can’t believe it’s almost the new year!?!

Thought I’d make a 4×6 Printable Version for you here too so that you can save it for yourself every year!  Click the link below to download it!

Black Eyed Pea Stew 4×6 Recipe Card


Filed Under: Eat

  • 1
  • 2
  • 3
  • …
  • 7
  • Next Page »
  • 
  • 
  • 
  • 
  • 
  • 

Subscribe by Email

Oldies but Goodies

Copyright © 2025 · Logan Wolfram · Logo by Annie Barnett · Site by Design by Insight