Logan Wolfram

Enjoying Life for Dessert

  • Home
  • About
    • Meet Logan
    • Meet My Family
  • Blog
  • Eat
  • Journey
  • Create
  • Connect

Make Awesome Valentine Cards…Guest Post

January 18, 2012 by Logan 19 Comments

I have a treat for you guys today.  You all know I love a good craft project and I have a few friends who dominate in some specific crafting areas.  My friend Beth from college is one such gal.  She is a phenomenal card maker and stamper.  And with Valentine’s Day right around the corner, I asked Beth to share a little expertise and some fun ideas for making your own Valentines Day cards.  She’s even offering a giveaway today with some items she’s used to create these amazing Valentines, and later on she’s going to give us an even more in depth tutorial on how to make a couple of these things.  So give a happy welcome to my friend Beth, from Southern Inkerbelles:

Well, let me start off saying , “AAAHHHHH! This is my first post as a guest blogger!”  Thanks so much to my sweet KD sorority sister, Logan, for inviting me to share a little about what I do.  I am not a smooth writer like Logan, but I can do some damage with paper, stamps and ink 🙂

I am the author of a little blog called Southern Inkerbelles.  I typically speak to a more focused group of people daily than Logan does.  You guys get it all with “Life for Dessert!  We have an obsession with paper, ink and rubber stamps headed up by a company called Stampin’ Up!  I have been a demonstrator for almost 8 years and I am thrilled to be sharing what I love with you today.

Because I am talking to many different levels of crafters today, I am going to start out slow and then eventually get to the OOOOs and AAAHHHs at the end.

I’m focusing on one stamp set today.  Naturally in my line of work, we are all geared toward Valentine’s Day right now.  It’s one of the biggest days to send cards.  So, here are a few ideas for those of you who want to make something special for someone.  And, even a fun project for your kids.

Here is the stamp set that I will be using on all my projects.  It’s called Sweetheart.

Sweetheart - Clear Mount Stamp Set - by Stampin' Up!
Sweetheart ($15.95 for clear stamps and $21.95 for wood)


Here is my first project with this little ditty 🙂

This is about as basic as I can do 🙂  This is a 3×3 enclosure card.  I stamped on the white piece through an acrylic block and then used our large heart punch to get the red heart and adhered it to the middle.  The punch makes it SUPER easy, but you can always cut a heart out yourself using the standard scissors method.

Full Heart Punch - by Stampin' Up!
Full Heart punch $16.95

There is a secret to this stamp set.  Stampin’ Up! does a really good job at thinking outside the box.  We do so much more than just paper and stamps.  Anyway, SU! came out with a product called Sweet Treat Cups and look what they can do!

If you blinked, I just went 3D on you! This little treat is perfect for kids because there is an interactive aspect to this card.  With this technique, you can pull the sliding trap door and the candy will fall out.  If you don’t do the trap door, you would have to rip the card apart to get the candy.  For some that is ok.  You just have  to know your recipient.  To see a step by step tutorial for this project come back later this week and I’ll show you!

For those of you who love to make your kids’ Valentines for their class at school, this is for you.

Run, don’t walk, as fast as you can to your nearest craft store and get some lollipop sticks and slap it on the back of this baby!  SO FUN!

Now, to take it a step further, actually quite a few steps further, here is a card I have made using the sweet treat cups.

This is a project for the serious crafter.  It takes several tools to create this, but I am hoping that some of you would be up to the challenge.  This is no ordinary card.  Wait for it….wait for it…

This is what we call an easel card.  I love the 3 M&Ms holding it up.  A card like this should not lie flat or even hang on a fridge!  I’m going mantle! 🙂  If this card has you over the moon, head on over to Southern Inkerbelles on Friday this week for a more in depth tutorial.

I know you are asking how in the world you could mail a card like this.  You would need to use a bubble mailer like the ones we sell here.

Sweet Treat Padded Envelopes - by Stampin' Up!
Padded Envelopes 3 for $2.95
Sweetheart Treat Cup - by Stampin' Up!
Sweet Treat Cups 12 for $2.95

Thank so much to Logan for having me today!  I hope you will take to time to check out Stampin’ Up!  You might find just what you need to get back into paper crafting.  One thing I am hoping from my customers this year is they have resolved to do more for themselves.  That means, dusting off cobwebs and gettin’ inky!

For those of you who made it through this whole post, please leave a comment.  We will have a prize drawing to receive some of the products I have shared with you today!

For those of you who aren’t into paper as much, I am sending Logan a set of our Sweet Press Cookie Stamps.  Did you know you could stamp on dough?  Be looking for this from Life for Dessert soon.

Occasions Sweet Pressed Cookie Stamps

Inky Hugs.

Beth Crocker

Thanks to Beth for stopping by today!  I had a fit over the sweet treat cups myself and am ordering some to make those awesome lollipops for Tid Bit’s class for Valentine’s day!  Beth is going to come back later this week to show us how to make the trap door to open the sweet treat cups on cards and lollipop sticks.  And since she’s awesome, she’s going to give away 2 packages of the sweet treat cups and 1 Sweetheart Stamp Set (that was featured to make the cards) to one lucky winner!

Here’s how to enter to win (this giveaway is open to US residents only and will end at 9am this Friday, January 20th ):

Mandatory Entry: Like Southern Inkerbelles on facebook (and make sure to check out the Southern Inkerbelles blog for some more serious inspiration!)

  • For extra entries leave separate comments detailing each action:  You can earn 1 extra entry for each action taken, for a total of FOUR extra entries…1)Subscribe to receive the Life For Dessert feed (it’s in the sidebar on the top right.)  2) Like Life for Dessert on Facebook 3) Share this link on your own Facebook wall, 4) Tweet this link to all of your followers.

Filed Under: Create, Journey, Uncategorized

What’s Cooking?! Incredible Sugar Cookies

December 27, 2011 by Logan 2 Comments

Happy couple of days after Christmas everyone!  I hope that your holiday was filled with wonder.

We watched the Nativity Story on Christmas Eve afternoon before our service at church and I loved how it set the scene for my heart for worship even more.  If you’ve never seen that movie…go watch it.  It is such a neat look at what it must have really been like back in that time and place when Christ was born.  Gives you a new perspective on it all.

I’ve been enjoying the last few days with nothing on our agenda as well.  Since my oldest is out of school this week, I plan on doing more of the same…a whole lotta “nothing major.”  Today though, we’re going to make some sugar cookies.  My littlest one is turning TWO in just a couple of weeks, so I figure we’ll do what we can to get started on some preparations for his party.  Last year, these sugar cookies were a great hit when I made them at his Very Hungry Caterpillar  birthday party, and again in the shape of musical notes at Tid Bit’s bluegrass themed party.  This year we’re going to be doing a dog theme because the child LOVES dogs.  I think I’m going to go simple on the cookies though and make them in the shape of bones.  I have shared this recipe before, but realized since it was ages ago and I was just learning about blogging, I didn’t tag it properly and it’s hard to find on the blog.  So here it is again for ya!

It uses powdered sugar instead of regular granulated, resulting in a really shortbready tasting cookie…DELISH!  I scoured the internet and cookbooks to find the perfect recipe, and this one is about as perfect as I have ever had! It makes really good thick cookies, which I love.  I guess if you’re a thin cookie person though, that’s just all up to you and your rolling pin!  To make the icing just mix powdered sugar,  a dash of vanilla, and milk (or soymilk) til it’s the consistency you want.

Amazing Sugar Cookies
yield: about 75 medium cookies

  • 24 ounces butter (softened)
  • 20 ounces powdered sugar (sifted)
  • 3 whole eggs, plus
  • 1 egg yolk
  • 1/2 ounce vanilla extract
  • 1/4 ounce almond extract
  • 6 1/2 cups flour
Directions:
  1. With paddle attachment, mix butter for 30 seconds. Add a 1/3 of the powdered sugar, mix on first speed for 1 minute. Add another 1/3 of the powdered sugar, mix another minute. Finally, add the last 1/3 of sugar, mix 1 minute.
  2. Combine eggs, vanilla, and almond extract together, add to butter/sugar mixture. Mix for 30 seconds.
  3. Add a 1/3 of the flour, mix 1 minute.
  4. Scrape.
  5. Add the next 1/3 of the flour, mix 2 minutes.
  6. Scrape.
  7. Add the final 1/3 of the flour, mix 3 minutes.
  8. Refrigerate until able to be rolled out and cut into desired shapes. (if you’re using the dairy free version i told above,  I’d refrigerate it AT LEAST 24 hrs before rolling out to make sure it really sets up.) Bake at 350 for 9-15 minutes depending on the size you cut them!)

(As a side note for my friends who have food allergies, you can make this recipe dairy free.  To do so, I substituted 1/2 the amount of butter with Fleishman’s Unsalted Margarine, and 1/2 with Earth Balance Buttery Sticks which I buy at Whole foods.  You really need to mix the two to get it right.  The margarine makes a flavorful, but super soft and sticky dough by itself, and the buttery sticks sometimes have a slightly oily taste but have a harder consistency…by mixing the 2, you’ll keep a good buttery flavor from the margarine and keep the texture right from the buttery sticks.)

I hope you are enjoying some relaxing time with your family too!  Makes me long for the days of summer for sure!

Filed Under: Create, Eat, Journey

What’s Cooking?! Santa Hat Brownie Bites

December 19, 2011 by Logan 3 Comments

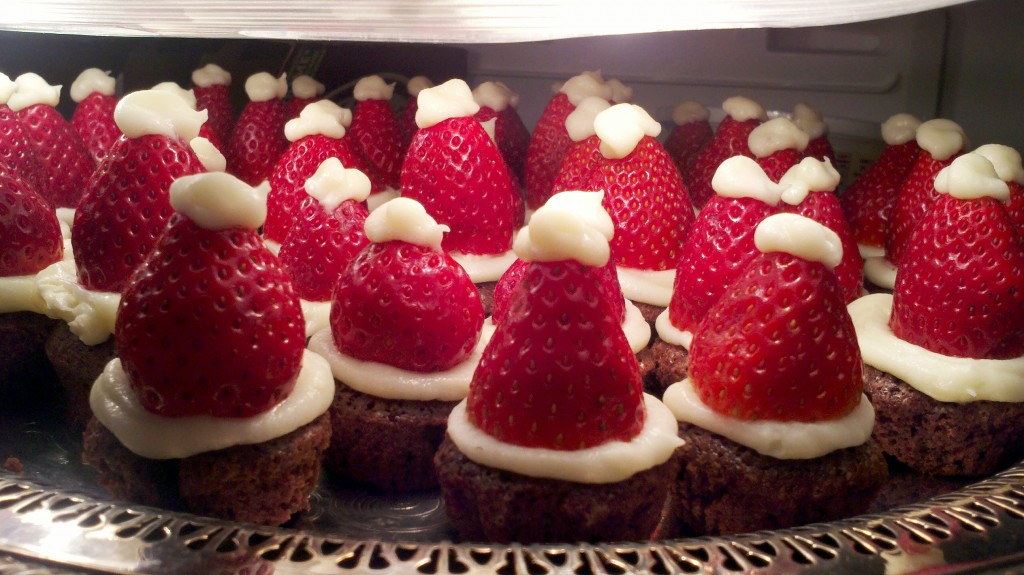
I wish I could claim this idea as my own…but I can’t.  I saw a picture of these adorable santa hat brownie bites somewhere on Pinterest and thought to myself, “I’m making those for sure!”  So, I did….for the party that we had on Friday (which was a great success by the way!)

I never went back to find out how the person had done it, because I thought it was pretty self-explanatory.  And…I make my grandmother’s amazing brownie recipe all the time, so that was a no-brainer too.  Someone told me the other day they’d heard of this done with cool whip, but I made homemade cream cheese icing which is tastier and stickier too (to hold the berry in place.)

So here’s my Mema’s brownie recipe.  I normally make it in a 9×13 pan and bake at 350 for 25 minutes, but this time I used mini muffin tins and baked for around 18 minutes.  Make sure you spray your muffin tins so these will fall out when they’re done!

To make the best and easiest brownies ever, you’ll need:

  • 4 sq (4 oz) unsweet Baker’s chocolate (comes in an orange box in the baking section)
  • 2 sticks butter
  • 2 c. sugar
  • 4 eggs
  • 1 c. flour
  • 1 tsp vanilla (I always just squirt the vanilla in, so it’s probably way more than 1 tsp…I’m generous with vanilla like that!)

Put the chocolate and butter into a microwave safe dish and melt on high for about 3 1/2 minutes.  When that’s done, stir it up well to make sure the chocolate squares melted completely.  Then add and incorporate sugar, then eggs, then vanilla, and finally flour.  Don’t overmix.  I always just do this by hand…less to wash and it’s so easy anyhow.  Pour into whatever baking vessel you choose and bake at 350…for about 18 minutes in mini-muffin tins, 25 in a 9×13 pan, and 35-40 in an 8×8 if you like a thicker brownie.  A toothpick should come out pretty clean in the center of the pan.  I like mine slightly underdone though…just slightly…to make them really fudgy.

To make cream cheese frosting:

  • 2 (8 ounce) packages cream cheese, softened
  • 1/2 cup butter, softened
  • 2 cups sifted confectioners’ sugar
  • 1 teaspoon vanilla extract

In a medium bowl, cream together the cream cheese and butter until creamy. Mix in the vanilla, then gradually stir in the confectioners’ sugar. Store in the refrigerator after use.

For the santa hat bites, wash, dry, and cap your strawberries (they need to be really good and dry so they don’t make everything runny.)

Use a ziploc bag with a small corner cut off to pipe the icing onto the brownie.  I found it worked best to not cover the entire brownie…start at the outside and make a circle of icing.  (I left a small space in the center to give the icing room to spread out when you put the berry on top.)  Stick the berry on top, and then pipe a small dollop of frosting onto the point of the berry.  Keep refrigerated until you’re ready to serve!

These were crazy good and so cute to have at the party!  I made an entire tray and could’ve eaten them all!  So so good!  Tried one with a raspberry too, and while it didn’t look like a Santa hat…it was pretty tasty as well!


Filed Under: Create, Eat

Good Mail

December 5, 2011 by Logan 2 Comments

Card from Tiny Prints

What is it about good mail that just makes your day?

You know what I’m talking about, right?  When you open your mailbox and go about the normal sorting through of bills, flyers, magazines, and more bills…and then there it is…a piece of “good mail.”  In a colored or different sized envelope…an actual stamp in the top corner instead of the “presorted bulk mail” inked up there….and the best part…the handwriting.  Evidence that an actual person has spent time on something…for you.  Isn’t that just the best feeling when the fast rifling through slows to a stop and the anticipation of what happiness is inside that envelope builds?  It’s like Charlie finding the golden ticket to visit Wonka Land.  I love good mail.

And Christmas is my most favorite time of year for mail.  Almost every day brings at least one piece of good mail.

Tis the season for Christmas cards…

I LOVE Christmas cards.  Any card will do, but I have to be honest and say that my most favorite ones are the ones with pictures.  Pictures of family, pictures of friends, pictures of old friends I haven’t seen in ages with children I’ve never had the chance to meet.  I LOVE it.  I love the connection of past and present all jumbled together…all hung from a string around my doorway…visible to me multiple times per day.  I love the memories of each friend that come flooding back as I look at the cards….fun times, life shared, connections made.

They don’t come without a cost either…Christmas cards.  There’s the cost of printing them… which isn’t so bad as the cost of mailing them.  And to stuff them and address them takes quite a bit of time.  But what really takes time is keeping up with all the addresses.  Going back through the previous years list, emailing, calling, collecting addresses of the friends who have moved, or new people to whom you’d like to send a card this year.  And for me…it’s time well spent.  It’s a little thing…a little time….that brings joy and says “I care about you.”  And I love to send them…and I love to get them!

I’ve been working on our family’s Christmas card today.  I designed them and uploaded pictures, agonized over text and word placement and paper quality, and waited on a painfully slow internet connection to upload them to the printer.  I even paid for faster shipping so that I have them and send them in time for Christmas.

Not that Jesus really cares one iota that I get a card in the mail in time for his birthday.  I mean, he’s the reason behind it all.  But I wonder what he thinks about the whole card thing?

I think He loves it too.  I think He loves the extra time that people take to pour into one another and to say “I care.”  Because no matter how commercialized Hallmark, and Walmart, and every mall in America want to make His birthday…how un-Christ centered our culture dares to make Christmas….still, I think He loves that during this season more than any other, people take time for connection and community and life together more than any other time of year.  When Jesus walked the earth, He was all about loving people…and taking time to let them know how much.  And He’s still about the business of loving people…and pouring out…and telling them.

I’m not trying to over spiritualize Christmas cards, but I do love that they are significant of effort made to connect and reconnect with one another…to build community and keep ties to special people in our lives open…to not close some doors of our past…and to make room for new doors in our future.  Jesus was all about open doors…and I think he’d have sent cards to people too….just to say he cared.

But that’s just me.  What do you think?

Filed Under: Create, Journey

Happy Thanksgiving Friends!

November 24, 2011 by Logan Leave a Comment

Happy Thanksgiving to all of you!

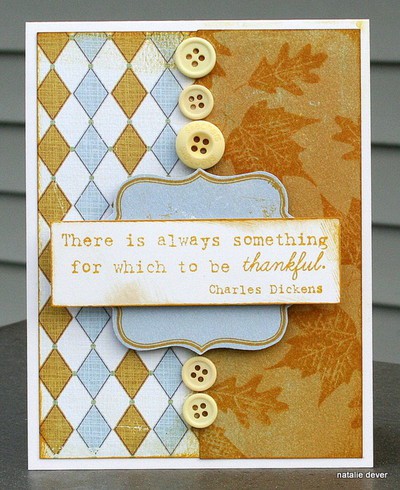
I just love that we have an entire calendar day devoted to cultivating and celebrating an attitude of gratitude.  Really, I should do that every day…because boy do I have SO MUCH to be thankful for!  I love this card that I found.

via Pinterest

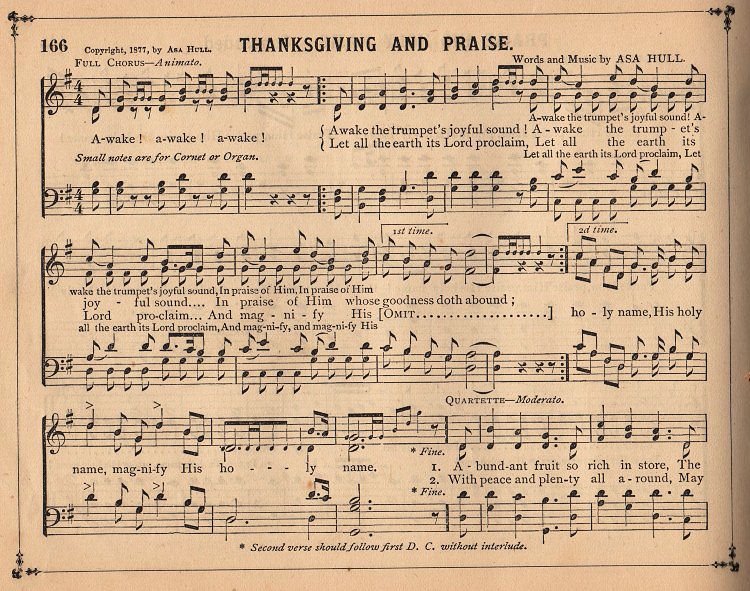
I found this old hymn page too, and since you all know I’ve had a thing going with hymnals lately, and since the words of this song pretty much sum it all up…I thought I’d share it.  Because even in the valleys, I can still see that “his goodness doth abound.”

And, because you all know that I just can’t celebrate really anything without a little dose of humor….

via Pinterest

Guess that answers the question of what I’ll be wearing to join my family in the feast!  Boy did I love celebrating holidays in maternity clothes…oh well….at least leggings are in!

I hope your day is filled with family, friendship, laughter, and most of all…a pondering of life’s many blessings.

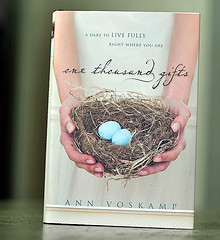
Might I recommend also while we’re talking about cultivating an attitude of thankfulness, a book….by my new friend Ann Voskamp…called “One Thousand Gifts.”  If it’s not on your Christmas list…it should be.  If you need a good gift idea for anyone else…this is a great one.  There have rarely been words I’ve read that inspire and transport my heart the way that Ann’s words do.  Find thankfulness in everything…live fully where you are…find a new way to think about it all… in this book.  I highly…highly recommend!

Spend time being thankful today dear ones.  And so you all know, of all the things I count as blessings in my life, please know that you, my friends, are among them.

Filed Under: Create, Journey, Uncategorized

How To…Make a Book Page Wreath

November 21, 2011 by Logan 9 Comments

I’m up to my eyeballs in Christmas decorations around here.

This is the first year EVER that I have even gotten my Christmas stuff down before Thanksgiving.  If I don’t get a jump on it though, there’s no way I’ll get it done in time for the Lily Pottery Jewelry show that I’m having here the Tuesday after Thanksgiving.  (Which by the way, if you’re local and want to come, you’re invited…email me for directions.)

And since I’m going to have a Christmas party this year too…I just have a lot that I want to get done.

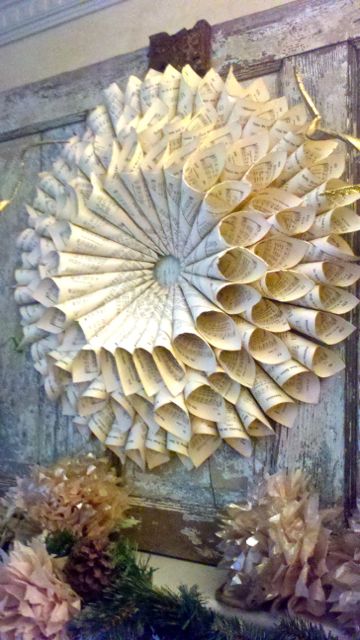
My living room has been the most fun to do so far since I’ve been crafting up a storm with those hymnals I bought about a week ago.  Today I thought I’d give you a tutorial for this fabulous wreath made from hymnal pages.  The first time I saw one was on Miss Mustard Seed and I didn’t realize until just now that she’d done a tutorial.  So for all my intents and purposes, I was doing it blindly….turns out my ingenuity was pretty much the same as her method in the end.  So here’s what you’ll need to make one.

  • An old hymnal, book, or sheet music
  • glue gun
  • sturdy cardboard

That’s it.  I’ll show you the pictures of how I did it and then explain along the way.

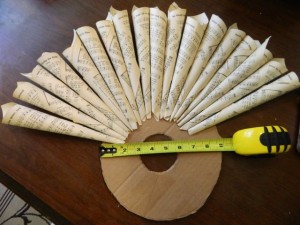
From a sturdy piece of cardboard, cut a circle.  I used a very specific circle cutting guide called a “salad plate.” As you can see mine is about 9 inches across.  Then cut another circle in the center…this time I used a specific circle guide called “the lid of my sugar bowl.”

Next you’ll begin to make cone shapes from the pages.  Since I wanted my wreath to be 3 cones deep, I rolled each section of pages slightly differently.  I’ll show you.

For the outer grouping, make sure that the point of the cone is at the very bottom corner of your page.  Roll at an angle, and then secure the page at the final corner with a small bead of hot glue.  Make a ton of these until you fill all the way around your cardboard.  My finished wreath is about 2ft across (if you want it smaller than that, I suggest you adjust your circle size.) Begin gluing the cones onto the cardboard.  Since I wanted my wreath 3 cones deep, I made sure to leave room on the cardboard for a couple more rows of cones to glue on.


For the second layer of cones, I wanted them to be a bit shorter so that they wouldn’t completely cover the back row.  To do this, you’ll use the same rolling method above, but when you begin your cone, the bottom point should be maybe 3/4 up the side of the page.  See how I did it here?  Then roll it the rest of the way and secure the end with glue again.


Make a bunch of these too and you’ll begin to glue them onto the cardboard guide as well.  I made my second row points touch the edge of the center circle.  Fill this all the way around.  I found it necessary to run a line of glue along the length of the cone at the back to secure it to the cones behind it.


For the final center row, you’re going to make more cones again, but this time the point of the bottom will be about halfway up the page like this.  Again, my reasoning for shortening the lengths of the cones with each layer was because I wanted the cones of each layer behind to show.


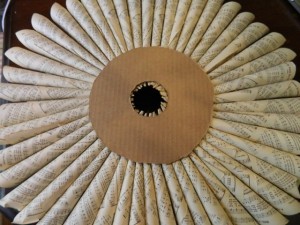
You’ll run a bead of glue along the length of these cones too and secure them to the cones behind as well.  When you secure these center cones, you will completely cover your cardboard circle’s center so that you don’t see the cardboard at all.

When you’re done, the front and back of the wreath will look like this…


In order to hang the wreath, I used a piece of jute rope, hot glued it on to the back and then covered it with a scrap piece of paper…just to be able to mash the glue into the rope well.

I’m pretty pleased with the results, and my mantle decor is taking a real turn towards awesomeness with this beauty hung onto a chippy looking old door that I put over the mantle.  I’ve been making ornaments and even hymnal flowers as well that are turning out great.  I’ll show you about those later this week too!

Sorry for the blurry photo below too. We left our camera at a friend’s house the other night and I’m having to use my phone!

All total, this wreath cost me maybe $1 to make since I didn’t use even 1/2 of my 75 cent hymnal, cut my cardboard from an old box, and I already had loads of hot glue.  It’s maximum impact for minimum dollar value, and I think it’ll look great all year as I change the mantle decor around it!  Once I get the mantle decorations finished for Christmas, I’ll show you the full view!

Happy Crafting!


Filed Under: Create, Uncategorized

How to…Make a Great Cup of Coffee

November 18, 2011 by Logan 5 Comments

I’m a coffee lover.  As in, I have a real opinion on real coffee.  And while I like the occasional fluffy sounding coffee treat, as a general rule, I prefer just a plain mug of a fantastic regular brew.  For awhile my fav was a local Greenville, SC roaster called West End Coffee Company and while it’s probably still my favorite, at the rate that I go through it…it wasn’t the best for my budget.  I’ll drink the Maxwell Houses and Eight O’Clocks of the world happily at your house too…but in my house, I’ve found a soulful connection with Whole Foods’s Pleasant Morning Buzz which is a little more dinero than it used to be but still not too bad at about $13 for a 24oz bag.

I was thinking this morning as I arose to drink my happily anticipated cup of morning coffee that it seems that too many people don’t know how to make a decent cup of coffee.  I only say this because several of my friends have even confessed that they don’t know how to do it well.  So I thought I’d give ya’ll the low-down… especially since the holidays are upon us and you may likely find yourself with more opportunities to brew coffee than you’re typically accustomed to doing.

So here are some tips:

Buy decent coffee, and if you can make yourself grind it, then buy it in whole bean form when you can and keep it in an airtight container. Buying a one-week supply is ideal. Contrary to popular belief, coffee beans and grounds should be stored in an airtight container at room temperature to maintain their best flavor. (Now’s the time to rescue those beans from the freezer…yes…NOW.)  If you know you won’t grind it yourself, then it’s ok…buy the pre-ground stuff…I’m coming to hang out with YOU anyhow…not your coffee.

Use good water…In Greenville, our water was rated to be some of the best water in the country…so I use tap water.  If you have nasty minerally water, then your coffee will only be as good as your nasty water….which is well….kinda nasty.  Filter that stuff and you’ll be happier.

Ideally, grind your coffee beans just before brewing. (If you’re using pre-ground, that’s okay, too. I know what it’s like to be busy!) The faster your brew cycle, the finer you should grind the beans. A good rule of thumb is to use a fine grind (20–25 seconds in a blade grinder) for vacuum pots and one-cup cones, a drip grind (15 seconds) for most drip brewers and a coarse grind (10 seconds) for plunger pots and cold water extractors. (this little tid bit was from Whole Food’s website.)


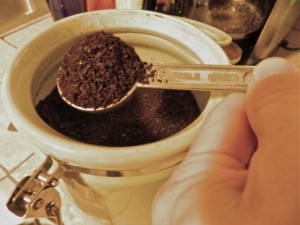
Here’s the part that trips up most of the people I know.  The coffee to water ratio.  The rule of thumb is about 2 Tbsp per 3/4 c water that will be poured through…no matter how much you’re making.  On our standard coffee pots, 3/4 cup is about what they consider to be 1 cup.  So my own personal rule of thumb is to use a crazy full heaping Tbsp for every 2 cups…which when I measured it this morning to tell you this was just shy of 2 Tbsp.  Here’s what I do though…take the number of cups you want to make (a standard coffee pot makes 12)…half it (so we’re at about 6)…and then add one to grow on (so 7 ginormous heaping tablespoons for 1 standard pot of coffee.)  And if you’re making a lot of coffee or anything else for that matter, know that there are 4 Tbsp in 1/4 cup.  So do the math and cut down on your scooping.  (Tuck that little measurement conversion into your back pocket for the next time you’re doubling a recipe too.)

And, when you drink your coffee….it’s gonna taste the best within the first 30 minutes it’s brewed.

Hope this helps! Now you’ll be the one among your friends who becomes known for a good cup o’joe!  Happy brewing!

Starting on Monday, I’m going to show you a few crafts that I’ve been working on with all those hymnal pages I told you about!

Before I leave you today, I thought I’d show you how to make my MOST favorite cup of coffee ever.

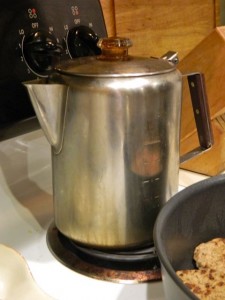
<—-This old pot….

+

This company…—->

+

A fire in the fireplace…—->

+


<—- This view…

From this porch…

equals

Pretty much the most perfect cup of coffee ever.

And I’ll be enjoying my coffee that way every morning over Thanksgiving in the mountains too!

Filed Under: Create, Eat

The Hazards of Being Crafty….

November 16, 2011 by Logan 3 Comments

I’ve been doing some crafting here lately.  I picked up 2 old hymnals from an estate sale this past weekend for just 75 cents each, and even though something in me cringed when I started tearing them apart, that’s exactly what I’ve been doing.  I’ve made a wreath, some Christmas ornaments, some flowers, and I have a plan to make some paper feathers too.  I’ll show you all about that tomorrow, but today I have to tell you about a little known pitfall of this much crafting, that you may want to be aware of should you find yourself on a crafting binge too.

I was unloading the dishwasher just a couple of mornings ago, and since I have small children, we’re still in the sippy cup phase.  Typically I unload the sippy cup parts and leave them on the counter until I finish unloading everything else and can go back to them to reassemble all the parts.  When I was unloading, I dropped a couple of the straws onto the floor and raced to grab them before my 5-second-rule time limit expired.  I finished unloading everything to the tune of “Mommy…juice, juice…cuppy…cuppy” over and over again.  I hurried to get my littlest one a cup of juice.  The cup I selected has a real fault though.  Something happens when you screw the lid on and the pressure inside forces some liquid up the straw every time, causing an overflow.  “I’ll solve this,” I thought to myself.  “I’ll just sip some of the juice off the top while I screw the lid on.”
And that’s just what I set out to do.

Something is wrong though….in my haste to get all of this done, I must have inserted the bottom portion of the straw incorrectly because no liquid would come out.  I remove the lid and push the straw up farther into the mouthpiece…then another sip.  This time I take a good long pull to make sure it’s working.  My cheeks suck inward and nothing comes out.  So I remove the lid again…certain that I’ve just pushed the straw too far up this time.  I pull the straw back out partways and again…suck on the straw really hard to make sure it’s working properly this time….

Nothing.

“Screw this,” I think to myself…I’ll just use this other straw.  Somehow I ended up with an extra at the end of my assembly process anyhow.  I put that straw in and Voila…drinking just fine.  I sip the top amount off of the straw and hand it to my little guy.

“What in the heck is wrong with that straw though?!”  Maybe something clogged it while it was in the dishwasher.  I pick up the straw to inspect it only to immediately see my problem is not the straw….

it’s that the “straw” is….

image source

a gluestick!!!

Yes ladies and gentlemen….a little known hazard of crafting in your kitchen….the gluestick is mistaken for a sippy cup straw.  Now that you know this, you can be aware when you are crafting.  Maybe this should be a label on the package of gluesticks when you buy them.  “Buyer Beware:  Gluesticks are not intended for liquid consumption.”  You know those ridiculous warnings happen because someone has done the stupid thing and then tried to sue the company for it.  Well not to worry hot glue stick company out there…no law suit here.  Just a little wiser…and a little more aware of the many hazards of being crafty.

Filed Under: Create, Journey

You need to know about….Lily Pottery

November 15, 2011 by Logan 7 Comments

Swoon….

image from Lily Pottery

That’s the feeling I had when I first saw Lily’s amazing ceramic pottery jewelry.  To put it plainly…it’s just totally rad looking stuff.  It’s classic, and funky, and artsy, and feminine, and hardcore, and original all at the same time.  I love it, and I think you will too!

I’m a fan of celebrating hometown flavor anyways, and my hometown of Greenville, SC seriously has loads of flavor to sink your teeth into.  I was so stinking excited when Greenville was featured in the September issue of a fantastic magazine called Garden and Gun this fall too.  (I’ll tell you more about Garden and Gun soon….but for now, just know that it’s a must have on your Christmas list.)  Anyhow, in the magazine I was especially thrilled to see mentions of some of my favorite local places as well as features on some fantabulous artists in the area such as my friend Barb from Knack Studios and Lily from Lily Pottery.  Lily even got some full-page love and let me tell you what… this girl deserves it.  Her creations are gorgeous!

Here’s what G&G had to say about Lily:

Lily Wikoff
Design Star

Twenty-seven-year-old potter and jewelry designer Lily Wikoff expected to spend just four short years in Greenville, getting her degree in studio art at Bob Jones University before heading to New York, where she had the occasional modeling gig. But sometimes smaller really is better. “I just love this city,” Wikoff says. “It’s a smaller city, but it’s such a melting pot. I’ve been able to surround myself with so many other creative types.” From her Pendleton Street studio, Lily Pottery, Wikoff crafts ceramic jewelry painted in vibrant hues and stamped with her intricate organic designs. But it’s her housewares that have lately caught the eye of national purveyors. She’s in talks with the Urban Outfitters–owned Terrain and with home-goods company Shabby Chic to create outdoor and home lines. “I could not have made all this happen as quickly in another city,” Wikoff says. “The support in Greenville is just amazing.”

image from Lily Pottery

image from Lily Pottery

Did ya’ll catch that?!  Yep…the girl is going places!  I’m so excited for her!  And I’m even more excited to be hosting a show for her on Tuesday, November 29th from 6-9pm!

Now ya’ll have to understand something about me.  I quit doing the home show circuit awhile back.  I’ll go these days to support a friend, and maybe I need another Pampered Chef spatula since I do love those….or if I’m jonesing for some Tastefully Simple beer bread, then I might hit up one of those parties…but I have to be honest and say I’m not big on hosting home shows anymore.  It’s not that I don’t want to support friends’ businesses, but if I threw a home show for everyone that asked, I’d burn out myself and all the friends I’d be inviting to come.

Here’s the thing about Lily though….I ASKED HER if I could host a show.  Her stuff is that awesome, and I wanted to offer friends and readers an opportunity to buy from her in a warm and fun environment.  I do love a reason to have a party, so of course I’ll be whipping up some bites to eat and pouring hot cider and wine….but mostly I think Lily is making some pretty amazing stuff that’ll make the people on your Christmas list feel awfully special this year!  My own list of presents to buy will be considerably shorter after the show…so if you’re related to me and are reading….sorry….I just spoiled your surprise!

image from Lily Pottery

I don’t know about you…but most of the time, I don’t want exactly what everyone else out there has.  And the things I have that are showstoppers….that random people comment on when I’m in the line at the store or grabbing a coffee….it’s typically not the stuff I found at Target.  It’s something really original, like the pieces that I have from Lily Pottery.  Wearable art ya’ll.

If you’re far away, don’t worry….you can still order online HERE!  AND, between now and December 1st, enter the coupon code LIFEFORDESSERT at the checkout when you purchase from Lily Pottery online to get FREE Shipping!  If you’re in town (Greenville, SC), and would like to come to the show, then shoot an email to Logan @LifeForDessert dot com, and I’ll send you the address.  Bring a sister, a friend, a neighbor…and I’ll look forward to seeing ya’ll Tuesday November 29th from 6-9pm.  You’ll also be entered to win a Lily Pottery gift certificate just for showing up!  (And yes…in case you’re wondering, that’s the Tuesday AFTER Thanksgiving.  Forget black Friday…save your pennies and your sanity for the Tuesday afterwards.  You’ll be glad you did…


Filed Under: Create, Journey

What’s Cooking: Rum-Raisin Apple Bread…and Giveaway Winners!

November 1, 2011 by Logan 1 Comment

appleA couple of weeks ago my family went apple picking at my most favorite orchard ever called Skytop in the mountains of North Carolina.  We needed a family day, wanted to pick apples but didn’t want to have to do it amongst crowds, so we took some advice my mom gave me ages ago to “never let schooling interfere with education,” took Tid Bit out of school for the day and headed mountainward.

It was a glorious day.  Cool, sunny, crisp, in need of a jacket and hat.  Fall breathing everywhere.  It’s my favorite kind of weather.  It was my favorite kind of day.


And we picked some serious apples.  Pink Lady apples.  My favorite kind of apples (which coincidentally are the MOST expensive kinds to buy at the store.)  Of course…


And because I recently learned an interesting factoid that apples will last 10 times longer in the fridge (equating to about 90 days of freshness,) I thought we needed to buy even more than we picked.  Can I just say that one entire drawer of my fridge is full…so full of apples that I can barely open it.  And I still have probably 25 more apples on the counter…counting down their days of freshness 10 times faster than the happy apples in the fridge.

I had a problem.  And I needed apple recipes.  But not the same apple recipes that are standbys either.  I wanted fresh ideas for my quickly unfreshening apples.  So I went to my current stand-by favorite cookbook and found a recipe for Rum-Raisin Apple Bread.  It had me at “rum”…and the fact that it required a good number of apples to make it.  Mostly, I figured that since my favorite banana bread recipe has rum, it must be a key player in moisture and flavor even though you don’t taste it at all in the finished product.  If I’d gone to culinary school, I’d probably know the exact science behind what it does…but I didn’t, so I leave it to Alton Brown and Good Eats from the Food Network to teach me about those things.

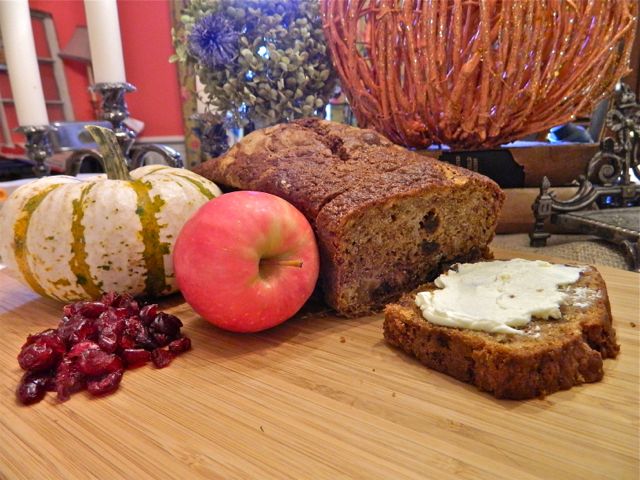
It’s a good one ya’ll.  I totally overcooked it because I decided in my infinite wisdom to begin this project before church.  It took me longer to do than I’d guestimated because of all the extra helpers in the kitchen, so I had to set the oven to finish up while we were gone.  It’s still good though.  The flavor is subtle, fallish, and delish.  It is especially excellent toasted with cream cheese or butter slathered on top.  Plus, it was easy peasy to make.  You get to chop the apples in a food processor!

So without further ado…I give you…

Rum-Raisin Apple Bread


This sweet, quick bread is moist and rich, and needs no embellishment at all. It keeps up to 5 days, freezes beautifully, and makes a nice holiday gift.

Makes two 9 by 5-inch loaves

4 cups all-purpose flour (I might use 1/2 whole wheat flour next time too to give it that more nutty flavor but keep it from being too heavy)
1 tablespoon baking powder
2 teaspoons baking soda
2 teaspoons ground cinnamon
1 teaspoon ground cardamom
½ teaspoon salt
2 cups sugar
4 large eggs
1¼ cups canola or safflower oil
¾ cup dark rum
1 tablespoon pure vanilla extract
4 Granny Smith or other tart apples, peeled, cored, and roughly chopped
1 cup raisins
1 cup currants

1. Preheat the oven to 350 degrees

2. Grease and lightly flour two 9 by 5 by 3-inch loaf pans and set aside.

3. Sift together the flour, baking powder, baking soda, cinnamon, cardamom, and salt in a large bowl and stir to mix.

4. Cream together the sugar, eggs, oil, rum, and vanilla in a separate bowl with an electric mixer.

5. Add the flour mixture to the egg mixture and stir just until the dry ingredients are moist and blended. Do not overmix.

6. Put the apples in the bowl of a food processor fitted with the metal blade and pulse several times; you should have 4 to 4½ cups processed apples. Add the apples, raisins, and currants to the batter and stir until just blended. Pour the batter evenly into the prepared pans.

7. Bake 1 to 1¼ hours, until the breads have risen, the tops are slightly cracked, and a toothpick inserted in the center of each loaf comes out clean. (Note: This is a very dense, moist loaf.)

8. Let rest for 10 to 15 minutes before removing from the pans. Serve warm or place on a baking rack to cool.

We’ve been having it for breakfast or also I’ve loved it as a snack with afternoon coffee.  I doubled the recipe, put 3 loaves in the freezer, and have loved having it around for just general homemade yumminess at my fingertips.

Enjoy!

Oh, and PS.  The winners (as chosen randomly from random.org) from the Fashion Week Giveaways are:

#14 Comment “enter me in, loges! I FB liked you and Becca!” from Amy

from the Accessorize Yourself post

and #1 comment “I liked Luxe Beauty on Facebook” from Molly

from the Best Face Forward post.

If you ladies would please email me your addresses to Logan @ LifeForDessert dot com then I’ll pass along your information to our generous giveaway sponsors Style By Becca and Luxe Beauty Boutique (who don’t forget is still offering a discount code for purchase orders placed through the middle of this month. See the end of THIS POST for more details on how to save when you buy beauty products.)


Filed Under: Create, Eat, Journey, Uncategorized

  • « Previous Page
  • 1
  • …
  • 4
  • 5
  • 6
  • 7
  • 8
  • …
  • 13
  • Next Page »
  • 
  • 
  • 
  • 
  • 
  • 

Subscribe by Email

Oldies but Goodies

Copyright © 2025 · Logan Wolfram · Logo by Annie Barnett · Site by Design by Insight