Logan Wolfram

Enjoying Life for Dessert

  • Home
  • About
    • Meet Logan
    • Meet My Family
  • Blog
  • Eat
  • Journey
  • Create
  • Connect

What’s Cooking?! For New Year’s Day!

December 29, 2011 by Logan 5 Comments

This is a post I wrote a couple of months ago….prematurely really, since it’s actually the perfect thing to serve for New Years…but it was just so so good that I couldn’t wait.  So…you’re getting it again.  It’s good enough to share again.  I promise!

I must confess that headed into this recipe I was skeptical. I’m a good Southern girl, but that doesn’t mean that I have a burning passion for all things black-eyed peas and collard greens that I want to tell the world about. In fact, memories of the food from every single New Year’s Day growing up still make me cringe.

If you’re from the South, you probably at least know what I’m talking about. The New Years Day dinner. Black eyed peas for luck and prosperity in the new year, collard greens for money, cornbread for gold, stewed tomatoes for wealth and health, and if you really want to be the luckiest one at your table, then you’ll be the one served the penny in the bottom of the pot along with all of your black-eyed goodness.

I started dreading New Year’s Day food always very shortly after Christmas. And every year I remember begging my mom to just make something normal.

SO, when my sister recommended that I try this recipe back in November (it is originally from Cooking Light 2007,) I just wasn’t so sure. But she’s a great cook and so is my mom who also recommended it. They both love the New Years food though. It was a risk to be sure, but after weeks of sickness, and busyness, and travel…I have to be honest and say that my creative cooking bone had taken a vacation as well. To put it plainly, I’d been in a culinary slump. And the first time I made this, I just didn’t want to have to think about what was for dinner…I just wanted to cook it.

I did it though. I went to the store and I bought the stuff I needed and I made this stew. And now since I’ve taste-tested, I can’t wait to eat it again. It is awesome! This stew has single-handedly changed my opinion on New Year’s food.  In fact, when I saw black eyed-peas on sale at the store this week, I was actually excited to make this again at the time that seems to most celebrate these ingredients!

Here you go ya’ll. For those who love collards and black-eyed peas…and for those who, like me, need a new opinion of them.
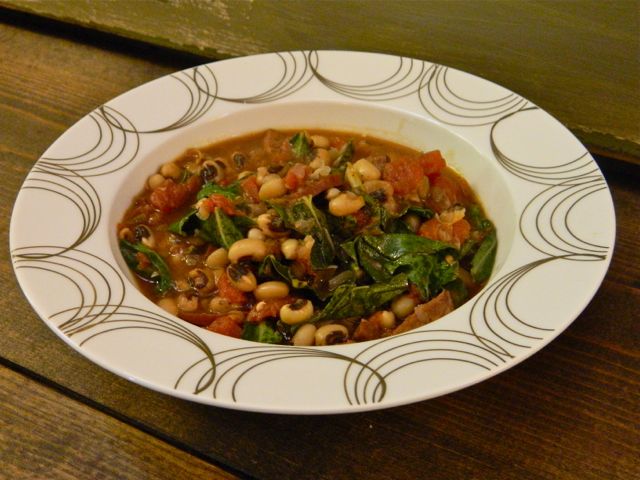
Ingredients

  • 2 cups dried black-eyed peas
  • 1 tablespoon peanut oil (whatever…I used EVOO. I have a feeling any oil is probably fine.)
  • 3/4 cup finely chopped yellow onion
  • 8 ounces turkey kielbasa, halved lengthwise and cut into 1/2-inch pieces
  • 4 cups vegetable broth (I LOVE Better than Bouillon more than broth or bouillon…give them a shot for any base broth)
  • 1 teaspoon salt
  • 1/2 teaspoon crushed red pepper
  • 1/2 teaspoon freshly ground black pepper
  • 2 bay leaves
  • 1 tablespoon cider vinegar
  • 1 (28-ounce) can no-salt-added diced tomatoes
  • 1 (10-ounce) bag prewashed collard greens (or mustard greens, or turnip greens…the collards are a little heartier though)
  • 1 (10oz can) Rotele tomatoes (the original recipe didn’t call for this, but it added some awesome kick.) For a less spicy version, I’d leave this out.

Preparation

  • Sort and wash peas; set aside.
  • Heat oil in a large saucepan over medium heat. Add onion to pan; cook 3 minutes or until tender. Add sausage; cook 4 minutes or until lightly browned.
  • Stir in broth; bring to a simmer, scraping pan to loosen browned bits. Stir in peas, salt, peppers, and bay leaves. Cover and simmer 45 minutes or until peas begin to soften. Uncover and cook 15 minutes or until liquid begins to thicken.
  • Stir in vinegar, tomatoes, and mustard greens; simmer 10 minutes or until peas are tender, stirring occasionally. Discard bay leaves.

Enjoy ya’ll. And lemme know if any unusual luck comes your way after you make it! 🙂

I can’t believe it’s almost the new year!?!

 

Filed Under: Uncategorized

Don’t Cry Over Spilt… Pickles

December 28, 2011 by Logan 2 Comments

Yesterday was “one of those days” with my kids.  Or more particularly with my 5 year-old.

Granted, we’ve been kinda cooped up lately, and since he is a boy who is ALL BOY, we run into some behavioral issues when he gets too bored or cooped up.  So I have tried to stave off at least the boredom with things like making sugar cookies, working together to un-decorate from Christmas, playing games, doing crafts….you name it…we’ve been doing it.  But the hours in the day are longer than my list of things fun to do, and sometimes un-fun things just have to go on don’t they?!  (Laundry, tidying up, etc.)  The cooped up though….well, since it’s been raining like crazy…it was bound to get the best of him…and me.  And even when it stopped yesterday, my yard was a smooshy mess with giant trees swirling around in strong winds so I wasn’t exactly itching to send the kid outside to come in muddy-smooshy, or smooshed from a falling branch….even when he drives me crazy, I still love the little guy.

He was tough though yesterday….mean to his brother, rude to me, wildly disobedient, and ridiculously strong-willed (I wish I could say that last part was a real shocker, but with 2 hard-headed parents, the kid comes by it pretty honestly.  SO….to all of you who said that I had it coming from when I was a kid….hope you’re happy now!)

Sometimes, I SOO wish I was one of those people who was described as a “gentle and quiet spirit.”  But I’m not.  I’m not necessarily an all out firecracker either, but I would have to say that if I leaned one way more than the other…I’ve naturally got more spark than serenity.  And yesterday, I felt like my fuse got lit in the morning and as soon as I’d think I’d get it extinguished and under wraps, he’d do something else.  Running around like a wild thing when I was on a phone call, poking my littlest one with a recorder, stealing his balloon, popping his balloon, and then….the thing that about put me into complete explosion….the pickles.

I was trying to take down some of the Christmas decorations…the ones that were so dead even 2 weeks ago they’ve been a fire hazard…wrapped around my banister, flanking my china cabinet, over the doorways….good thing my temper couldn’t ignite them, or we’d have been up in flames by 9 am yesterday!  Anyhow…I digress.  So, I’m taking down decorations in the foyer and my son starts yelling at me that he’s hungry.  I tell him he needs to ask nicely and wait til I’m done and I’ll be glad to help him find something to eat.  Next thing I know, I hear a crash…the sound of glass shattered…and I run into the kitchen yelling “What did you do?!”

I wish I ran in yelling “Are you ok?,” but by that point in the day…I was just over it.  I did remind myself to make sure he was ok, which he was, but when I rounded the corner and smelled the stench of pickles combined with chards of glass strewn clear across the room….I wanted to just absolutely lose it.  And I didn’t completely…but I was angry…and I yelled at him to please just go away so that I could clean the mess….and to please take his brother so that we didn’t end up at the hospital with glass embedded in anyone’s foot either.

It was one of those messes that makes you frustrated just looking at it….lime green, stinky pickle juice seeping across the room in the tunnels that the tile grout lines make…a pile of sandwich stacker pickles covering up even more broken glass…huge chunks of glass jar strewn even up to 8 feet away…and it stunk….pickle stink.  Where to begin?!  Sop up the juice with too many paper towels?  Pick up the mound of pickles, retrieve the chunks of broken glass?  All the while trying to keep a 2 year old out of the room which had quickly become a safety violation.  So so frustrating.

I wiped, I picked up glass, I vacuumed TWICE, I swept, I mopped, and then I steam mopped….and I think…I hope that I got it all.  As I was doing it all, I thought to myself…. “don’t cry over spilt milk…or spilt pickles.”  And by cry, I mean “lose it.”  Don’t let one thing ruin the rest of them…be slow to anger….turn away wrath with a gentle word…even my own wrath…with my own words.  And I find myself realizing that even though I’m no monster by any stretch…not someone who goes nuts all the time (it happens sometimes though), I felt so so angry in my heart….and from the mouth flows what’s in the heart….and, from the heart, I ooze some serious ugliness.

This morning I spent some time studying anger during my quiet time.  I came across these verses in Ephesians 4:

” and that you be renewed in the spirit of your mind, 24 and put on the new self, which in the likeness of God has been created in righteousness and holiness of the truth.  25 Therefore, laying aside falsehood, SPEAK TRUTH EACH ONE of you WITH HIS NEIGHBOR, for we are members of one another. 26 BE ANGRY, AND yet DO NOT SIN; do not let the sun go down on your anger, 27 and do not give the devil an opportunity. 28 He who steals must steal no longer; but rather he must labor, performing with his own hands what is good, so that he will have something to share with one who has need. 29 Let no unwholesome word proceed from your mouth, but only such a word as is good for edification according to the need of the moment, so that it will give grace to those who hear. ”

Do not give the devil an opportunity….let my words give GRACE to those who hear.

Whack!  Upside the head!  And I feel convicted and resolute….that a battle against allowing anger to rule my emotions in these moments is a battle against giving evil a foothold.  It’s me claiming the grace that’s been paid for on the cross, and grabbing that grace…clinging to that grace, and somehow…supernaturally…allowing that to be the thing that takes over my heart and proceeds out of my mouth.

Filed Under: Uncategorized

What’s Cooking?! Incredible Sugar Cookies

December 27, 2011 by Logan 2 Comments

Happy couple of days after Christmas everyone!  I hope that your holiday was filled with wonder.

We watched the Nativity Story on Christmas Eve afternoon before our service at church and I loved how it set the scene for my heart for worship even more.  If you’ve never seen that movie…go watch it.  It is such a neat look at what it must have really been like back in that time and place when Christ was born.  Gives you a new perspective on it all.

I’ve been enjoying the last few days with nothing on our agenda as well.  Since my oldest is out of school this week, I plan on doing more of the same…a whole lotta “nothing major.”  Today though, we’re going to make some sugar cookies.  My littlest one is turning TWO in just a couple of weeks, so I figure we’ll do what we can to get started on some preparations for his party.  Last year, these sugar cookies were a great hit when I made them at his Very Hungry Caterpillar  birthday party, and again in the shape of musical notes at Tid Bit’s bluegrass themed party.  This year we’re going to be doing a dog theme because the child LOVES dogs.  I think I’m going to go simple on the cookies though and make them in the shape of bones.  I have shared this recipe before, but realized since it was ages ago and I was just learning about blogging, I didn’t tag it properly and it’s hard to find on the blog.  So here it is again for ya!

It uses powdered sugar instead of regular granulated, resulting in a really shortbready tasting cookie…DELISH!  I scoured the internet and cookbooks to find the perfect recipe, and this one is about as perfect as I have ever had! It makes really good thick cookies, which I love.  I guess if you’re a thin cookie person though, that’s just all up to you and your rolling pin!  To make the icing just mix powdered sugar,  a dash of vanilla, and milk (or soymilk) til it’s the consistency you want.

Amazing Sugar Cookies
yield: about 75 medium cookies

  • 24 ounces butter (softened)
  • 20 ounces powdered sugar (sifted)
  • 3 whole eggs, plus
  • 1 egg yolk
  • 1/2 ounce vanilla extract
  • 1/4 ounce almond extract
  • 6 1/2 cups flour
Directions:
  1. With paddle attachment, mix butter for 30 seconds. Add a 1/3 of the powdered sugar, mix on first speed for 1 minute. Add another 1/3 of the powdered sugar, mix another minute. Finally, add the last 1/3 of sugar, mix 1 minute.
  2. Combine eggs, vanilla, and almond extract together, add to butter/sugar mixture. Mix for 30 seconds.
  3. Add a 1/3 of the flour, mix 1 minute.
  4. Scrape.
  5. Add the next 1/3 of the flour, mix 2 minutes.
  6. Scrape.
  7. Add the final 1/3 of the flour, mix 3 minutes.
  8. Refrigerate until able to be rolled out and cut into desired shapes. (if you’re using the dairy free version i told above,  I’d refrigerate it AT LEAST 24 hrs before rolling out to make sure it really sets up.) Bake at 350 for 9-15 minutes depending on the size you cut them!)

(As a side note for my friends who have food allergies, you can make this recipe dairy free.  To do so, I substituted 1/2 the amount of butter with Fleishman’s Unsalted Margarine, and 1/2 with Earth Balance Buttery Sticks which I buy at Whole foods.  You really need to mix the two to get it right.  The margarine makes a flavorful, but super soft and sticky dough by itself, and the buttery sticks sometimes have a slightly oily taste but have a harder consistency…by mixing the 2, you’ll keep a good buttery flavor from the margarine and keep the texture right from the buttery sticks.)

I hope you are enjoying some relaxing time with your family too!  Makes me long for the days of summer for sure!

Filed Under: Create, Eat, Journey

What’s Cooking?! Amazing Homemade Pimento Cheese

December 23, 2011 by Logan Leave a Comment

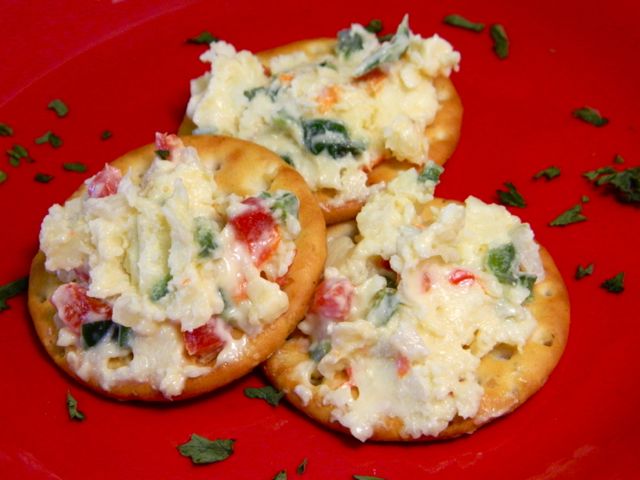
I SOOO wish I could claim this recipe as my own…but I can’t, so I won’t.  Got to give credit where credit is due, so thanks a million to my friend Heidi, who I met on an airplane and liked so much we’ve kept in touch.  She made this MOST amazing pimento cheese recipe to bring to our Christmas party, and I was so so excited when there was some leftover…until I ate the rest… and had to make more today.

It’s ridiculously easy, it’s amazing, and for those of you who don’t do pimento cheese…well, give it another shot.  This recipe redeems all pimento cheese you’ve ever had that could have scared you away.  Promise.

Pimento Cheese

  • 1 lb  very sharp white cheddar (cabot is great!), grated
  • 1/3  cup small diced vidalia onion
  • 3-4 jalapenos, seeded & diced
  • 2 small or 1 large jar diced pimentos, drained well
  • 1/3-1/2 cup mayonnaise (definitely start with less– the veggies will juice a little after a while)
  • fresh ground pepper to taste

Mix all ingredients together and enjoy!

The great thing about Pimento Cheese is that it’s awesome all year too.  As an appetizer, on a sandwich, try it on a burger as well….possibilities are endless.

Also, I’m gonna take a little bloggy break for a few days to celebrate Christmas with my family.  I’ll be back next week for sure though.  If I get a chance, I might try to post a few more pictures of our holiday decorating before I have to take it all down again.

My friend said something to me the other day that’s caused me some real pause…in a super-awesome way.  We were talking about Christmas, and also then later about how I was freaking out a bit over my own audacity to get a big honking tattoo, and she said to me….”You know what’s totally audacious?  God…coming to earth…as a baby.”

Yes indeed!  Thank you Kristin!  And I, for one, am so thankful to spend the next few days particularly in celebration of such a totally audacious God!

Hope you all have a VERY MERRY CHRISTMAS!

Filed Under: Uncategorized

Own It!….A Big, Bad Tattoo….

December 21, 2011 by Logan 13 Comments

I am a stay at home mom of 2 little boys in suburban America.

I drive a minivan that I swore I’d never drive.

I live in a really pretty neighborhood with lots of nice people.

I lead Bible studies.

I love Jesus.

I’m a decorator and a creative person.

I’m girly.

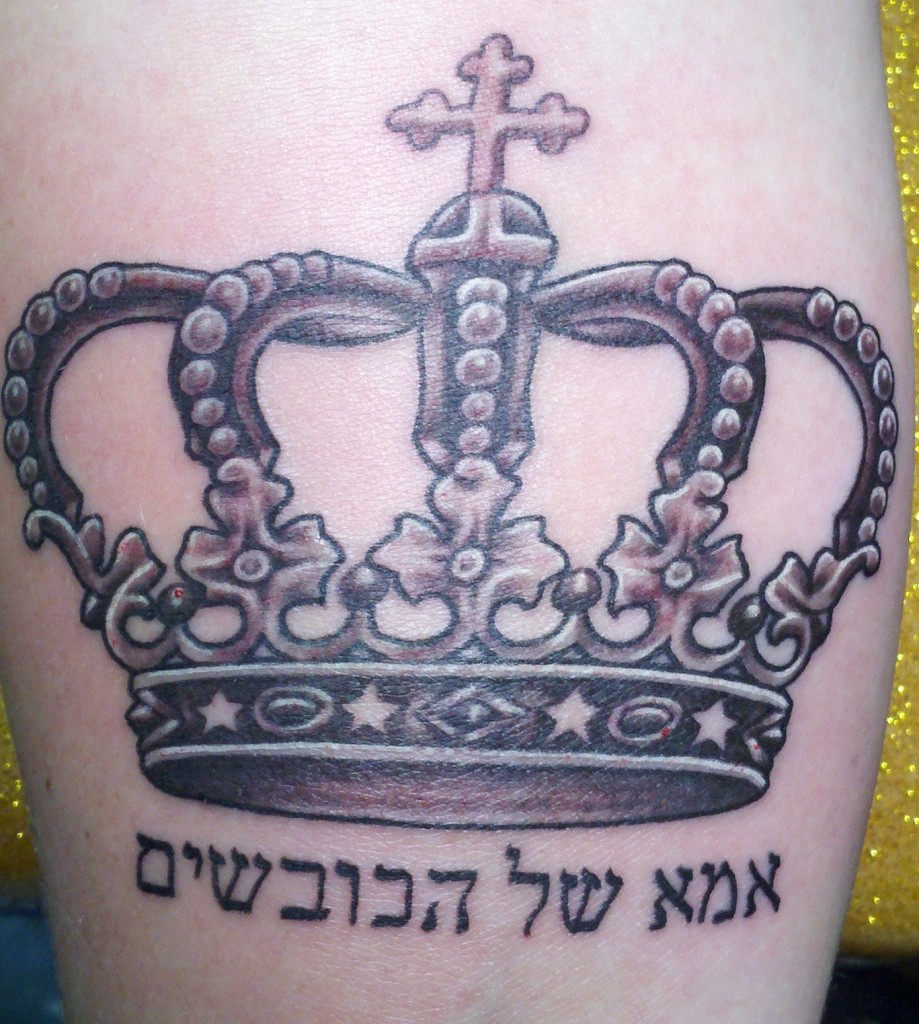
And now…I have a big ass tattoo on my arm.

And if I’m being honest with you, which I always am…I’m freaking out just a little bit right now.  Ok…maybe a lot.

It’s not so much “buyers remorse” or anything…but as the tattoo artist said to me yesterday “That’s a badass tattoo.”  And as I left and looked down at the big ol bandage on my arm, I thought to myself….”and it’s a big ass tattoo too!”

It’s bigger than I was originally thinking…almost twice as big (that’s the truth of it that I’ll tell you if I’m not trying to convince myself that it’s only 1/3 bigger than the original plan.)  And it is absolutely beautiful.  But like I said…I’m a mini-van driving, carpooling, conservative who’s now sporting a big honking tattoo in a really obvious place.  And here’s what I’m having trouble coming to terms with after permanence is already in place….

What will people think of me?


I wish I could say that I really don’t care…but that’d be a lie.  I care.  And I’m realizing as I’ve got a big spot of amazingly beautiful and deeply meaningful ink on my arm, that I’m challenged by the meaning of the tattoo for me…even in the existence of the tattoo.

Where do I find my identity?


The story of the tattoo goes something like this:

A little over 4 years ago I had my first miscarriage.  After we lost the baby and I struggled with what that meant and all that was going on at that time, we had dinner with some friends of ours.  They prayed for us, and as our friend Chad was praying, he stopped and said “The Lord just told me that you are going to be the mother of warriors.”  Warriors….plural.  And warriors….for the Kingdom of God.

I’m good with that.  I love that.  I want to raise my boys to be mighty men of God…willing to fight to see the Kingdom of Heaven advance here on earth.  So that’s what the Hebrew written there means.  Technically, it means “Mother of Conquerers”…but honestly I like that even better…a greater implication of a battle already won.  And I’ve wanted that phrase tattooed on me ever since then.  Part of my identity.

Then, about a year and a half ago, we were standing in church one day during worship and I was thinking about getting the tattoo and praying about it.  Then I had this strong impression that “mother of warriors” wasn’t my only identity…it’d be an incomplete tattoo.  I’m a wife too….to a great man, who I know God wants to use for great things.  And I heard the Lord say to me…”you are also the wife of a general….a general in my army.”  So that’s what the 4 stars represent….a 4 star general….that my husband is… and is becoming in the army of the Lord.

I have to tell you a funny aside about this part though.  At first I was thinking… “Am I suppossed to put 5 stars here?…because a 5 star general is pretty hard-core…pretty awesome.”  I kept having this impression though that it was just suppossed to be 4 stars, but I didn’t want to offend my husband by somehow making him feel demoted or like I didn’t think he was capable of top level awesomeness.  So I told him my dilemna…hoping that I wasn’t offending him with the dilemna.   He got really quiet and said “Would you like my input on this?”  I was hesitant, but said yes.  Then he said to me “it’s supposed to be 4 stars.  Some guys spoke the very thing over me before you ever said it…you confirmed what had already been spoken.  I just haven’t told you before now because I didn’t want it to sound arrogant or anything to you.”  Then he went on to tell me that the office of a 4 star general is given for a specific purpose…for a specific need.  The appointment goes hand-in-hand with the position of office to which they are linked.  Pretty cool huh?  So….that’s what the 4 stars on the crown are about.

About 6-8 months ago, I was in church again and thinking about identity….and my own identity…and the tattoo…when I heard clear as a bell… “You ARE a mother of warriors, and you ARE the wife of a general….but never forget that above all of those things, you are a daughter of THE KING.”  Hence the crown.

My identity….written on my arm…most importantly to remind me, and now I guess…that other people see too.  So here’s my challenge now as I look at this big ass, bad ass, amazing word from the Lord for me on who I am to Him, and who I am on this earth….

OWN IT.


Own the big, bad tattoo on my arm….but more importantly…MOST importantly….own the meaning behind it all.  Own the identity…and be defined by the identity given to me by the Most High….not by one I seek from other people.


Filed Under: Journey, Uncategorized

What’s Cooking?! Santa Hat Brownie Bites

December 19, 2011 by Logan 3 Comments

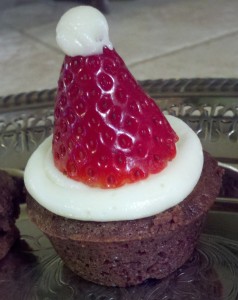
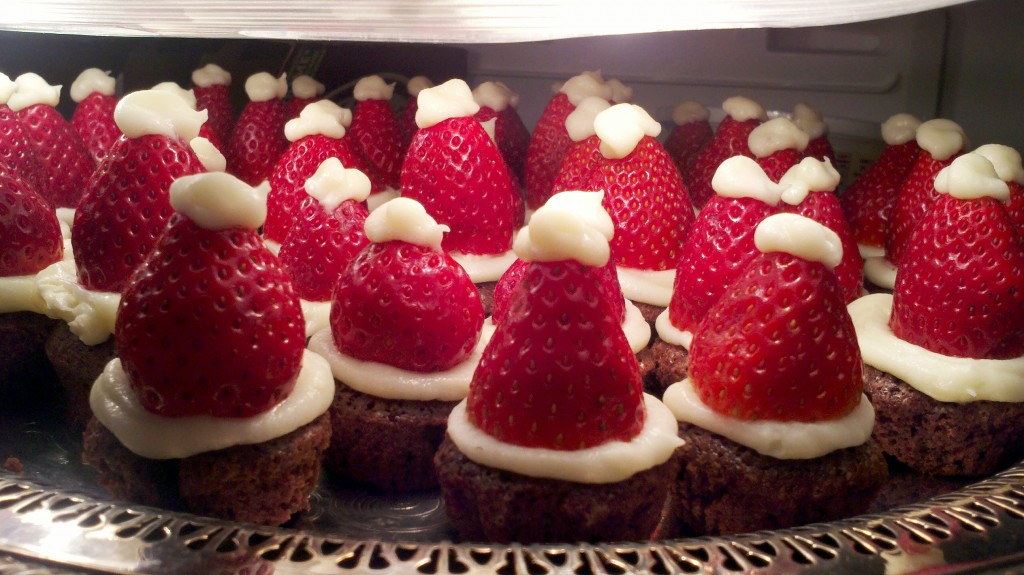
I wish I could claim this idea as my own…but I can’t.  I saw a picture of these adorable santa hat brownie bites somewhere on Pinterest and thought to myself, “I’m making those for sure!”  So, I did….for the party that we had on Friday (which was a great success by the way!)

I never went back to find out how the person had done it, because I thought it was pretty self-explanatory.  And…I make my grandmother’s amazing brownie recipe all the time, so that was a no-brainer too.  Someone told me the other day they’d heard of this done with cool whip, but I made homemade cream cheese icing which is tastier and stickier too (to hold the berry in place.)

So here’s my Mema’s brownie recipe.  I normally make it in a 9×13 pan and bake at 350 for 25 minutes, but this time I used mini muffin tins and baked for around 18 minutes.  Make sure you spray your muffin tins so these will fall out when they’re done!

To make the best and easiest brownies ever, you’ll need:

  • 4 sq (4 oz) unsweet Baker’s chocolate (comes in an orange box in the baking section)
  • 2 sticks butter
  • 2 c. sugar
  • 4 eggs
  • 1 c. flour
  • 1 tsp vanilla (I always just squirt the vanilla in, so it’s probably way more than 1 tsp…I’m generous with vanilla like that!)

Put the chocolate and butter into a microwave safe dish and melt on high for about 3 1/2 minutes.  When that’s done, stir it up well to make sure the chocolate squares melted completely.  Then add and incorporate sugar, then eggs, then vanilla, and finally flour.  Don’t overmix.  I always just do this by hand…less to wash and it’s so easy anyhow.  Pour into whatever baking vessel you choose and bake at 350…for about 18 minutes in mini-muffin tins, 25 in a 9×13 pan, and 35-40 in an 8×8 if you like a thicker brownie.  A toothpick should come out pretty clean in the center of the pan.  I like mine slightly underdone though…just slightly…to make them really fudgy.

To make cream cheese frosting:

  • 2 (8 ounce) packages cream cheese, softened
  • 1/2 cup butter, softened
  • 2 cups sifted confectioners’ sugar
  • 1 teaspoon vanilla extract

In a medium bowl, cream together the cream cheese and butter until creamy. Mix in the vanilla, then gradually stir in the confectioners’ sugar. Store in the refrigerator after use.

For the santa hat bites, wash, dry, and cap your strawberries (they need to be really good and dry so they don’t make everything runny.)

Use a ziploc bag with a small corner cut off to pipe the icing onto the brownie.  I found it worked best to not cover the entire brownie…start at the outside and make a circle of icing.  (I left a small space in the center to give the icing room to spread out when you put the berry on top.)  Stick the berry on top, and then pipe a small dollop of frosting onto the point of the berry.  Keep refrigerated until you’re ready to serve!

These were crazy good and so cute to have at the party!  I made an entire tray and could’ve eaten them all!  So so good!  Tried one with a raspberry too, and while it didn’t look like a Santa hat…it was pretty tasty as well!


Filed Under: Create, Eat

A REALLY Big Star…

December 15, 2011 by Logan 2 Comments

The Mystery of the Christmas Star - by Digistar

I don’t know much about astronomy.  I can find the big and little dippers, and Orion in a clear night sky, but that’s about it.  Beyond that, I don’t much know what I’m looking at aside from a dark blanket of twinkling beauty.

This morning, I found myself wanting to read through the Christmas story again.  I’ve read the story a lot over the years, but today for some reason something really stood out to me in  the story in Matthew more than ever before.

In Chapter 2, the magi appear to King Herod and ask if he knows “Where is he who has been born King of the Jews?  We saw his star in the east and have come to worship him.”  It then goes on to say that “Herod was troubled about this”…and he then basically goes on a rampage to find the baby Jesus and goes so far as to exterminate all of the baby boys in and around Bethlehem.  Something was really bothering this guy.

I’ve always thought that Herod was troubled just by the idea of being replaced as king.  How many other times I wonder did anyone ever come to him with a conjecture about the arrival of the Messiah?  How many times in his reign did he keep an eye on a general in his army who was especially hard-core or could pose a threat some day to his throne?  How many times were there people in his lands that he had to take out because they may have been getting too powerful?  I mean, if you’re gonna protect your throne to the degree that you wipe out all infants in an entire region…I’m guessing that your pattern of self-protection didn’t just begin with a couple of fancy kings suggesting the possibility of a “new” king to you.  Possibilities can be threatening…but there was something bigger than just a potential threat going on with this baby.

But then this morning I noticed that in verse 7, Herod takes great pains to find out more about what was going on with this star…the star of the King.  “We saw his star in the east and have come to worship him.”  And I find myself wondering….

What was so special about this star that they knew it was the one prophesied from way back in the Old Testament?

What was it that made this star so evidentially the one of the Messiah?

Why was it that Herod went to great effort to find out more about this star?

And I wanted to find out more about this star too.  So I’ve done some digging around and found the following interesting astronomical information.  This star WAS way bigger and brighter than normal.  And there are some thoughts as to what actually occurred to create such a bright and beautifully threatening twinkle in the sky.

Some scholars believe that what may have happened is called a “greatest conjunction,” and I found some interesting information about it that I thought I’d share with you.

A Greatest conjunction is a conjunction of Jupiter and Saturn at or near their opposition to the Sun. In this scenario, Jupiter and Saturn will occupy the same position in right ascension on three separate occasions over a period of a few months.  The “Star of Bethlehem” is theorized to be a greatest conjunction.

I didn’t know what planets “in opposition” meant, so I looked that up too.  (Remember, I’m just a 3 constellation kind of gal.)

A planet is said to be “in opposition” when it is in opposition to the Sun, as seen from the Earth. When a planet is like this,

  • it is visible almost all night, rising around sunset, culminating around midnight and setting around sunrise;
  • at this point of its orbit it is roughlyclosest to the Earth, making it appear bigger and brighter.
  • the half of the planet visible from Earth is then completely illuminated (“full planet”)
  • the opposition effect increases the reflected light from bodies with unobscured rough surfaces.

Interesting huh?  I love that God is THAT creative.  And I love that it’s called “Greatest” conjunction.  The very best coming-together of even the heavens.  That all of heaven aligned perfectly to point with great light down to the baby King lying in a feed trough in a little redneck town called Bethlehem.   The stars and the planets aligned….and a shaky king on a usurped throne knew it…and was really afraid.

Luke 2:10, But the angel said to them, “Do not be afraid; for behold, I bring you good news of great joy which will be for all the people; 11 for today in the city of David there has been born for you a Savior, who is Christ the Lord. 12 This will be a sign for you: you will find a baby wrapped in cloths and lying in a manger.” 13And suddenly there appeared with the angel a multitude of the heavenly host praising God and saying,

14 “Glory to God in the highest,
And on earth peace among men with whom He is pleased.”

The stars aligned, the heavens rejoiced, and love came down.

Filed Under: Uncategorized

When Ladybugs Look Like Cockroaches….Tattoo Musings….

December 14, 2011 by Logan 1 Comment

I interrupt this regularly scheduled holiday season with an announcement….and a little tid bit that you may or may not already know about me.

I have tattoos.

Yep.  I do. Gasp!

Two of them to be exact.  And the reason I’m telling you this now is because I’m about to increase that number to three.

Yes…seriously.

If you’re currently still catching your breath from the realization that I have tattoos at all…sorry to knock the wind back out of you again with the realization that they weren’t just a rash moment of foolishness in my youth.  Well…at least not one of them.

The first one actually was a moment of foolishness.  Call it 16-year-old stupidity…or peer pressure…or whatever you want…but here’s what I call it now…”the ladybug that looks more like a cockroach.”  Yes friends…I once had a ladybug…that was supposed to be on my toe.  But somehow in the dead of winter, where wearing shoes could have supposedly harmed a tattoo on my toe…some man with a perpetual cigarette hanging out of his mouth named Earl (or something like that) talked me out of the toe and into anywhere else.  That “anywhere else” ended up being on my pelvic bone…and thank heavens you can’t see it in even a bathing suit.  Two kids and 20 pounds past age 16….it’s just not that cute anymore.  My ladybug looks like a cockroach.  And to this day, I still can’t come up with any significant thing to say about why I chose a ladybug in the first place.

The second one was well thought through.  Essentially, I decided that if I was going to be inked anywhere, I should have made it count for something the first time.  But, since I didn’t…I figured I should give it another shot at making it matter.  That was when I was 22.  And I still really love everything about the second tattoo…well, except that I later learned that having a lower back tattoo is sometimes referred to as a “tramp stamp.”  I’m not really down with the whole “tramp stamp” thing…but I do love the tattoo…and I like that it’s on my back.

It looks like this….

If I had it to do over again…I’d do the same thing but maybe make it look more like this (without the text around it)…. —–>

All to say…I like it well enough that I’d do it all over again.

And in case you’re familiar…yes, this is Martin Luther’s seal.  No…I’m not Lutheran …never have been. (and just to clarify…Martin Luther is an entirely different person from Martin Luther King…who was likely named after the original Martin Luther.)

Here’s a quick run down of what this seal means though (from Martin Luther himself.)

First, there should be a black cross set in a heart, which should keep its natural colour. This will remind me that faith in the Crucified Christ saves us.  Now, although the cross is black, it does not tend to change the colour of the heart, does not destroy nature, i.e., does not kill, but keeps alive. “For the just shall live by faith,” – by faith in the saviour.  But this heart is fixed upon the center of a white rose, to show that faith causes joy, consolation and peace. The rose is white, not red, because white is the ideal colour of the angels.  The rose, moreover, is fixed on a sky-coloured ground, to denote that such joy of faith in the spirit is but an earnest yearning and beginning of heavenly joy to come.  Around all of this is a golden ring, to signify that such bliss in heaven is endless, and more precious than all joys and treasures, since gold is the best and most treasured metal. Christ, our dear Lord, He will give us grace unto eternal life. – Martin Luther

I like that meaning.  That it doesn’t just seem cute, but that it really MEANS something.

And that’s what’s gonna happen with this third tatoo…a meaningful little mark on my personal docket of things that will happen here pretty soon.  No…I haven’t told my mom.  So….”Hi mom!  Just fyi….I’m getting another tatoo.”  (Ok…so I kinda told her before now…but I think secretly she hopes maybe I won’t actually do it.)

Anyhooo….I just had to tell you all.  I’m not going to tell you what I’m getting yet though.  Where’s the suspense in that?!  I’ve known at least part of what it’d be for a few years…and the rest has come to me over the past 2 years.  So, this one has been in the making since December of 2007.  I love it.  It means something to me.  It’s got quite a lot to do with my true identity…which is a whole lot greater than I naturally tend to think of it.

And while we’re on it, my friend Laura wrote a really interesting post recently HERE asking the question…”Could tatoos be a modern-day form of baptism?”  I don’t really personally think it should replace traditional baptism, but she brings up some really interesting thoughts about our culture…this generation…and the ways we express ourselves.  It’s worth a read…whether you’re into ink or not.  (By the way…I’m not trying to open a whole big theological can of worms about tattoos and baptism here either.  Not really my bag, you know.  If you have opinions on it though, I invite you to leave those comments on Laura’s post….she is definitely into cultivating that sort of discussion.)

So…have I made you curious?!  Don’t you know I’ll write a post about the whole tatoo experience too?!  They say that the third time is a charm….I wonder if “they” were talking about things like tattoos?!  Hmmm….probably not.

Filed Under: Journey, Uncategorized

Here We Come A Wassailing…..

December 13, 2011 by Logan 2 Comments

Here we come a-wassailing
Among the leaves so green;
Here we come a-wand’ring
So fair to be seen.

REFRAIN:
Love and joy come to you,
And to you your wassail too;
And God bless you and send you a Happy New Year
And God send you a Happy New Year.

My dear friend Wikipedia taught me that the old English wassail song refers to ‘wassailing‘, or singing carols door to door wishing good health.  And according to Readers Digest; “the Christmas spirit often made the rich a little more generous than usual, and bands of beggars and orphans used to dance their way through the snowy streets of England, offering to sing good cheer and to tell good fortune if the householder would give them a drink from his wassail bowl or a penny or a pork pie or, let them stand for a few minutes beside the warmth of his hearth. The wassail bowl itself was a hearty combination of hot ale or beer, apples, spices and mead, just alcoholic enough to warm tingling toes and fingers of the singers”

Anyhow, one thing that always reminds me of holiday fare is hot Wassail Punch.  It’s perhaps one of my most favorite hot things to drink (next to a good cup of coffee you know,) but because it has several ingredients, it’s not really one that you whip up just a cup of for yourself.  It makes your entire house smell AMAZING, and it’s just cozy and good.  It pretty much dominates basic hot cider in the flavor department, and well….it’s just worth making ya’ll!

My wassail doesn’t have toast on top (something they used to do to sop up every last bit,) and while it’s good with a little spike or wine as a base too, this time I’m making it non-alcoholic.  So, I thought I’d share this fun Yuletide drink that is great to serve up to your family, or friends, or whomever.

Holiday Wassail….

Image from AllRecipes.com

Ingredients

  • 2 quarts apple cider
  • 1-1/2 cups orange juice
  • 3/4 cup pineapple juice
  • 1 tablespoon brown sugar
  • 1/2 teaspoon lemon juice
  • 2 cinnamon sticks (3 inches)
  • Dash ground cinnamon
  • Dash ground cloves

Directions

  • In a large saucepan, combine all of the ingredients. Bring to a boil. Reduce heat; cover and simmer for 20-30 minutes. Discard cinnamon sticks. Serve hot in mugs. Yield: 10-12 servings (2-1/2 quarts).

That’s it!  It does keep for a little while after you make it, so if you do want to make a pot, put the rest in the fridge and then you CAN have a cup at your leisure!  And while you’re at it…call a friend to enjoy a cup with you!

That song at the beginning is totally one that I knew, but I never realized what it was about.  When I looked it up to make sure I got the lyrics right for this post, I came across several more verses of it and thought that I’d share.

We are not daily beggars
That beg from door to door;
But we are neighbours’ children,
Whom you have seen before.

Bring us out a table
And spread it with a cloth;
Bring us out a mouldy cheese,
And some of your Christmas loaf.

God bless the master of this house
Likewise the mistress too,
And all the little children
That round the table go.

Good master and good mistress,
While you’re sitting by the fire,
Pray think of us poor children
Who are wandering in the mire.

Tis the season for giving…so as you make your wassail this year, and share it with a friend….remember the people who would love just a cup of something warm to drink… and think about what you can do to make a difference in their lives….

Filed Under: Uncategorized

Getting Crafty….Baby Shower Invitations

December 12, 2011 by Logan 3 Comments

My little sister is having her first baby in February.

I am SO excited!

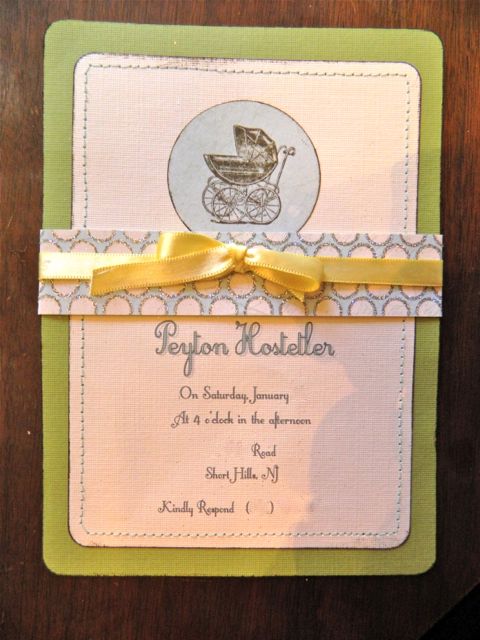
I’m throwing a shower for her with some other girls, and since she’s my sister, and since I think that an invitation sets the tone for well, anything… I wanted to do them. You all know enough about me by now to guess that I just had to make them.  After all…it is for my sister.

I have to tell you though, these things were crazy labor intensive.  I worked on them here and there…a little each day for about a week.  I’d say all total each invitation takes about 8 minutes to make…and I made 30 of them.  Of course, I could have cut out lots of the steps and they’d still have been really pretty…but like I said…it IS my sister (and thankfully she just needed to send 30…otherwise I’m sure I’d have been cutting steps out for sure.)

So, today I thought I’d tell you how I made these invitations.

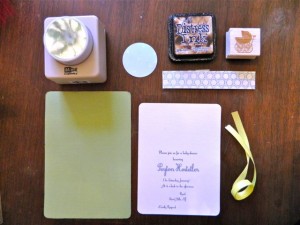
First of all, I decided how big I wanted them to be based upon the envelope size I wanted to use.  I bought scrapbook paper and used a paper-cutter to cut each sheet so that the outside dimensions of the invitations were about 5 3/4 inches by 8 inches (because the envelope I bought was like 6×8 1/2 or something close to that.)  The inner dimension of the cream part of the invitation is 5×7.  Might I suggest if you don’t want to spend this much time…buy precut cards in the size you want for the inner invite part and cut just the outer piece.

To make these you’ll need…

  • paper for both the inner part of the invitation and the outer layer
  • envelopes
  • a coordinating paper for the circle
  • a stamp that suits your event (could be for Christmas, or a wedding…whatever you want.)
  • 12×12 sheet of super cool scrapbook paper to create a ribbon effect around the middle (you’re going to cut this into 1 inch strips)
  • ribbon (I ended up needing about 22 inches per invitation)
  • a stamp pad (I used a walnut colored distressing ink pad)
  • a circle hole punch (mine is almost 2 inches I think)

First, cut out all of your paper.  I have a corner rounder too, so I did that on both the green sheet for the outer layer, and the cream inner layer….I just like the look of rounded corners.

I designed the invitation using Microsoft Publisher, but you could use any publishing program or even a Word or Open Office type program.  Just find a cool font…neat fonts make all the difference in the world.  There are loads of great free ones out there for download too.  One of my favorite sites is UrbanFonts.com,  For this invitation I used a font called “Little Lord Fontleroy” for all of the main wording and information, and then for my sister’s name, I used a font called “Cursif” and plugged it into a part of Publisher that will add outlines, and drop shadows and stuff to it.  I’d measured the circle I was cutting out first, and then figured about where I’d want it to stick on each invitation and that helped me determine the margins for the type.  Once you format your invitation, I suggest doing a couple of trial prints on plain paper cut to size just to make sure it’s printing in the area that you want.  When I got them how I wanted, I then printed the cream portion of the invitations and set them aside.

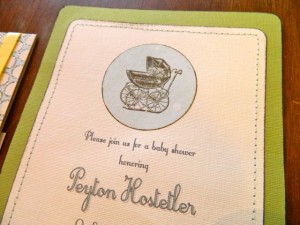
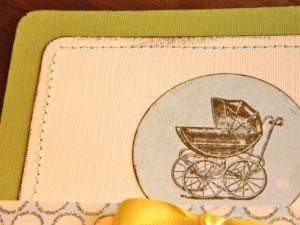
Next I used my circle cutter to cut out all of the circles I used for the stamped portion of the invitation.  Once I cut those out, I stamped each one with the vintage pram stamp using the walnut colored stamp pad.  I happen to have supplies for embossing from way-back-when, so I actually embossed the stamp as well….but have mercy…don’t go out and buy that stuff if you don’t have it.  It looks nice, but if you don’t already own it all, it’s not worth the extra expense unless you plan on doing this sort of thing ALL THE TIME.

Once you’ve stamped all of your circles, keep out your stamp pad.  I then held the stamp pad at about a 45 degree angle and brushed it along the edges of all of the circles, the cream layer, and the green layer of the invitations… to add a bit more dimension, as well as an aged feel.

Once you’ve done all of this, use a glue stick to adhere all of the layers together.  Glue the circle to the invitation, and then glue the invitation to the backing.

My next step involved sewing around the edge of the cream layer.  Yes…I actually ran these invitations through my sewing machine using a thread that complimented the rest of the invitation colors (which were chosen from my sister’s nursery bedding by the way.)  Once you finish sewing around the edges, use a seam ripper or a needle to pull the thread sticking out of the front, to the back of the card.  I then gathered all of the loose ends of thread and secured them on the back with a small piece of clear tape.

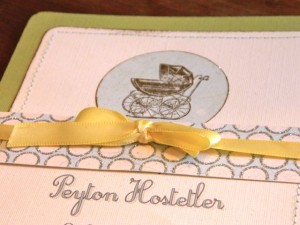
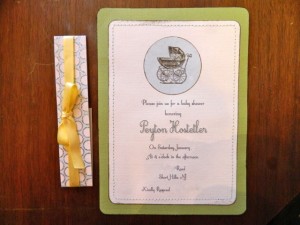
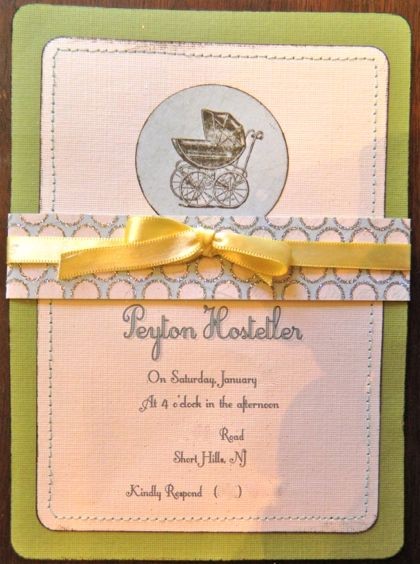
The final part was to make the pretty ribbon around the invitation.  I bought 3 sheets of sparkly, dotted 12×12 scrapbook paper and cut it into 1 inch x 12 inch strips.  I centered the strip where I wanted it on the invitation and folded the sides of the strip around to the back of the card.  Next, I tied a piece of satin ribbon around the strip and made a bow at the front.  I positioned it so that my sister’s name would still be visible when the invitation is opened, but this part slides right off to reveal more details.

I put them into cream envelopes, used the vintage pram stamp again on the back of each envelope at the flap for another little touch, and they’re finally going into the mail tomorrow!

I’ve loved making them, but I have to be honest and say that I’m glad to be done too!  So here they are….in all of their glory!  I hope my sis likes them!

(Please note that they do look better in person…since they actually contain all of the necessary information!  It looks a little funny on here to have it all removed, but you get the general idea!)

Filed Under: Uncategorized

  • « Previous Page
  • 1
  • …
  • 17
  • 18
  • 19
  • 20
  • 21
  • …
  • 43
  • Next Page »
  • 
  • 
  • 
  • 
  • 
  • 

Subscribe by Email

Oldies but Goodies

Copyright © 2025 · Logan Wolfram · Logo by Annie Barnett · Site by Design by Insight